Saturday, May 19, 2012

Mini Chicken Pot Pies

 I made mini chicken pot pies for my son and niece for lunch today and they were so cute!

Mini Chicken Pot Pies
1 can jumbo refrigerated biscuits
1c cooked shredded chicken
1/2 can cream of chicken soup (you could use cream of mushroom, celery, or potato as well)
1/2 can mixed veggies ( I used corn, carrots, and green beans)
leftover mashed potatoes
about 1c shredded cheese
butter, shortening, or non stick spray to coat muffin pan

Pop open your can of biscuits.  Take each one and flatten them.  I greased each of my muffin tins with shortening then took each biscuit and pressed it into the bottom and up the sides of the tins.  The biscuits I used were not jumbo but I recommend buying the jumbo size so the biscuits will reach completely to the top of your tin.


Bake in a 350 degree oven for about 6-8 minutes and they will come out looking something like this:


Mine were puffed up a little too much so I used the back of a spoon and made a well for my filling.

In a bowl combine the cream of chicken soup, veggies, and shredded chicken, mix.

Put about a spoonful of the filling in each biscuit.


Top with mashed potatoes and spread to cover all of your filling.


Top with some shredded cheese.

And pop in the oven for another 6-8 minutes.

Ugh lookin at these pictures makes my eyes hurt.  I apologize for the fact that these go from dark to way too bright.  I had horrible lighting and 2 little ones running around the kitchen.

Anyways..

They were yummy and both the kids loved them.  These are a great way of using leftovers which is my favorite thing about this recipe.

Friday, May 18, 2012

Sneaky Pancakes

I don't know about every other mom, but I am always trying to find ways to get extra nutrition into my little guy.  He goes through phases where he will eat anything and everything one day and the next he wants nothing that doesn't contain vast amounts of sugar.  I swear he can smell sugar from across the room (is that possible, I believe so).  I have started adding pureed fruits and even veggies into random things, one of them being pancakes.  I have made a few varieties: sweet potato, sweet potato banana, apple cinnamon, banana, and strawberry banana.  I have had great success with all of them and my little one doesn't even eat his with syrup, they have so much flavor without it, so it's a double score for me.
To make it easier on myself I keep a plastic container of dry pancake mix in the pantry so all I have to do is add the milk, egg, and puree.  Here is the recipe for the mix that I use:

Pancake Mix
5c all purpose flour
1c whole wheat flour (I try to add a smidge of wheat flour wherever possible but not enough for my son or husband to be able to taste it, otherwise they may not eat it)
2/3c sugar
2T baking powder
1T baking soda
wisk these ingredients together and put in an airtight container.  When ready to use simply combine 1c of the dry mix with 1t, 3/4c milk and 1 egg (I write this on a label or piece of paper and tape it to the outside of my container so if my husband is making them he will know exactly how to mix it and what to add.

Now you can start experimenting and adding your purees and spices.  I don't actually measure when I add the puree but it looks like about 1/2-3/4 of a cup.  I add them with the vanilla, milk and egg when making a batch. If you end up adding too much and your batter seems too thin you can always add a little more pancake mix to thicken it up.

Sweet Potato
approximately 1/2c pureed sweet potato
1/2-1t cinnamon
1t vanilla
1c pancake mix
3/4c milk
1 egg

Banana
1 mashed banana
1/2-1t cinnamon
1/4t nutmeg
1t vanilla
1c pancake mix
3/4c milk
1 egg

Sweet Potato Banana
1/2c pureed sweet potato
1/2 a mashed banana
1t vanilla
1/2-1t cinnamon
1/4t nutmeg
1c pancake mix
3/4c milk
1 egg

Strawberry Banana
1/2 a mashed banana
approximately 4-5 medium sized pureed strawberries
1t vanilla
1c pancake mix
3/4c milk
1 egg

Apple Cinnamon
2 finely chopped small apples or 1/2c applesauce
1/2-1t cinnamon
1/4t nutmeg
1c pancake mix
1t vanilla
3/4c milk
1 egg

**It's really easy to make a double or triple batch of these and freeze them for a busy morning or breakfast on the go.  Just take them out of the freezer and microwave them for 30-45 seconds.  I try to keep pancakes in my freezer at all times so on those mornings I can barely open my eyes, let alone operate the stove, Grant can still get a nutritious homemade breakfast.


Wednesday, May 16, 2012

On-the-Go Goodie Bag

I am constantly trying to find ways to pacify my little one while I'm trying to grocery shop, which normally consists of multiple drinks and snacks.  I always have a baggie of goodies in my purse and end up holding it over the shopping cart handle.  The only problem with this is everytime I move my hand the baggie of snacks inevitably comes with me which prompts my son to start screaming at me for taking away his goldfish crackers. 
The same problem exists in the car when lunch time is near and I just need to make one more stop before heading home.  Grant understandably starts yelling for a snack and I am left to either listen to the screaming and yelling or hold a baggie of goodies where he can reach them until they are gone.
I finally came up with a solution to this problem.  I was watching Jon & Kate Plus 8 (the first season before the drama and Kate's weird hair cut) and they had little cloth drawstring bags filled with cereal they clipped to the kids car seats when they ate breakfast on the go.  I immediately thought, "I have to make Grant a couple of those".  So why not kill two birds with one stone and make 1 cloth baggie for the car and 1 to attatch to the shopping cart.

Here is one clipped to his harness belt filled with yummy cheerios.  I was afraid he would dump them all over his carseat but he did great and just munched away.

When I finished with Grant's bags my mom loved the idea and asked me to make her one for my niece Sophie.  Since I whipped up Grants in about 20 minutes over the weekend I didn't take the time to make a tutorial but I'm working on one while I slowly get Sophie's done.   I just couldn't wait for the tutorial to share it with everyone.

Monday, May 14, 2012

Kindle Case for Mother's Day

My mom just got a Kindle and I immediately thought I could make her a case for the fast approaching Mother's Day.  Of course then she ruined the surprise when she asked me to make her one and I very well couldn't tell her no, then she would have went out and bought one.  Me being me I had to put it off until the day before because why would anyone start a sewing project any earlier than the day before you're giving it as a gift.

I measured my mom's Kindle and it was 5x7inches so I cut 2 pieces of fabric and 1 piece of heavy interfacing into a rectangle that measured 16x8inches so I would have a 1/2inch seam allowance.  Layer your pieces in this order:

inner fabric wrong side up
outer fabric right side up
interfacing


Pin your fabrics all the way around.
On one of the short ends of your rectangle place a looped piece of elastic, a thin hair tie, piece of ric rac, or ribbon as a closure for your case.  In the picture below I have place my loop of elastic in between the right sides of my inner and outer fabrics with the ends of the elastic hanging over the end of my fabric.  Be sure to pin this in place and double stitch over it to secure it in place.


Stitch around using 1/2inch seam allowance making sure to leave a 3 inch opening for turning.  Clip corners.


Turn right side out and stitch around the outside, making sure to stitch the opening closed you used for turning, using a 1/4 inch seam allowance.


Fold one side of your case over about 6 inches and pin in place.  Stitch only on either side, this will be the pocket for your kindle so you don't want to stitch it closed.
Stitch the button in place so you will be able to close your case.


And here is what it looks like closed (I accidentally stretched my elastic out so it wouldn't hold my case closed.  I used a small piece of ric rac and sewed it in place where the elastic is).


I'm so excited with how this case turned out and I absolutely love this fabric I bought at Hobby Lobby.


Monday, May 7, 2012

Sophia's 1st Birthday Gift

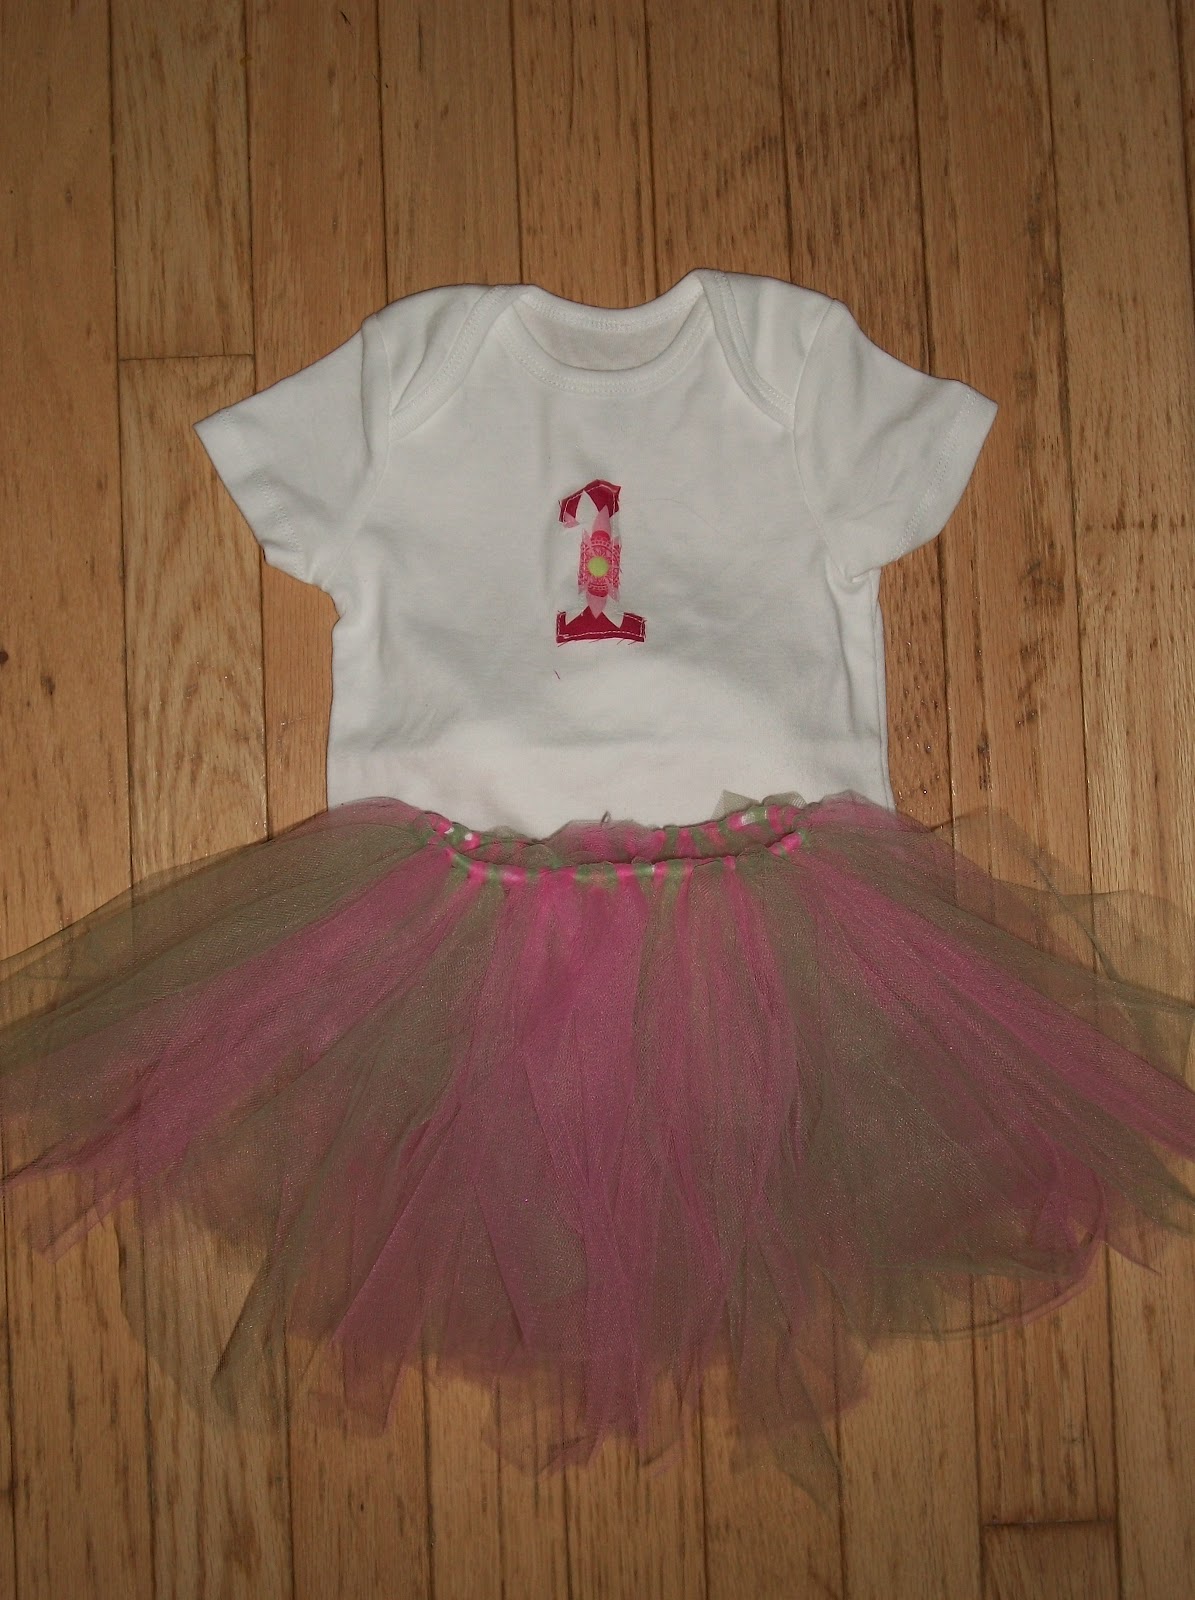
My niece's birthday was Saturday and of course as usual I was up til midnight finishing her gifts.  I added matching diaper covers for each of her little dresses.

I ended up trying this on  Sophie before I wrapped it because I was really afraid it wouldn't fit.  I'm glad I did because it was too long for her to crawl in so I shortened it and added a diaper cover.


My intention was to cut out an "S" for Sophia and applique it to the pink shirt so it and the shorts would be "matchy matchy", needless to say at 12:15am I decided it wasn't worth it.  I made the shorts using this tutorial


My favorite is this reversable dress made using this pattern and tutorial.  The length of this dress actually made me think I may have made it too short but after trying it on her, it's perfect for her to crawl around in but definately too short not to have a matching diaper cover.  I used the diaper cover pattern here, however I didn't follow the tutorial I just started sewing and hoped for the best.  Following the tutorial would have made for a more finished diaper cover so I would suggest anyone else out there to give themselves enough time to follow the correct way of making one.


I have been wanting to make a tutu for a couple years and my mom and I decided Sophie's birthday could not be a proper celebration without a pink and green tutu.  There are a million tutorials out there and it was probably one of the easiest projects I've done in a long time. 


I'm so excited with how everything turned out and I hope I get to see her in all her cute outfits.


Friday, May 4, 2012

Girly Birthday

My neice's first birthday is this weekend and normally I give a homemade Bit of Whimsy doll but since I gave her one of those for Christmas and she really needs clothes for summer, I decided to make her a couple dresses, a skirt and a pair of shorts.

I made this reversable dress with a Cinderella Princess print on the opposit side.  I found the tutorial and pattern here.  It is super simple to make with only about 5 steps after cutting your fabric.  I did make a few changes, as usual.  The top of mine does not have button holes, the buttons are just sewn on.  I figured because it ties in the back this was one step I could easily skip (and therefore I wouldn't have to hunt down my button hole presser foot).


Here is the back.  My favorite part is that it's reversable so it's like a two for one deal.


The second dress I made was a pillowcase dress.  I'm not all too crazy about it so I'm waiting for Sophie to be at the house tonight to try it on and see if I get any crazier about it.  The ones I've seen online are so cute but I think mine looks a little plain.  I didn't use a pattern just measurements.


I'm anxious to try it on her and see how it looks.

The skirt I made I somehow measured incorrectly and instead of a 12-18mo skirt I ended up with more like a 6mo size.  Needless to say I had to do alot of seem ripping and am in the process of fixing it.  The shorts are finished but are currently MIA.  How does that even happen? My one guess is my little one Grant probably decided to play hide and seek with it.

It felt so good to start sewing again that I can't stop now.  Mother's Day is coming up and my mom has requested I make her a case for her new Kindle.  I'm so excited to go look for fabric, so stay tuned!

Thursday, March 29, 2012

Thin Mint Cupcake

I have not been doing any sewing recently and I have to confess I'm having some major withdrawal symptoms.  Most of my sewing supplies are in my mom's basement in unmarked boxes mixed in with about 50 other unmarked boxes stacked to the ceiling.  Finding my supplies would be like searching for that one missing sock that you swear the dryer ate.  Every time I get it in my mind I'm actually gonna find my sewing stuff, I stand in front of the piles and piles of boxes and just stare at them for a good 10 minutes before deciding I should just start rebuying the needed supplies.

Anyway...

What have I been doing with my time you ask?  Baking cupcakes!
My mom and I are signed up for our local Relay For Life in June.  My family has been deeply effected by cancer with 2 of my aunts and my mother having gone through treatment for breast cancer and my grandmother dying of lung cancer, so this is close to my heart.  We decided we wanted to try and raise money for our team and my mom came up with the idea of Cupcakes for a Cure.  Every Wednesday for the last 3 weeks she has taken cupcakes to her school where people donate money for my cupcakes.  I was so super excited to try out some of my recipes and I wanted to share my Thin Mint with every one.

Since it is Girl Scout cookie season and my favorite are Thin Mints.  I've been wanting to make a Thin Mint cupcake forever and it came out perfect!  I adapted this recipe using the WASC version I found at Cakecentral

Thin Mint Cupcakes
2c chocolate cake mix
1/2 c flour
1/2c sugar
1T cocoa powder
1/4t salt
2Tchocolate pudding mix
2 egg whites
1/2 c sour cream
2/3c coffee
1/4 c chocolate milk
1T oil
1t vanilla
1c crushed thin mint cookie crumbs
approximately 1/4t creme de menthe Lorann flavoring (the flavoring should be very light since a thin mint does not have a strong mint flavor.  Be sure to add this flavoring to taste)

wisk all dry ingredients together then add all other ingredients and mix with hand mixer.

Chocolate Mint Buttercream
1/2c soft butter
3T milk
2 cups sifted powdered sugar
1c melted semi sweet chocolate chips
approximately 1/4t creme de menthe Lorann flavoring (once again taste your frosting and add just enough flavoring to lightly flavor your frosting with mint)

cream the butter with a hand mixer until its fluffy. add 3T milk and mix. Add powdered sugar in small amounts and mix well.  Pour in melted chocolate chips and mix. Add flavoring to taste.

Yummy!!!

LinkWithin

Related Posts Plugin for WordPress, Blogger...

Total Pageviews