I recently read through the cookbook, Deceptively Delicious by Jessica Seinfeld, and it opened my eyes up to the idea of adding veggie purees to different foods and I'm obsessed with it now. The key to adding them is to add enough so the nutritional value is there but not enough so your little ones know it's there. I have been experimenting with different recipes and have had success so far, even fooling my husband a few times (sorry honey!).
My latest experiment was with pumpkin muffins. I love love love me some pumpkin. I love that it smells like fall while I bake and everything you cook with it is always super moist and yummy. I found this recipe on a freezer cooking website a few years ago. So no fear of making a batch and 1/2 of them going to waste because you can freeze as many as you want and take them out the morning you want them, nook em in the microwave, and be on your way.
Carrot Pumpkin Muffins
1 1/2c flour
2 eggs beaten
1c sugar
1 (15 oz) can pumpkin
1/2t cloves
1/4t allspice
1t baking soda
1/2c butter melted
1t cinnamon
1/4t salt
1/2c carrots finely shredded
mix dry ingredients and set aside. Beat eggs. Stir pumpkin, melted butter, and carrots. Slowly add dry ingredients. Spoon into muffin tins. Bake at 350 degrees for 20-25 minutes.
You can't taste the carrots and if you grate them finely you can't even really see them unless you actually look for them. Knowing there is nutritional value to these makes me feel a little less guilty for letting Grant eat 3 of them in one sitting (where does he fit it all in that little belly?).
Bake and Enjoy!!
Tuesday, May 22, 2012

Monday, May 21, 2012
Training Underwear
My son has recently started showing signs he may be ready to start potty training. He is very very very stubborn so I'm a little scared and want to start slow by just introducing him to the concept. I bought a potty seat Saturday and started looking at training underwear. Holy Crap those things are pricey. The only brand I could find were Gerber packages of 3 for about $6. When I started thinking about the fact that I would probably go through 3 training pants in about an hour (my little guy drinks alot) and therefore would need 30 pair or more, I began to panic a little....Ok ALOT!
Like always I started trying to think of how to make my own or at least cut the cost in some way. I will be keeping my eye out for training pants and underwear at yard sales but until I hit that jackpot, I was lucky enough to have received about 3 packages of the flat prefold cloth diapers as baby shower gifts with Grant and have been trying to figure out how to turn those into waterproof training pants. I thought if I could make cloth diapers why couldn't I make training pants.
Of course I packed all those prefolds in boxes during the move and they have remained in boxes since I did not think I would be needing them until another baby came along. I considered buying another package and starting with those however when I added up the cost of cloth diapers (about $12), waterproof PUL fabric (about $9/yd with a 40% off coupon), and elastic, it averaged out to be about $2 a pair. So it would have been pointless and my husband's honey-do list got one more thing added to it: Find prefold cloth diapers!
I have been looking for free patterns online and tutorials and after a couple late nights surfing the internet (oh the things us wives/moms will do to save a little cash or find an excuse to craft) I found 2 that I really like and seemed to suit my needs.
This one is my favorite and the one I think I'll go with since I really want the waterproof layer to avoid having to buy the rubber pants.


Like always I started trying to think of how to make my own or at least cut the cost in some way. I will be keeping my eye out for training pants and underwear at yard sales but until I hit that jackpot, I was lucky enough to have received about 3 packages of the flat prefold cloth diapers as baby shower gifts with Grant and have been trying to figure out how to turn those into waterproof training pants. I thought if I could make cloth diapers why couldn't I make training pants.
Of course I packed all those prefolds in boxes during the move and they have remained in boxes since I did not think I would be needing them until another baby came along. I considered buying another package and starting with those however when I added up the cost of cloth diapers (about $12), waterproof PUL fabric (about $9/yd with a 40% off coupon), and elastic, it averaged out to be about $2 a pair. So it would have been pointless and my husband's honey-do list got one more thing added to it: Find prefold cloth diapers!
I have been looking for free patterns online and tutorials and after a couple late nights surfing the internet (oh the things us wives/moms will do to save a little cash or find an excuse to craft) I found 2 that I really like and seemed to suit my needs.
This one is my favorite and the one I think I'll go with since I really want the waterproof layer to avoid having to buy the rubber pants.
(Are these cute or what?)
Here is the other one I found and I would probably use it with an added PUL layer if I already had one of those things to put snaps on (have no idea what their official name is so I'll just call it the snap thingy). I want to buy one eventually, especially before we have baby #2, for cloth diaper making but for now I want to avoid that expense.
These could also be used as a regular cloth diaper if you put a waterproof layer overtop and then you could graduate into potty training with them. I am always trying to get more than one use out of everything. It's a sickness.
I'm hoping to get started on these this week. They are added to my craft to-do list that continuously gets longer and longer. But maybe I'll have a few to show off my finished masterpieces, haha.
Saturday, May 19, 2012
Mini Chicken Pot Pies
I made mini chicken pot pies for my son and niece for lunch today and they were so cute!
Mini Chicken Pot Pies
1 can jumbo refrigerated biscuits
1c cooked shredded chicken
1/2 can cream of chicken soup (you could use cream of mushroom, celery, or potato as well)
1/2 can mixed veggies ( I used corn, carrots, and green beans)
leftover mashed potatoes
about 1c shredded cheese
butter, shortening, or non stick spray to coat muffin pan
Pop open your can of biscuits. Take each one and flatten them. I greased each of my muffin tins with shortening then took each biscuit and pressed it into the bottom and up the sides of the tins. The biscuits I used were not jumbo but I recommend buying the jumbo size so the biscuits will reach completely to the top of your tin.


Mini Chicken Pot Pies
1 can jumbo refrigerated biscuits
1c cooked shredded chicken
1/2 can cream of chicken soup (you could use cream of mushroom, celery, or potato as well)
1/2 can mixed veggies ( I used corn, carrots, and green beans)
leftover mashed potatoes
about 1c shredded cheese
butter, shortening, or non stick spray to coat muffin pan
Pop open your can of biscuits. Take each one and flatten them. I greased each of my muffin tins with shortening then took each biscuit and pressed it into the bottom and up the sides of the tins. The biscuits I used were not jumbo but I recommend buying the jumbo size so the biscuits will reach completely to the top of your tin.

Bake in a 350 degree oven for about 6-8 minutes and they will come out looking something like this:

Mine were puffed up a little too much so I used the back of a spoon and made a well for my filling.
In a bowl combine the cream of chicken soup, veggies, and shredded chicken, mix.
Put about a spoonful of the filling in each biscuit.

Top with mashed potatoes and spread to cover all of your filling.

Top with some shredded cheese.

And pop in the oven for another 6-8 minutes.
Ugh lookin at these pictures makes my eyes hurt. I apologize for the fact that these go from dark to way too bright. I had horrible lighting and 2 little ones running around the kitchen.
Anyways..
They were yummy and both the kids loved them. These are a great way of using leftovers which is my favorite thing about this recipe.
Friday, May 18, 2012
Sneaky Pancakes
I don't know about every other mom, but I am always trying to find ways to get extra nutrition into my little guy. He goes through phases where he will eat anything and everything one day and the next he wants nothing that doesn't contain vast amounts of sugar. I swear he can smell sugar from across the room (is that possible, I believe so). I have started adding pureed fruits and even veggies into random things, one of them being pancakes. I have made a few varieties: sweet potato, sweet potato banana, apple cinnamon, banana, and strawberry banana. I have had great success with all of them and my little one doesn't even eat his with syrup, they have so much flavor without it, so it's a double score for me.
To make it easier on myself I keep a plastic container of dry pancake mix in the pantry so all I have to do is add the milk, egg, and puree. Here is the recipe for the mix that I use:
Pancake Mix
5c all purpose flour
1c whole wheat flour (I try to add a smidge of wheat flour wherever possible but not enough for my son or husband to be able to taste it, otherwise they may not eat it)
2/3c sugar
2T baking powder
1T baking soda
wisk these ingredients together and put in an airtight container. When ready to use simply combine 1c of the dry mix with 1t, 3/4c milk and 1 egg (I write this on a label or piece of paper and tape it to the outside of my container so if my husband is making them he will know exactly how to mix it and what to add.
Now you can start experimenting and adding your purees and spices. I don't actually measure when I add the puree but it looks like about 1/2-3/4 of a cup. I add them with the vanilla, milk and egg when making a batch. If you end up adding too much and your batter seems too thin you can always add a little more pancake mix to thicken it up.
Sweet Potato
approximately 1/2c pureed sweet potato
1/2-1t cinnamon
1t vanilla
1c pancake mix
3/4c milk
1 egg
Banana
1 mashed banana
1/2-1t cinnamon
1/4t nutmeg
1t vanilla
1c pancake mix
3/4c milk
1 egg
Sweet Potato Banana
1/2c pureed sweet potato
1/2 a mashed banana
1t vanilla
1/2-1t cinnamon
1/4t nutmeg
1c pancake mix
3/4c milk
1 egg
Strawberry Banana
1/2 a mashed banana
approximately 4-5 medium sized pureed strawberries
1t vanilla
1c pancake mix
3/4c milk
1 egg
Apple Cinnamon
2 finely chopped small apples or 1/2c applesauce
1/2-1t cinnamon
1/4t nutmeg
1c pancake mix
1t vanilla
3/4c milk
1 egg
**It's really easy to make a double or triple batch of these and freeze them for a busy morning or breakfast on the go. Just take them out of the freezer and microwave them for 30-45 seconds. I try to keep pancakes in my freezer at all times so on those mornings I can barely open my eyes, let alone operate the stove, Grant can still get a nutritious homemade breakfast.
To make it easier on myself I keep a plastic container of dry pancake mix in the pantry so all I have to do is add the milk, egg, and puree. Here is the recipe for the mix that I use:
Pancake Mix
5c all purpose flour
1c whole wheat flour (I try to add a smidge of wheat flour wherever possible but not enough for my son or husband to be able to taste it, otherwise they may not eat it)
2/3c sugar
2T baking powder
1T baking soda
wisk these ingredients together and put in an airtight container. When ready to use simply combine 1c of the dry mix with 1t, 3/4c milk and 1 egg (I write this on a label or piece of paper and tape it to the outside of my container so if my husband is making them he will know exactly how to mix it and what to add.
Now you can start experimenting and adding your purees and spices. I don't actually measure when I add the puree but it looks like about 1/2-3/4 of a cup. I add them with the vanilla, milk and egg when making a batch. If you end up adding too much and your batter seems too thin you can always add a little more pancake mix to thicken it up.
Sweet Potato
approximately 1/2c pureed sweet potato
1/2-1t cinnamon
1t vanilla
1c pancake mix
3/4c milk
1 egg
Banana
1 mashed banana
1/2-1t cinnamon
1/4t nutmeg
1t vanilla
1c pancake mix
3/4c milk
1 egg
Sweet Potato Banana
1/2c pureed sweet potato
1/2 a mashed banana
1t vanilla
1/2-1t cinnamon
1/4t nutmeg
1c pancake mix
3/4c milk
1 egg
Strawberry Banana
1/2 a mashed banana
approximately 4-5 medium sized pureed strawberries
1t vanilla
1c pancake mix
3/4c milk
1 egg
Apple Cinnamon
2 finely chopped small apples or 1/2c applesauce
1/2-1t cinnamon
1/4t nutmeg
1c pancake mix
1t vanilla
3/4c milk
1 egg
**It's really easy to make a double or triple batch of these and freeze them for a busy morning or breakfast on the go. Just take them out of the freezer and microwave them for 30-45 seconds. I try to keep pancakes in my freezer at all times so on those mornings I can barely open my eyes, let alone operate the stove, Grant can still get a nutritious homemade breakfast.
Wednesday, May 16, 2012
On-the-Go Goodie Bag
I am constantly trying to find ways to pacify my little one while I'm trying to grocery shop, which normally consists of multiple drinks and snacks. I always have a baggie of goodies in my purse and end up holding it over the shopping cart handle. The only problem with this is everytime I move my hand the baggie of snacks inevitably comes with me which prompts my son to start screaming at me for taking away his goldfish crackers.
The same problem exists in the car when lunch time is near and I just need to make one more stop before heading home. Grant understandably starts yelling for a snack and I am left to either listen to the screaming and yelling or hold a baggie of goodies where he can reach them until they are gone.
I finally came up with a solution to this problem. I was watching Jon & Kate Plus 8 (the first season before the drama and Kate's weird hair cut) and they had little cloth drawstring bags filled with cereal they clipped to the kids car seats when they ate breakfast on the go. I immediately thought, "I have to make Grant a couple of those". So why not kill two birds with one stone and make 1 cloth baggie for the car and 1 to attatch to the shopping cart.

When I finished with Grant's bags my mom loved the idea and asked me to make her one for my niece Sophie. Since I whipped up Grants in about 20 minutes over the weekend I didn't take the time to make a tutorial but I'm working on one while I slowly get Sophie's done. I just couldn't wait for the tutorial to share it with everyone.
The same problem exists in the car when lunch time is near and I just need to make one more stop before heading home. Grant understandably starts yelling for a snack and I am left to either listen to the screaming and yelling or hold a baggie of goodies where he can reach them until they are gone.
I finally came up with a solution to this problem. I was watching Jon & Kate Plus 8 (the first season before the drama and Kate's weird hair cut) and they had little cloth drawstring bags filled with cereal they clipped to the kids car seats when they ate breakfast on the go. I immediately thought, "I have to make Grant a couple of those". So why not kill two birds with one stone and make 1 cloth baggie for the car and 1 to attatch to the shopping cart.

Here is one clipped to his harness belt filled with yummy cheerios. I was afraid he would dump them all over his carseat but he did great and just munched away.
When I finished with Grant's bags my mom loved the idea and asked me to make her one for my niece Sophie. Since I whipped up Grants in about 20 minutes over the weekend I didn't take the time to make a tutorial but I'm working on one while I slowly get Sophie's done. I just couldn't wait for the tutorial to share it with everyone.
Monday, May 14, 2012
Kindle Case for Mother's Day
My mom just got a Kindle and I immediately thought I could make her a case for the fast approaching Mother's Day. Of course then she ruined the surprise when she asked me to make her one and I very well couldn't tell her no, then she would have went out and bought one. Me being me I had to put it off until the day before because why would anyone start a sewing project any earlier than the day before you're giving it as a gift.
I measured my mom's Kindle and it was 5x7inches so I cut 2 pieces of fabric and 1 piece of heavy interfacing into a rectangle that measured 16x8inches so I would have a 1/2inch seam allowance. Layer your pieces in this order:
inner fabric wrong side up
outer fabric right side up
interfacing



I measured my mom's Kindle and it was 5x7inches so I cut 2 pieces of fabric and 1 piece of heavy interfacing into a rectangle that measured 16x8inches so I would have a 1/2inch seam allowance. Layer your pieces in this order:
inner fabric wrong side up
outer fabric right side up
interfacing

Pin your fabrics all the way around.
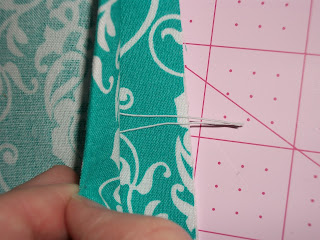
On one of the short ends of your rectangle place a looped piece of elastic, a thin hair tie, piece of ric rac, or ribbon as a closure for your case. In the picture below I have place my loop of elastic in between the right sides of my inner and outer fabrics with the ends of the elastic hanging over the end of my fabric. Be sure to pin this in place and double stitch over it to secure it in place.

Stitch around using 1/2inch seam allowance making sure to leave a 3 inch opening for turning. Clip corners.

Turn right side out and stitch around the outside, making sure to stitch the opening closed you used for turning, using a 1/4 inch seam allowance.

Fold one side of your case over about 6 inches and pin in place. Stitch only on either side, this will be the pocket for your kindle so you don't want to stitch it closed.
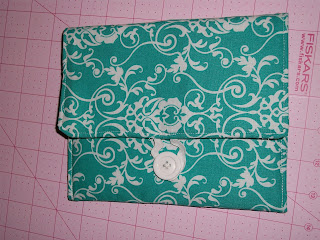
Stitch the button in place so you will be able to close your case.

And here is what it looks like closed (I accidentally stretched my elastic out so it wouldn't hold my case closed. I used a small piece of ric rac and sewed it in place where the elastic is).

I'm so excited with how this case turned out and I absolutely love this fabric I bought at Hobby Lobby.
Monday, May 7, 2012
Sophia's 1st Birthday Gift
My niece's birthday was Saturday and of course as usual I was up til midnight finishing her gifts. I added matching diaper covers for each of her little dresses.


I ended up trying this on Sophie before I wrapped it because I was really afraid it wouldn't fit. I'm glad I did because it was too long for her to crawl in so I shortened it and added a diaper cover.

My intention was to cut out an "S" for Sophia and applique it to the pink shirt so it and the shorts would be "matchy matchy", needless to say at 12:15am I decided it wasn't worth it. I made the shorts using this tutorial

My favorite is this reversable dress made using this pattern and tutorial. The length of this dress actually made me think I may have made it too short but after trying it on her, it's perfect for her to crawl around in but definately too short not to have a matching diaper cover. I used the diaper cover pattern here, however I didn't follow the tutorial I just started sewing and hoped for the best. Following the tutorial would have made for a more finished diaper cover so I would suggest anyone else out there to give themselves enough time to follow the correct way of making one.


I have been wanting to make a tutu for a couple years and my mom and I decided Sophie's birthday could not be a proper celebration without a pink and green tutu. There are a million tutorials out there and it was probably one of the easiest projects I've done in a long time.
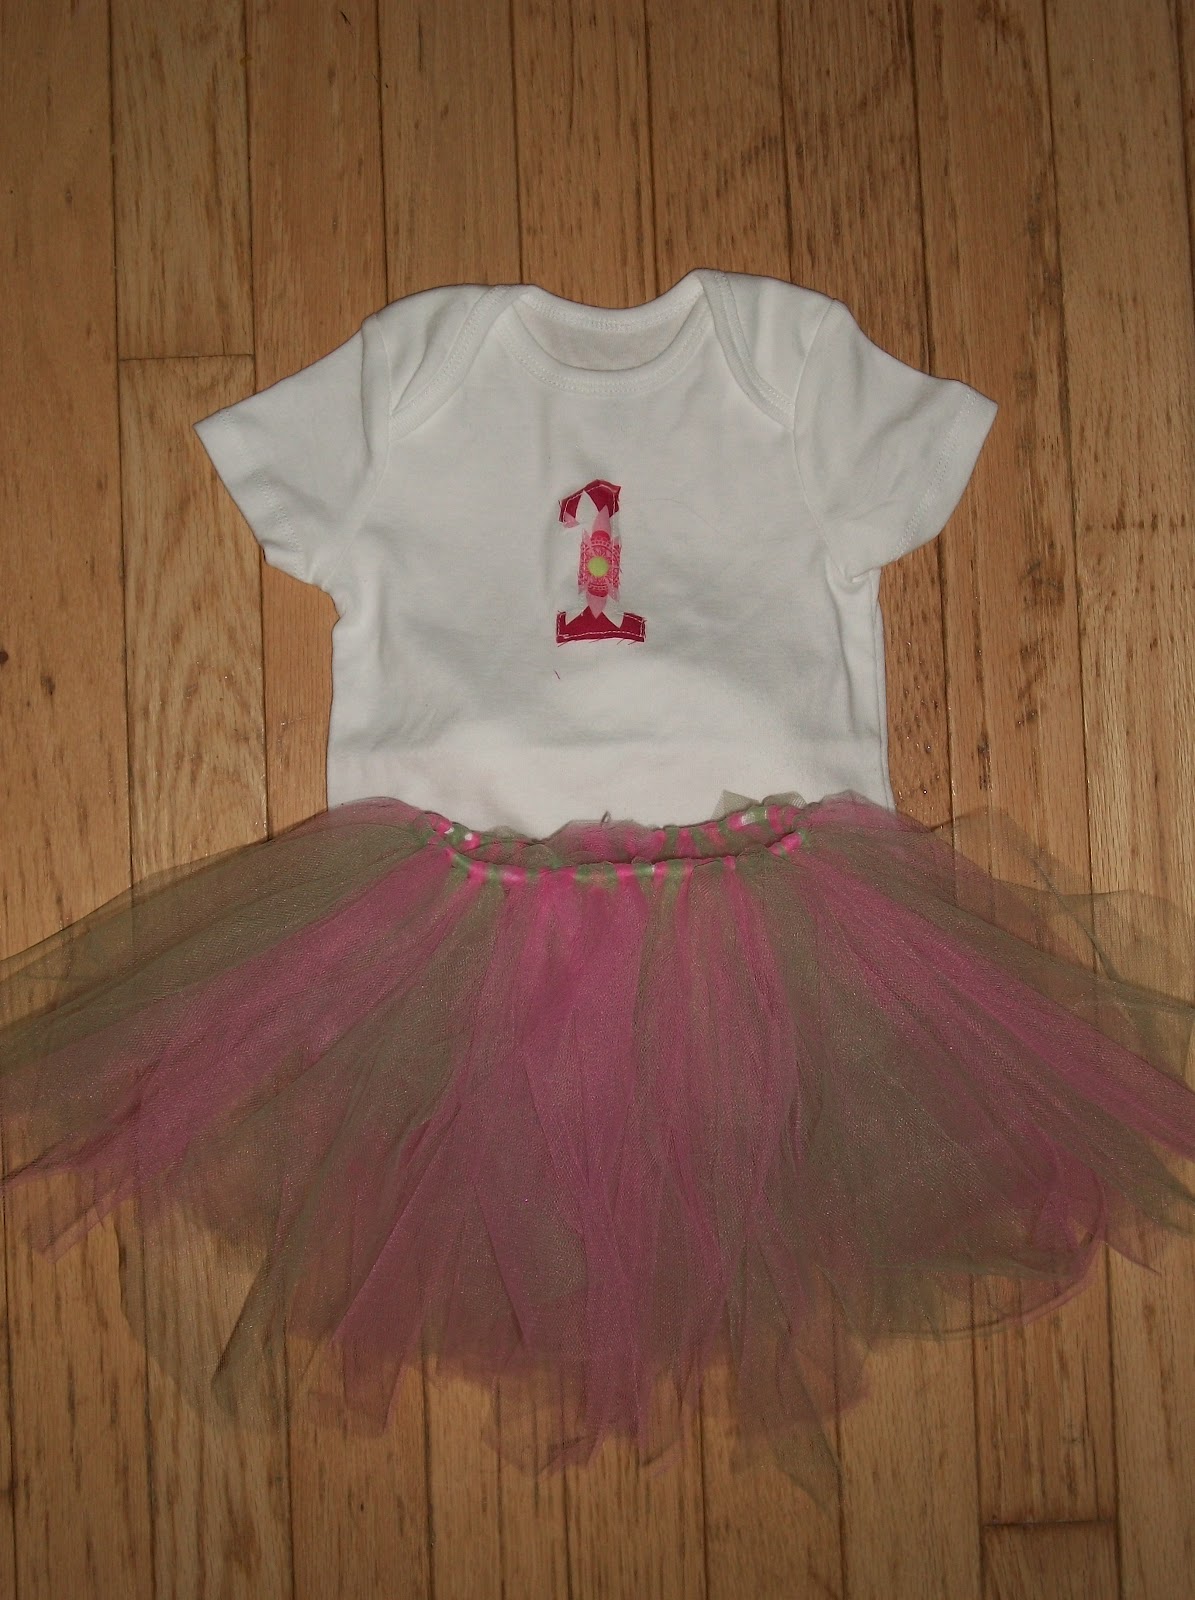
I'm so excited with how everything turned out and I hope I get to see her in all her cute outfits.
Subscribe to:
Posts (Atom)
LinkWithin
