Friday, June 13, 2014

Flubber Fun

Since I started watching my 10 year old cousin this summer I've been scouring the internet and trying my best to come up with some activities that will both occupy a 10 year old and 3 year old and will keep their attention for more than 37 seconds.

After the first couple days of our new summer routine  I adopted the attitude that as long as it was entertaining for them I would not freak out about the mess the projects made.  Needless to say I have done my fair share of cleaning my apartment and yet it is never clean, but the kids have had fun and that's what's important.

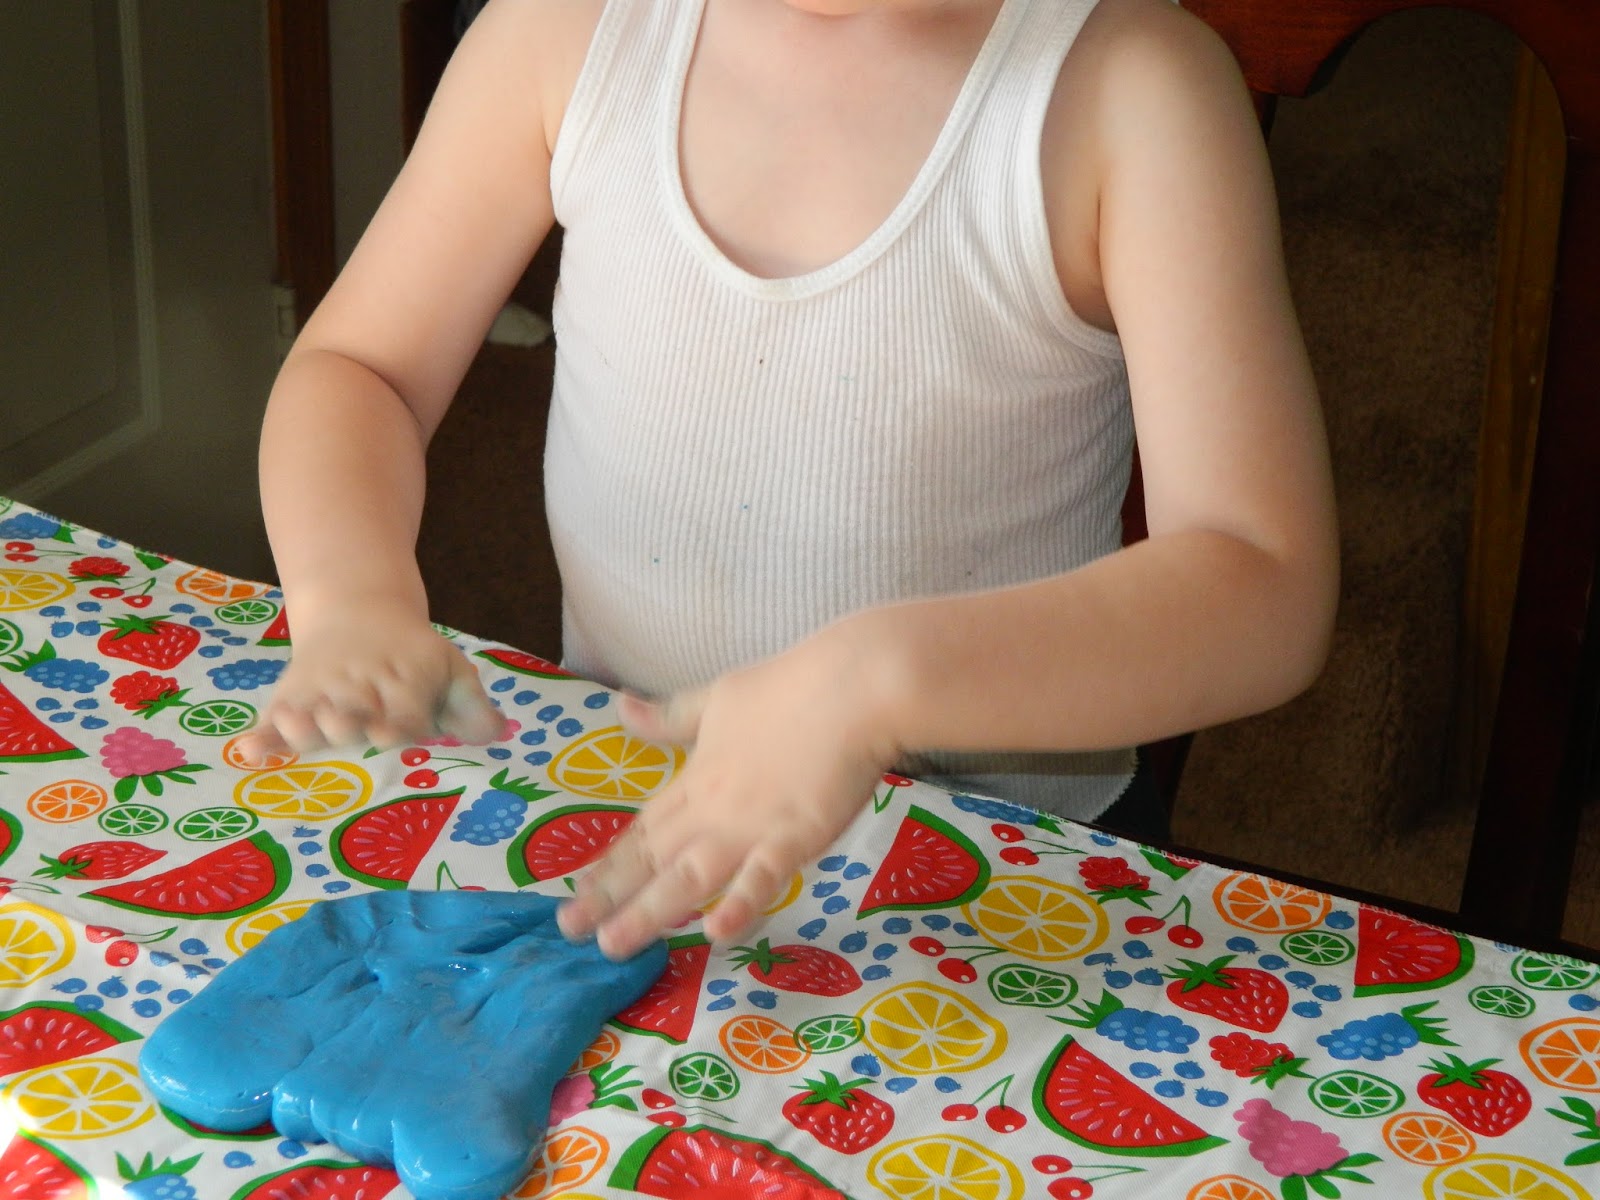
One activity we used to do a lot during my days working at a daycare was making flubber.  I've read where people say it is dangerous to use the borax because it's a chemical and all that but I make sure the kids wash their hands after playing with it, don't put it anywhere near their mouth, and the amount in flubber is very small so truthfully I'm not concerned, you can make up your own mind and decide what is best for your children.

I think the second best thing about this project (the first being that it kept them occupied for a good 45 minutes on numerous days) is that I already had all the ingredients at my house.  So no extra trip to wally-world where I would inevitably walk out with a cart load of goodies instead of the glue I went in to buy.

Recipe:

3/4 cup cold water
1 cup Elmer’s glue
liquid food coloring
1/2 cup hot water
1 teaspoon borax (you can find this in a box in the laundry aisle)
directions:
step 1: in bowl 1 – mix together the cold water, glue, and food coloring. set aside.
step 2: in bowl 2 – mix together the hot water and borax, until the borax is completely dissolved.
step 3: slowly add glue mixture to borax mixture. mix well. pour off excess water.

**disclaimer: if your child is like my son and squirts half the bottle of food coloring in his flubber mixture he will inevitably have blue tinged hands every single time he plays with it.
Recipe from here: http://www.livecrafteat.com/craft/homemade-flubber-for-kids/#ixzz34EWcdCfJ


I halved the recipe and gave each of them the necessary supplies to mix their own flubber.  I did not let them touch the borax, only stir it once I had added it to the hot water.  This was the perfect amount for each of them to play with.  Store your flubber in a plastic baggie (sandwich size is perfect for a halved recipe) and it stays good for at least a week.

I have every intention of stocking my craft cabinet with glue this summer during the back to school sales to have it on hand for future rainy days, and the cold days of winter.


Wednesday, June 11, 2014

Shaving Cream Bathtub Paint

I saw the summer roundup over at A Girl and A Glue Gun and was so excited with all the fun activities she had posted.  It can be difficult to figure out entertainment for kids during the summer but I have made a vow to not worry about the mess as long as the kids have fun with the activity.  When I saw the bathtub paint idea I was super excited because I knew Grant would have a blast.  He loves playing in the tub and it usually gives me the opportunity to clean the rest of the bathroom and do some laundry.


 All I did was took some Pure Silk women's shaving cream (which I got a while back with coupons for all of $0.15) but any shaving cream that foams white will work (I think you can get it at Walmart for $1), and sprayed it in the wells of a muffin tin.  Then I took some of Grant's Crayola washable paint and put maybe a teaspoon in each and mixed it together.  I found an old paintbrush, that will now be his bathtub paint brush, and let him go to town.

I think the "recipe" on the original website used food coloring instead of washable paint but after cleaning up the cool whip we played with and seeing the food coloring stain Grant's entire arm, I was afraid it may also stain the walls of the tub.  The last thing I wanted was to have to scrub the tub walls any more than I do already.

This is definitely an activity we will do again.  He was so excited about his painting he begged me to take a picture so he could show Daddy.  The best part for me, other than seeing how much fun he had, was the clean-up was as simple as wiping it off with a wet washcloth.

This could also be an activity for playing outside.  You could take a white shower curtain from the Dollar Tree, your shaving cream paint, and some sponge brushes and let the kids have at it.  Then just hose them and the shower curtain off, and hang it up to dry for another day.  Or leave the shaving cream on the shower curtain and use it as a foamy slip and slide.


Monday, June 9, 2014

Cool Whip Sensory Play

Summer is in full swing and while we spend most mornings, starting between 8:30 and 9am at one of our local parks, the afternoons I'm left to figure out something that will entertain a 3 year old, a 10 year old, and 1 day a week a 2 year old.  That can be really difficult, especially in a small space like ours.

I worked in a daycare for 4 years and learned quite a few different activities that kids of all ages enjoy.  One of them was playing with cool whip (or for older kids, shaving cream).  We used to do this once a week in the toddler room. 

I bought some to make a cake for my mom's birthday and ended up leaving it on the table for like 4 hours.  I was so annoyed it was ruined because of my inability to remember things these days but instead of throwing it away I decided the kids could play with it the next day and I wouldn't feel like it was completely wasted.

 I used some food coloring for extra fun and Grants whole arm was stained a nice shade of grayish blue.  I think next time I will use a smidge of his washable Crayola paints to coloring the whipped cream instead of food coloring.This could be a good sensory activity for Preschool learning the letter C or learning how the primary colors mix to make other colors.

Disclaimer: if you plan on doing this activity with kids who aren't in high chairs, outside is the best place so you can hose everything off.  Make sure the kids either wear art smocks or old clothing because it will inevitably have shaving cream all over it.  I found colored whipped cream everywhere when I was cleaning and even had to scrub parts of my carpet.  Who puts carpet in a dining area anyways, stupid apartments, makes no sense to me.

This activity was a simple one and the kids loved it.   They were busy making drawings, smearing, and slapping the cool whip for a good 30-45minutes. $1.50 (less if your store actually has the offbrand in stock) for nearly an hour of entertainment for 2 kids....not bad.


Friday, June 6, 2014

At Home Preschool Week 1

I did my first post on at home preschool here and decided posting at the end of each week would be best.  Not only for the fact there's no way I have time to do a lengthy post every single day but also because after day 1 when Grant was doing his "homework" (as he calls it) and I got out the camera, I quickly got a "mommy no more pictures", haha.  So the camera had to be put away (frown).

In case you didn't read my first post I started with the letter C, and our first day was about Caterpillars.

Day 2 was Cookies.  We read, If You Give a Mouse a Cookie  and Grant helped me make Chocolate Chip cookies.

 I cut the letter C out of construction paper, don't judge my C I know it's a bit wonky lol.  I had Grant practice with glue and glue pom poms on it.  This was originally supposed to end up looking like a really cute caterpillar but it ended up just being a little art project.

He traced the letter C on a worksheet again and we played a matching game that he LOVED!  He has actually asked to play many times since I made it.  Making a matching game is super simple.  I picked a few things with words that began with the letter C and did a google search for images of them.  I used Car, Cat, Caterpillar, Can, Cookie, Cracker, Cow, Cupcake.  I copied and pasted them into a word document then printed them on white cardstock and cut them into squares.  I wrote the words under the pictures with a black marker.


Day 3 was Clifford.  We read Clifford Goes to School and watched the cartoon.  Once again he traced the letter C but this  time I went over lowercase and uppercase and he traced the lowercase letter.

I incorporated the number 2 and had him trace the number.  He begged to play the matching game again....quite a few time actually.  I made a letter search and had Grant find all the letter C's. 


I created this in Picmonkey and yes it took quite a bit of time, probably a good half hour.  There are probably easier ways to make one but why take the easy way out right?

Our last day we were supposed to read If You Give a Cat a Cupcake and make cupcakes but unfortunately we never got around to it. I started watching a school ager for the summer and it has been exhausting and kind of thrown a wrench in our preschool time.  Our mornings we are usually at the park and by the afternoon I'm completely and utterly pooped!

I am so proud of Grant, we were looking at something and he pointed out the letter C all on his own.  I felt like maybe I can actually teach him his letters and numbers and maybe he is going to retain them.  I was so excited, it gave me inspiration to continue on with our preschool learning.

Tuesday, June 3, 2014

At Home Preschool Day 1

Grant is 3 1/2 and we had considered putting him in preschool this coming September but we figured 2 years of preschool was unnecessary.  So instead I decided to start doing some preschool activities at home.  Not only for the learning of letters, numbers, shapes, etc but also for the structure and focus time I feel like Grant really needs.


My mom works in the school system and a company brings in books you can purchase.  They had a Pre-k workbook she bought for Grant and it was perfect timing because I was looking for things online and this book had it all.


We took a trip to the library just to get some letter specific books.  We got If You Give A Cat a Cupcake., If You Give A Mouse a Cookie, and Clifford Goes to School (Grant loves Clifford and has the stuffed version he carries to bed most nights).  I already have the book by Eric Carl, The Very Hungry Caterpillar (and the stuffed caterpillar to go with it) and Grant has noticed loads of them crawling around our sidewalks recently so I thought starting with the letter C would be perfect.


I printed a letter C sheet from here.  I want to do a letter a week.  I've read varying pros and cons of doing one letter at a time but I couldn't wrap my head around teaching them all at the same time, it just didn't make sense to me.  So a letter a week it is for us and we will see how it goes.  I don't plan on going in order because I want to do all the letters I think will be the easiest for him to write (or trace) first.


For our first day I got out the flashcards and showed him the letter C, we went over what sound the letter makes as well as the difference between uppercase and lowercase.  Then I gave him a worksheet for him to trace the letter C.   I gave Grant a bingo marker (bought at the Dollar Tree) and the C sheet I printed out from here and had him only put dots on the inside of the outlined letters.

We did a caterpillar craft.  I cut out varying sizes of circles from construction paper and had him put them in order from largest to smallest.  Then we got out the glue, yes I was a brave woman yesterday with the messy glue, and glued the circles onto a white sheet of paper.  I had him draw eyes, legs, and put dots around the caterpillar with the bingo markers.


We read The Very Hungary Caterpillar by Eric Carle and went over how a caterpillar turns into a butterfly.


We practiced tracing straight and curved lines,


 as well as cutting them.  He is getting better and better with scissors.


Grant had so much fun and wanted to keep doing more.  I decided to do preschool at home and keep it short and sweet, by sticking to 20-30 minutes of school time a day  His attention span is short and I want to make sure we are keeping it fun so he doesn't lose interest or feel like it's "work".


LinkWithin

Related Posts Plugin for WordPress, Blogger...

Total Pageviews