Wednesday, July 23, 2014

Relay For Life 2014


Our Relay was at the end of June this year and while I'm relieved the festivities are over (due to the amount of preparation and work involved) I'm also sad because I thoroughly enjoy it.

We had some new team members this year so I spent the whole of one evening painting more team shirts using the freezer paper stencil method.  I think I ended up finishing about 15 shirts including a onesie for our youngest relayer.

We stepped it up this year with games at our campsite.  One of them was the fishbowl game.  A classic carnival game we all love to play but our parents dread because it comes with the possibility of owning a goldfish.  We didn't want to buy a bunch of goldfish, nor do we as parents want to put that on other parents so the solution was Swedish Fish and Goldfish crackers for our younger relayers as prizes.

 
I created a cute little tag for each of the prize baggies that said "Thank you for supporting Betty's Hope" so people would know where they won their prize and who we were.  I created them in Picmonkey and they were super easy and I think, a great little added touch.
Here are the games we had at our campsite, the fishbowl game and the Cancer Sucks game which was like a lollipop tree but in a flower pot instead.  We had a small bucket of trinkets if you picked a lollipop with a black tip you won a prize.  If you picked one without you still got to keep your lollipop.

We also had homemade cookies and a fleece blanket raffle.  For a few of the team members I busted out the good ol' Cricut and made team cups.  I purchased the clear tumblers from the Dollar Tree and used my breast cancer awareness cartridge to create the image and the calligraphy cartridge for the words.
We bought the trifold boards at the Dollar Tree and I used my cricut to cut out the letters.  We were really psyched with how good they looked.  Not to mention super easy to read as you walked by our campsite.

We like to take care of our overnight and early morning walkers so I whipped up some breakfast burritos filled with egg, sausage, green pepper and cheese.  I wrapped them in plastic wrap then in foil and around 3 am they go into the crockpot on warm and are hot and ready for everyone within an hour or so.

This is the second year I've made these and everyone really loves them.  They are easy to walk and eat at the same time which is perfect for any relayer.

We are already coming up with ideas for next year's relay and I'm excited at the possibility of new team members, and more money raised.  This year we have almost hit our goal of $1500.  Last year we raised just over $1000 and the year before (our first year) we raised $500.  We are steadily increasing and that's exciting for us.

If you want information on a Relay for Life event near you go to relayforlife.org for more information.


Monday, July 21, 2014

Peekaboo Bonnet for Eva

I saw the Peekaboo Bonnet pattern over at Made By Rae while I was pregnant with Eva and fell in love with it.  I told my husband if we had a girl I was buying that pattern and I would make her a dozen of those cute little bonnets.


Well, we had a girl and I promptly bought the pattern.  I let it sit on my kitchen table for a good week and a half completely intimidated.  I had never worked with piping and my ruffling and binding skills leave a lot to be desired.


I kept reading reviews for the pattern and of course everyone said how easy and quick the pattern was but I still didn't believe them so I let the pattern sit....stupid me.


Finally a couple days before my family reunion, which was to be held outside at the end of June can we say HOT.  I knew Eva needed that bonnet to protect her little head and keep the sun out of her eyes so I kicked my butt in gear and decided to just start sewing and see what I came up with.

Is this not the cutest little bonnet EVER!

I love it and I want to make 23 more.  My husband says it looks Amish and he's not a fan, I told him I don't care I'm making one in every color of the rainbow and a few extras after that.

And let me tell you this pattern was super easy.  After my pieces were cut out, because I did that on a separate day, it took me all of a naptime to finish it.  And if you have ever read my blog before you know naptimes in this house are never very long.  The only thing is I don't consider mine reversible because I machine stitched the center strip instead of hand stitching like Rae recommended, so the seam on the inside was very visible.  It doesn't look so bad that I couldn't reverse it if I wanted I just prefer to not see the seam. 

I've gotten so many compliments on it and Eva is the cutest little girl ever in it.  Sometimes I put it on her just so I can marvel at how adorable it is, and she is in it.

Friday, July 18, 2014

Hulk and Iron Man Freezer Paper Stencil Shirt

Hulk Smash!


That's what my 3 year old runs around our house saying...over, and over and over.  He loves the Avengers.  He loves superheroes.  He always notices the shirts in all the stores with these characters on them but lets face it, I'm not made of money, he has plenty of other shirts, and they are always upwards of $15 each.


And what does a DIY Mama do when she doesn't want to spend a small fortune on character shirts but really wants to give her little one what they want?


She makes it herself of course.


So I took a little trip to Hobby Lobby picked out a green shirt, they are less than $3 each after their "Always 30% off" discount.


I got online and googled, "Hulk freezer paper stencil", and somehow found an image of half a face that was supposed to be the Hulk.  I then went to Dafont.com and found a font that was more comic book-ish because I knew I didn't just want the face on there, there needed to be some kind of wording so anyone and everyone would know who it was supposed to be.


Of course the wording immediately came to me, it had to be, Hulk Smash!
Someone told me it's more of a Lego version of the Hulk and it probably is, but Grant knew exactly who it was as soon as he saw it and he loved it.  What did he say after he talked about how much he wanted to wear it, "right now!"?

Mommy where's my Iron Man shirt?

Another trip to Hobby Lobby later for a red shirt and a trip to Joann's for a small bottle of gold metallic fabric paint (because Hobby Lobby didn't have any) and he now has an Iron Man shirt as well.


To find the above image I simply googled, "Iron Man freezer paper stencil".  I now have 2 other shirts in the works for a Spiderman and one with the Avengers emblem on it.

There are dozens of freezer paper stencil tutorials out there which is why I didn't make one for this project.  I don't think I do anything different from anyone else.  Here is one I looked at before I did my first project last year.  If you've never done freezer paper stencils, go to the store and buy some freezer paper right this second!

You will quickly become addicted and coming up with your own shirt designs for you or your little ones.

Thursday, July 17, 2014

Smore's Trail Mix

Since I'm keeping a 10 year old this summer I wanted to come up with some different snacks than I normally do.  I'm not one to have a lot of cookies and cakes for snack time.  I prefer cheese crackers, fruit, pretzels and graham crackers with Nutella.  I figured a 10 year old who's used to the more junk filled snacking would get bored with my versions pretty quickly so I started thinking up ideas for a happy medium.


Enter in trail mix, not just any trail mix....s'mores  trail mix.  Does trail mix get any better than that, and who doesn't love s'mores?


If you answered, "me" to that question you are either lying to yourself, or haven't tried one made to perfection.


Either way you will love this and so will your kids.


It's as simple as pouring some Golden Grahams cereal, mini marshmallows, and chocolate chips in a bowl, giving it a stir, and separating it into those cute little snack baggies.

Now toss one to each of your kids, try not to whack them in the eye when you toss them, and don't forget one for yourself because, yes, you will want some too.

Friday, June 13, 2014

Flubber Fun

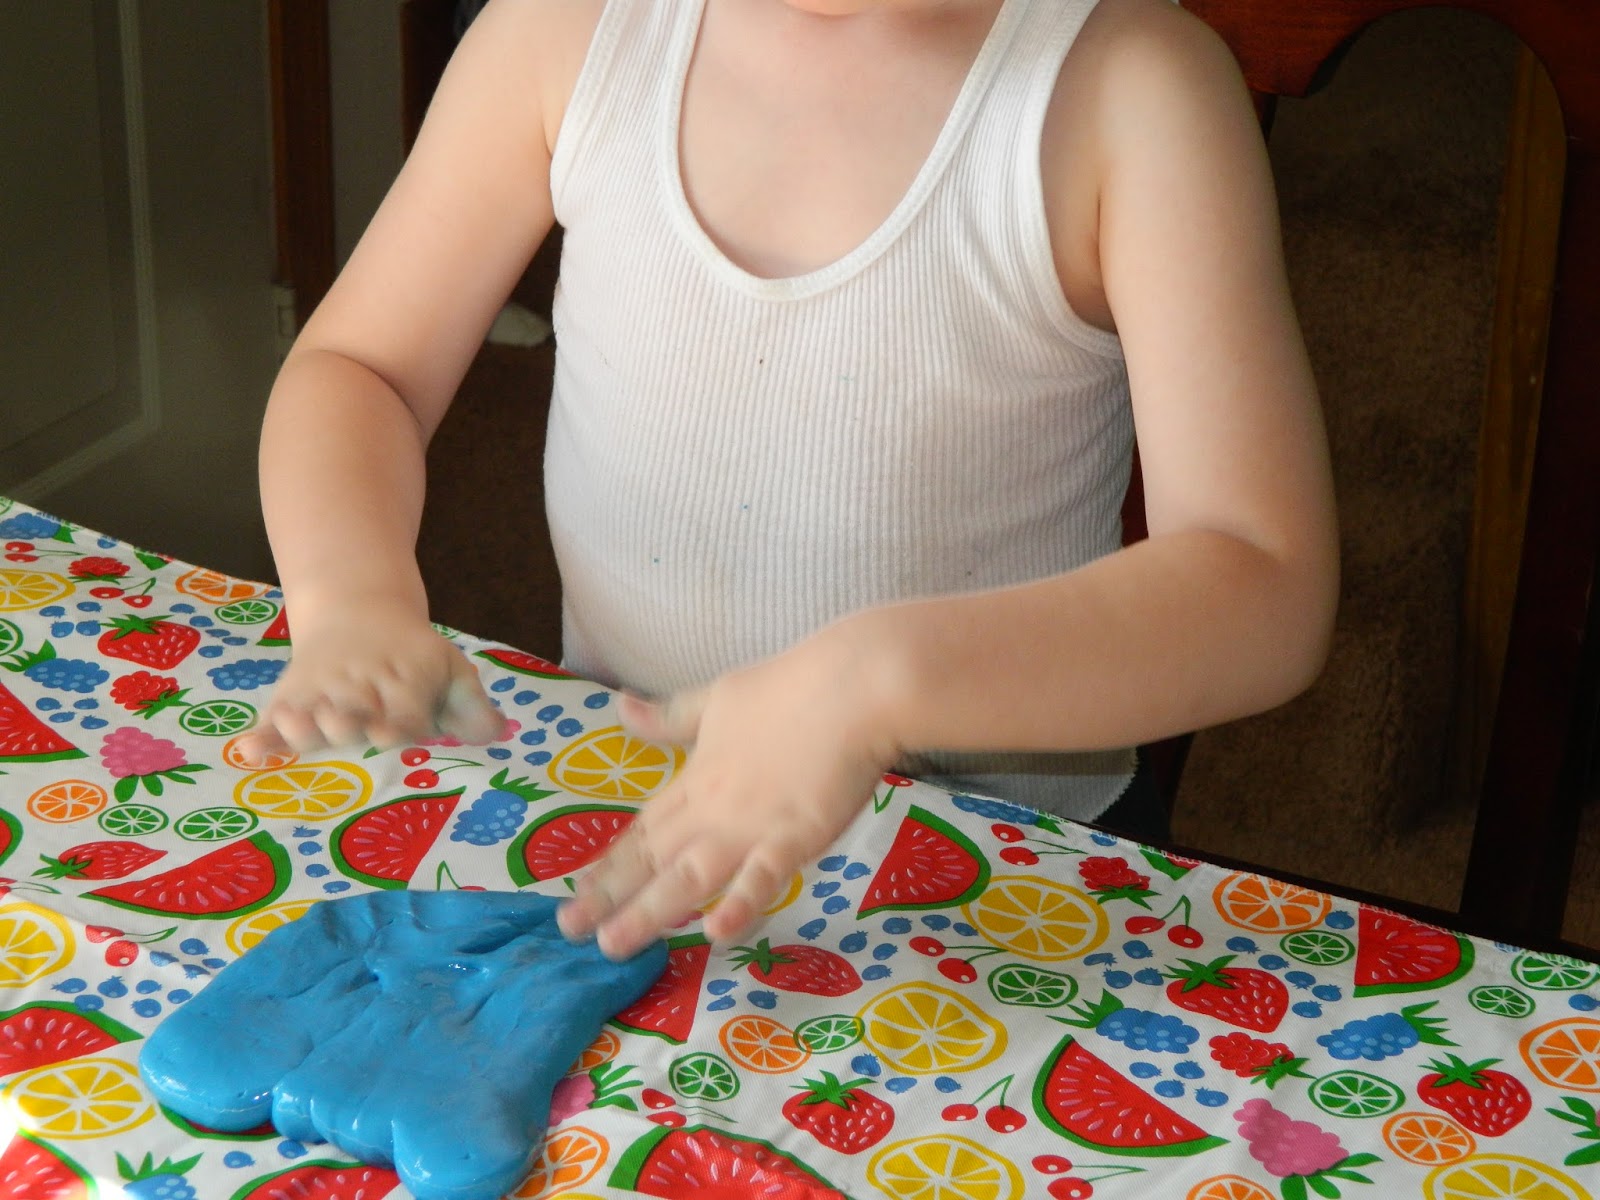
Since I started watching my 10 year old cousin this summer I've been scouring the internet and trying my best to come up with some activities that will both occupy a 10 year old and 3 year old and will keep their attention for more than 37 seconds.

After the first couple days of our new summer routine  I adopted the attitude that as long as it was entertaining for them I would not freak out about the mess the projects made.  Needless to say I have done my fair share of cleaning my apartment and yet it is never clean, but the kids have had fun and that's what's important.

One activity we used to do a lot during my days working at a daycare was making flubber.  I've read where people say it is dangerous to use the borax because it's a chemical and all that but I make sure the kids wash their hands after playing with it, don't put it anywhere near their mouth, and the amount in flubber is very small so truthfully I'm not concerned, you can make up your own mind and decide what is best for your children.

I think the second best thing about this project (the first being that it kept them occupied for a good 45 minutes on numerous days) is that I already had all the ingredients at my house.  So no extra trip to wally-world where I would inevitably walk out with a cart load of goodies instead of the glue I went in to buy.

Recipe:

3/4 cup cold water
1 cup Elmer’s glue
liquid food coloring
1/2 cup hot water
1 teaspoon borax (you can find this in a box in the laundry aisle)
directions:
step 1: in bowl 1 – mix together the cold water, glue, and food coloring. set aside.
step 2: in bowl 2 – mix together the hot water and borax, until the borax is completely dissolved.
step 3: slowly add glue mixture to borax mixture. mix well. pour off excess water.

**disclaimer: if your child is like my son and squirts half the bottle of food coloring in his flubber mixture he will inevitably have blue tinged hands every single time he plays with it.
Recipe from here: http://www.livecrafteat.com/craft/homemade-flubber-for-kids/#ixzz34EWcdCfJ


I halved the recipe and gave each of them the necessary supplies to mix their own flubber.  I did not let them touch the borax, only stir it once I had added it to the hot water.  This was the perfect amount for each of them to play with.  Store your flubber in a plastic baggie (sandwich size is perfect for a halved recipe) and it stays good for at least a week.

I have every intention of stocking my craft cabinet with glue this summer during the back to school sales to have it on hand for future rainy days, and the cold days of winter.


Wednesday, June 11, 2014

Shaving Cream Bathtub Paint

I saw the summer roundup over at A Girl and A Glue Gun and was so excited with all the fun activities she had posted.  It can be difficult to figure out entertainment for kids during the summer but I have made a vow to not worry about the mess as long as the kids have fun with the activity.  When I saw the bathtub paint idea I was super excited because I knew Grant would have a blast.  He loves playing in the tub and it usually gives me the opportunity to clean the rest of the bathroom and do some laundry.


 All I did was took some Pure Silk women's shaving cream (which I got a while back with coupons for all of $0.15) but any shaving cream that foams white will work (I think you can get it at Walmart for $1), and sprayed it in the wells of a muffin tin.  Then I took some of Grant's Crayola washable paint and put maybe a teaspoon in each and mixed it together.  I found an old paintbrush, that will now be his bathtub paint brush, and let him go to town.

I think the "recipe" on the original website used food coloring instead of washable paint but after cleaning up the cool whip we played with and seeing the food coloring stain Grant's entire arm, I was afraid it may also stain the walls of the tub.  The last thing I wanted was to have to scrub the tub walls any more than I do already.

This is definitely an activity we will do again.  He was so excited about his painting he begged me to take a picture so he could show Daddy.  The best part for me, other than seeing how much fun he had, was the clean-up was as simple as wiping it off with a wet washcloth.

This could also be an activity for playing outside.  You could take a white shower curtain from the Dollar Tree, your shaving cream paint, and some sponge brushes and let the kids have at it.  Then just hose them and the shower curtain off, and hang it up to dry for another day.  Or leave the shaving cream on the shower curtain and use it as a foamy slip and slide.


Monday, June 9, 2014

Cool Whip Sensory Play

Summer is in full swing and while we spend most mornings, starting between 8:30 and 9am at one of our local parks, the afternoons I'm left to figure out something that will entertain a 3 year old, a 10 year old, and 1 day a week a 2 year old.  That can be really difficult, especially in a small space like ours.

I worked in a daycare for 4 years and learned quite a few different activities that kids of all ages enjoy.  One of them was playing with cool whip (or for older kids, shaving cream).  We used to do this once a week in the toddler room. 

I bought some to make a cake for my mom's birthday and ended up leaving it on the table for like 4 hours.  I was so annoyed it was ruined because of my inability to remember things these days but instead of throwing it away I decided the kids could play with it the next day and I wouldn't feel like it was completely wasted.

 I used some food coloring for extra fun and Grants whole arm was stained a nice shade of grayish blue.  I think next time I will use a smidge of his washable Crayola paints to coloring the whipped cream instead of food coloring.This could be a good sensory activity for Preschool learning the letter C or learning how the primary colors mix to make other colors.

Disclaimer: if you plan on doing this activity with kids who aren't in high chairs, outside is the best place so you can hose everything off.  Make sure the kids either wear art smocks or old clothing because it will inevitably have shaving cream all over it.  I found colored whipped cream everywhere when I was cleaning and even had to scrub parts of my carpet.  Who puts carpet in a dining area anyways, stupid apartments, makes no sense to me.

This activity was a simple one and the kids loved it.   They were busy making drawings, smearing, and slapping the cool whip for a good 30-45minutes. $1.50 (less if your store actually has the offbrand in stock) for nearly an hour of entertainment for 2 kids....not bad.


Friday, June 6, 2014

At Home Preschool Week 1

I did my first post on at home preschool here and decided posting at the end of each week would be best.  Not only for the fact there's no way I have time to do a lengthy post every single day but also because after day 1 when Grant was doing his "homework" (as he calls it) and I got out the camera, I quickly got a "mommy no more pictures", haha.  So the camera had to be put away (frown).

In case you didn't read my first post I started with the letter C, and our first day was about Caterpillars.

Day 2 was Cookies.  We read, If You Give a Mouse a Cookie  and Grant helped me make Chocolate Chip cookies.

 I cut the letter C out of construction paper, don't judge my C I know it's a bit wonky lol.  I had Grant practice with glue and glue pom poms on it.  This was originally supposed to end up looking like a really cute caterpillar but it ended up just being a little art project.

He traced the letter C on a worksheet again and we played a matching game that he LOVED!  He has actually asked to play many times since I made it.  Making a matching game is super simple.  I picked a few things with words that began with the letter C and did a google search for images of them.  I used Car, Cat, Caterpillar, Can, Cookie, Cracker, Cow, Cupcake.  I copied and pasted them into a word document then printed them on white cardstock and cut them into squares.  I wrote the words under the pictures with a black marker.


Day 3 was Clifford.  We read Clifford Goes to School and watched the cartoon.  Once again he traced the letter C but this  time I went over lowercase and uppercase and he traced the lowercase letter.

I incorporated the number 2 and had him trace the number.  He begged to play the matching game again....quite a few time actually.  I made a letter search and had Grant find all the letter C's. 


I created this in Picmonkey and yes it took quite a bit of time, probably a good half hour.  There are probably easier ways to make one but why take the easy way out right?

Our last day we were supposed to read If You Give a Cat a Cupcake and make cupcakes but unfortunately we never got around to it. I started watching a school ager for the summer and it has been exhausting and kind of thrown a wrench in our preschool time.  Our mornings we are usually at the park and by the afternoon I'm completely and utterly pooped!

I am so proud of Grant, we were looking at something and he pointed out the letter C all on his own.  I felt like maybe I can actually teach him his letters and numbers and maybe he is going to retain them.  I was so excited, it gave me inspiration to continue on with our preschool learning.

Tuesday, June 3, 2014

At Home Preschool Day 1

Grant is 3 1/2 and we had considered putting him in preschool this coming September but we figured 2 years of preschool was unnecessary.  So instead I decided to start doing some preschool activities at home.  Not only for the learning of letters, numbers, shapes, etc but also for the structure and focus time I feel like Grant really needs.


My mom works in the school system and a company brings in books you can purchase.  They had a Pre-k workbook she bought for Grant and it was perfect timing because I was looking for things online and this book had it all.


We took a trip to the library just to get some letter specific books.  We got If You Give A Cat a Cupcake., If You Give A Mouse a Cookie, and Clifford Goes to School (Grant loves Clifford and has the stuffed version he carries to bed most nights).  I already have the book by Eric Carl, The Very Hungry Caterpillar (and the stuffed caterpillar to go with it) and Grant has noticed loads of them crawling around our sidewalks recently so I thought starting with the letter C would be perfect.


I printed a letter C sheet from here.  I want to do a letter a week.  I've read varying pros and cons of doing one letter at a time but I couldn't wrap my head around teaching them all at the same time, it just didn't make sense to me.  So a letter a week it is for us and we will see how it goes.  I don't plan on going in order because I want to do all the letters I think will be the easiest for him to write (or trace) first.


For our first day I got out the flashcards and showed him the letter C, we went over what sound the letter makes as well as the difference between uppercase and lowercase.  Then I gave him a worksheet for him to trace the letter C.   I gave Grant a bingo marker (bought at the Dollar Tree) and the C sheet I printed out from here and had him only put dots on the inside of the outlined letters.

We did a caterpillar craft.  I cut out varying sizes of circles from construction paper and had him put them in order from largest to smallest.  Then we got out the glue, yes I was a brave woman yesterday with the messy glue, and glued the circles onto a white sheet of paper.  I had him draw eyes, legs, and put dots around the caterpillar with the bingo markers.


We read The Very Hungary Caterpillar by Eric Carle and went over how a caterpillar turns into a butterfly.


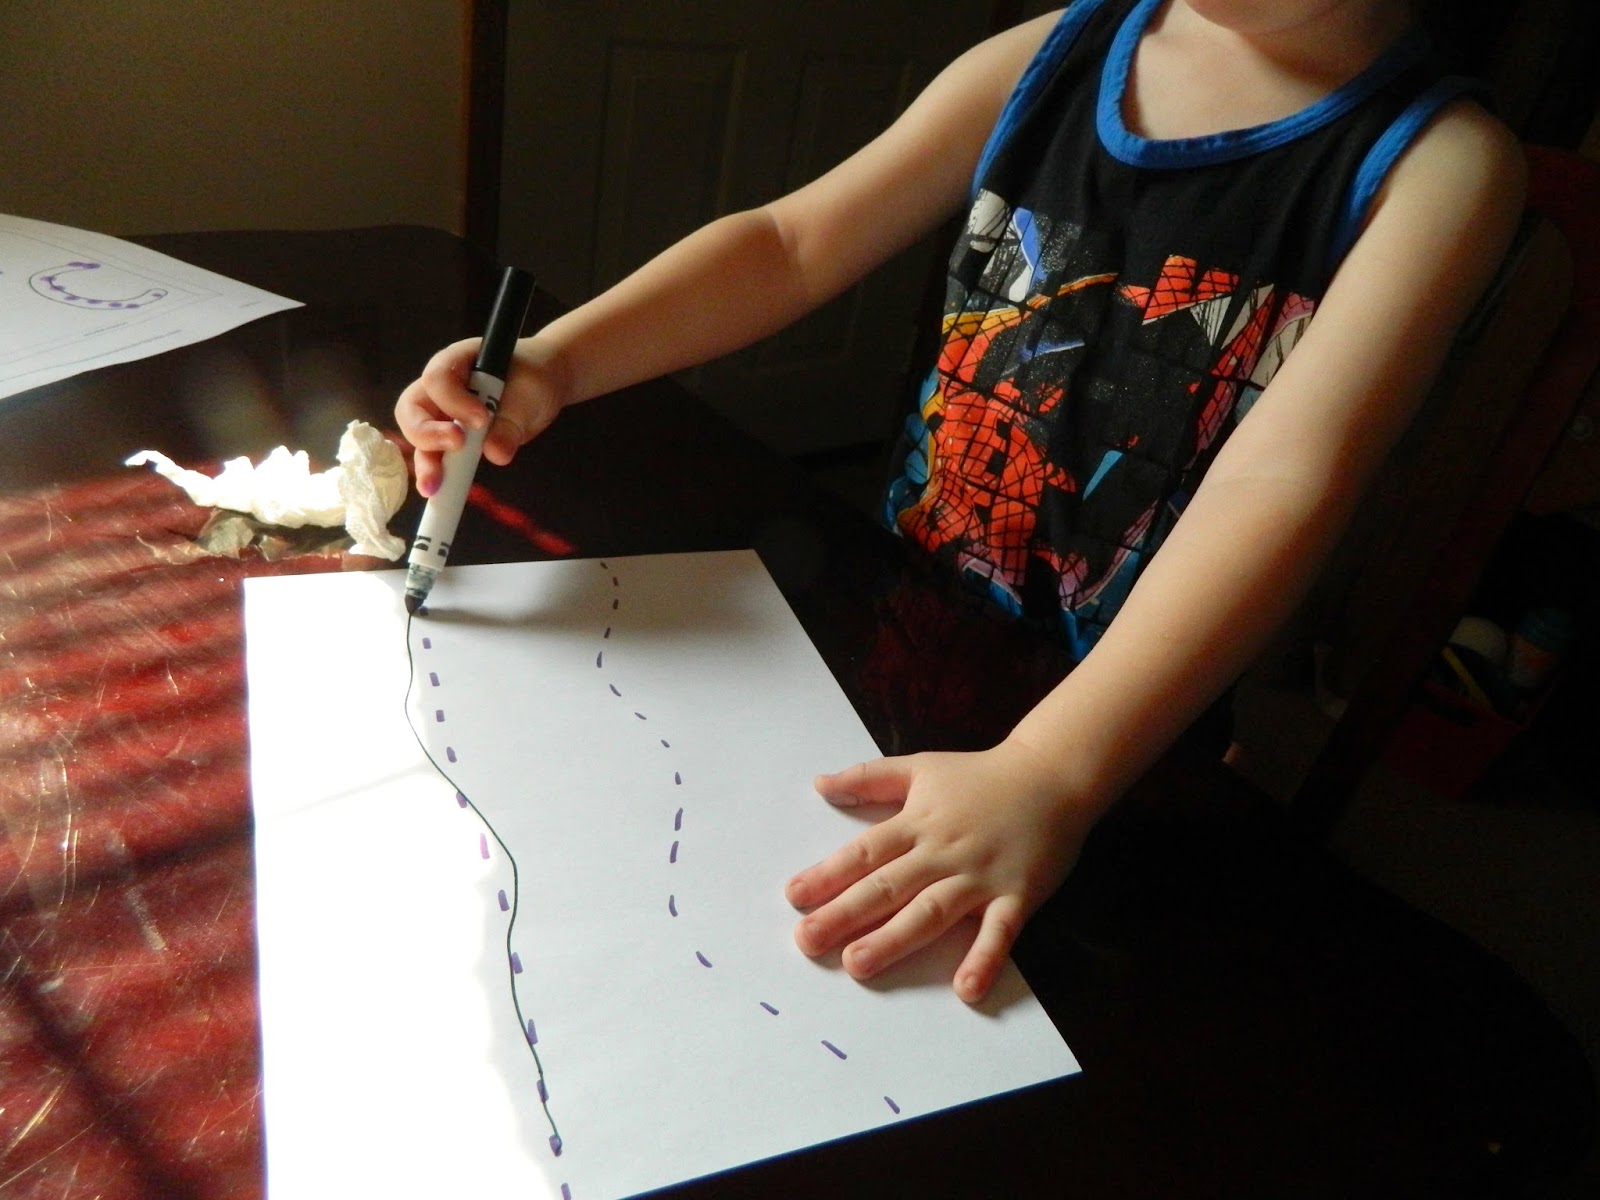
We practiced tracing straight and curved lines,


 as well as cutting them.  He is getting better and better with scissors.


Grant had so much fun and wanted to keep doing more.  I decided to do preschool at home and keep it short and sweet, by sticking to 20-30 minutes of school time a day  His attention span is short and I want to make sure we are keeping it fun so he doesn't lose interest or feel like it's "work".


Thursday, May 29, 2014

Yellow/Pink Chevron Bridal Shower

My sister's bridal Shower was this past weekend and I of course had to make some water bottle labels for my lil sister's shower.  I'm so excited with how they turned out.  I used Picmonkey to create the image and wording.  It's simple yet classic and that's what I wanted.

I used my Cricut to cut the circle shapes

Originally, when I offered to do the shower I had a vision in my mind of all these beautiful floral centerpieces.  Of course after we had our daughter and put a new engine in our truck I could no longer justify spending a bunch of money on flowers that would inevitably be thrown away or packed in a box.  My solution was to figure a way to make my own flowers.
Enter: Coffee filter flowers.  Here's how my first one turned out before I painted it.


Isn't it pretty.  I was so excited.  I used the templates from Martha Stewart but didn't actually read her instructions.  Being impatient as I am I just started cutting and taping and they turned out great.  So with my coffee filters that cost all of $1.79 for over 100 of them at Walmart.  Here's a word to the wise, make sure you paint the petals before you go to the work of curling, taping, and positioning every petal.  If you do like I did and paint them after you have them all put together and looking similar to perfection, the paint will ruin all your hard work and you will spend another 10 extra minutes reshaping every single petal.

I used paint I had in my stash.  Cheap acrylic that I squirted some into a small bowl of water, mixed it together and started painting.  I wish I would have gotten a great picture of the centerpieces before the event but I can't remember anything these days.  I didn't think about a pic until I was standing taking pictures of my sister opening her gifts, so this picture is not fantastic and of course the centerpieces fell over in the car on the way to the site which bent some of the petals (frown).  I used Frappuccino bottles wrapped in twine and a yellow polka dot ribbon tied around it.  Each one had 3 pink coffee filter roses.

Here are the thank you tags I created in Picmonkey.  I used the background of a pink heart in all the tags I used.  All the food labels, signs for the Recipe card tree, card basket, and cookie buffet.  I created it without really thinking and really really like it.  It's so simple yet it worked!

These tags were stuck on clear treat bags I bought from Hobby Lobby.  I used glue dots to attach them.  Everyone took a bag and filled it with cookies of their choice as their favor and dessert.

The cookie buffet:


Can't for the life of me remember what the sign said but It's something I found by googling "cookie buffet signs".

Once again I forgot to take pictures until the whole shebang was pretty much done.  I had 5 kinds of cookies for people to pick from, butter cookies, white chip chocolate, red velvet hearts, chocolate chip, and peanut butter.

One of my favorite decorations was the recipe card tree.  I sent the recipe cards with the invitations with directions to fill it out and bring it to the shower.  I took clothespins I had in my craft stash and used decorative pink striped tape I found at the dollar tree to cover one side of them.  The sticks were found in my mom's yard and placed in a half gallon mason jar.  I thought this was so cute and she got some really great recipes I plan on stealing haha.

This banner was not made by me but my sister's future mother-in-law had it from another shower she had done and asked if I wanted to use it.  It was burlap and so cute I had to get a picture.

I also had tissue paper poms in dark/light pink and yellow.  I made circle garland that didn't end up getting hung up because of time restraints and guests arriving early.

For food I chose chicken salad and ham salad sandwiches, pasta salad, deviled eggs, watermelon, strawberries, and cantaloupe.  For drinks we had bottled water, homemade strawberry lemonade, and sweet tea. 

My family is not big on games, in fact with every shower I've done (and there have been a few now) they complain at the mere mention of a game.  That being said, I had to have something else for everyone to do other than eat and watch Kayli open gifts.  So I chose the candy game where you match bridal phrases with a candy.  The prize was boxed Sugar Daddy's, Sweetarts, Nerds, Twix mini candy bars, and a PayDay candy bar stacked and tied with pink ribbon.

Everything turned out so great and even though I didn't get to decorate fully like I usually do everyone enjoyed themselves and Kayli got lots of goodies to start her married life.


Thursday, May 15, 2014

Yellow/Pink and Chevron Bridal Shower Invitations

There has been very little crafting going on in our house since Miss Eva came into this world.  She is a much better sleeper than my son ever was but my days with a newborn and a 3 1/2 year old are pretty busy.  Between feedings, diaper changes, meal prep/cooking/eating, naptimes, dishes, and laundry it's difficult to squeeze crafting time into the day.


That being said, last year I told my sister I would do her bridal shower for her upcoming wedding this summer.  This was before I was pregnant, before we were living on our own, before I was babysitting another toddler.  Pretty much before I was super busy.


Now the shower is a mere 2 weeks away and I'm scrambling to get things bought, made, and together.


I finished the invites over the weekend.  There is no theme other than the colors Yellow and Pink and chevron and heart prints.  This shower is going to be a huge undertaking, the biggest party I've done so far with a guest list of about 60 people.  So for the sake of my sanity and my bank account, I'm really trying to keep things simple.


I used my Cricut for the invites to cut the scrapbook paper and cardstock.  I used the Plantin Schoolbook cartridge for the yellow rectangle  and oval wording, and the Accent Essentials cartridge for the chevron cutout. I got the wording for the invite from this site.  I thought it was really cute and since there's no real "theme", I needed wording that was universal.


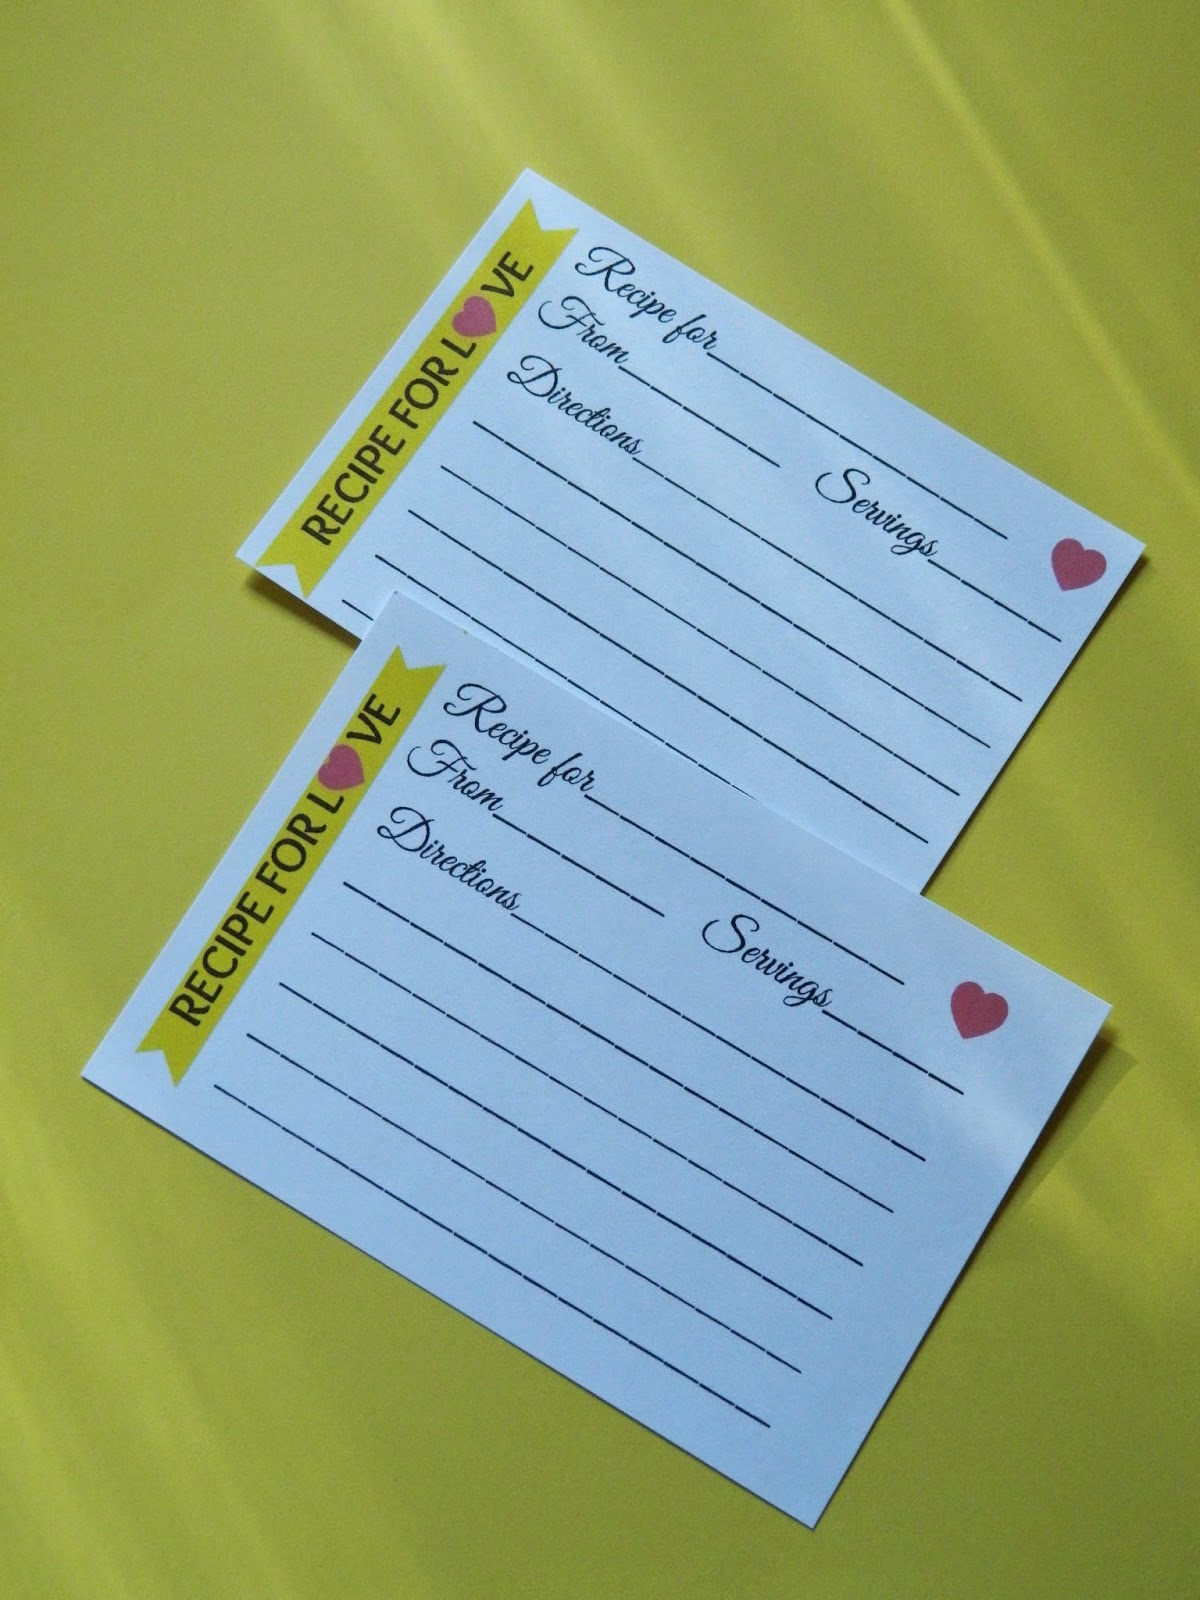
I saw an idea for recipe cards and thought I saved the blog I saw it on but of course my brain is not working most of the time and I didn't.  I loved the idea of a recipe card tree instead of an advice tree.  I didn't want to go the route of advice cards because it seems to me that everyone pretty much writes the same old same old, "don't go to bed angry", etc etc.  And while that's great advice, I'll say from personal experience there will be times when unless you want to be up all night, you're probably going to go to bed angry a time or 2 in your marriage.  I've also had many times at showers I've attended/hosted when people make the comments they don't know what to write and almost seem put out by having to come up with something.  So I decided to design a recipe card and include it with the invite letting people know to bring it to the shower with their favorite recipe written on it.  Once at the shower there will be clothespins and a "tree" for them to attach it to.  I just love this idea. 


I designed the recipe card at Picmonkey.com. I seriously love this site and have used it for so many things since I found it a couple years ago.  Once created I saved the image as a photo, uploaded it to my Kodak software on my computer and printed it on white cardstock as 3x5 images (4 to a sheet).


It's a huge relief to have these finished and mailed out.  Now on to the other dozen projects I have in store for this little soirée.


Wednesday, April 9, 2014

Hospital Bag Must Haves

I think every woman has a different list of items they feel is necessary in their hospital bag for when they give birth.  I didn't have a clue my first time around and relied on friends and family members for tips.  Some items they suggested I ended up using, others I found pointless to have.  I also had a whole separate bag packed for Grant with a whole lot of stuff I never even pulled out.


So I thought I'd share what is going in my bag the second time around.  The items I feel like are necessary as I have no desire to pack a bunch of crap I won't need.  All that does is make more work for me unpacking it later.


1. flip flops- you must have these for the shower.  I'm sure the janitorial staff does a great job cleaning showers but I still don't want my bare feet in the same shower that dozens of other people have used.  I bought mine at the end of the season last year for $1.  I have no intentions of bringing them back home with me since I bought them specifically for the hospital.  They will get pitched before leaving, less for me to unpack at home.


2. Travel size shampoo/conditioner/body wash/deodorant-  no reason to have large bottles of these items and if you have no use for them once you're home, just pitch these with the flip flops before leaving the hospital.  Normally I'm not one to waste but I figure after I've been through childbirth I feel like I have the right to waste a little if I want.


3. Nipple Cream- I had a difficult time breastfeeding Grant and while in the hospital they will provide you with sample packets of nipple cream but you will go through it like crazy.  The nurses do their best but sometimes it takes awhile to get more when you run out so I wanted to make sure I had my own this time around.


4. Vaseline in a tube- If you're going to have your little boy circumcised they will advise you to use Vaseline on the area to keep urine from aggravating it.  Once again they can give you packets of this while you are there but if you're like me you will use a crap load every time you change his little diaper to keep him as comfortable and pain free as possible.  Therefore you will go through those packets super quick and it could take longer than you'd like to get more if you're in the middle of a diaper change.


5. Travel size antibacterial gel: There will be plenty of this on the walls all over the hospital but you want to have this at arms length while you're there.  You could be in pain from a C-section or just sore from natural childbirth but either way you don't want to have to get up and walk across the room every time you need a quick hand cleaning.


6. Travel Lotion-  with all the handwashing and sanitizing you are going to be doing, you're hands will dry out pretty quick.  Lotion will help.


7. Nursing cover-  With all the people coming and going to visit you, you will want something to cover yourself if you're going to be nursing your little one.


8. Mini Loafa for showering- I bought a package of these at the Dollar tree when I put together a hospital kit for my cousin.  Now I'm glad I did because I prefer using a loafa rather than the super thin hospital wash cloths they provide for you. 


9. Pajamas- This is a comfort item because the hospital will provide gowns for you to wear but who wants to be stuck in those ugly things for 2 days with everyone you know coming to see you and your new little one and taking pictures.  I was fortunate enough to receive a really nice set of nursing ones for Christmas and I ended up making my own hospital gown, but any comfy pajamas will do.


10. Granny panties- yep you read that right.  The hospital will provide mesh ones, use these while you're there but you will need a pair of your own to wear home.  Don't take your nice ones take the ones you don't care if they get stained and you have to throw them away.   Last thing you want is to ruin your favorite pair.


11. Nursing bras- if you have sleep nursing bras take those because you will want to be as comfortable as possible but any nursing bras will work.


Now for your little ones bag.


When I packed a bag for Grant I packed burp cloths, receiving blankets, multiple outfits, hats, socks, and so many other things I thought I might need.  I used very few of the items I packed.  Here's what I'm packing this time around..


1. Outfit-Don't go nuts with the outfits because it's really not necessary.  One for leaving the hospital and one for pictures if you want it different than his/her take home outfit.


2. 1 Receiving blanket:  This isn't necessary as the hospital will provide ones for you to use while you are there but I like having one in a cute print so I'm taking one of my own, but only one.


And that's it for the little one.  The hospital provides most items you will need, so keep that in mind.
 

Monday, April 7, 2014

DIY Hospital Eye Mask and T-shirt Headband

I had a few posts I was working on before Eva was born and I had intended to finish them before she came but with her early arrival I didn't get a chance, so I'll be posting those as I get them finished. 


One thing I remember about my hospital stay with Grant is the lack of sleep.  Between the nurses coming in, what seemed like every 15 minutes, and the noise, and the hallway lights, I got a total of zero hours sleep both nights.  This time around I would like for that to be different so I decided to make an eye mask.

Sure I could have went to the Dollar Tree and bought one but what fun would that be when I can sew one myself.  I used the same fabric I made my maternity hospital gown with so they would match.

First I drew a pattern then cut the pieces.  You will need 2 pieces of fabric and a piece of batting.  I used 100% cotton batting because I had it leftover from making nursing breast pads but you can use whatever you have on hand.

Now cut a piece of elastic, mine was 12 inches. Lay your batting and 1 piece of fabric on top of that with the right side facing up.  then place your elastic on top of that pinning it in place. 


I overlapped part of my elastic so it wouldn't get caught in the seam while I was sewing.

 I baste stitched the elastic in place on either side to make sure it wouldn't move out of place.

Now place the 2nd piece of fabric wrong side up (you want the right sides of each fabric piece facing each other with the elastic in between) on top of your elastic.

Pin it in place and stitch all the way around making sure to leave an opening for turning your mask right side out.


Turn right side out and pin your opening closed.

Stitch around the outside using 1/4inch seam allowance, making sure to stitch your opening closed.

Now you're done, you have a super cute eye mask to match your hospital gown and hopefully get a little shut eye while you're there.

I also made a matching t-shirt headband.  I happened to have a maternity shirt I wasn't crazy about wearing and it just so happens that it matched my hospital gown.  I used this tutorial and it's seriously the easiest hair accessory I've ever made, I want to make a dozen more for the sole reason that I can finish them in about 5 minutes.

The tutorial is for a no-sew t-shirt headband but I already had my sewing machine out and didn't feel like heating up the glue gun so I ran mine through my machine to finish it off.

 
Both of these have made their way into my hospital bag and are just awaiting this little one's debut.


*I was really fortunate this time around and the nurses I had were amazing.  They didn't wake me up for vitals in the middle of the night if I was sleeping which was great.  So I didn't need the eye mask as much as I thought I would.

Tuesday, April 1, 2014

My Labor Day Story

I have always loved hearing other women's labor stories so I thought I'd share mine.  Yes I have been a little absent from the blog for about a month and that is all due to my little one making her way into this world.  The story is one reason why I don't like induction, ok I have quite a few reasons why I don't like induction but one of them is I want to have a story.  Something other than, "I went to the hospital at such and such time, they hooked me up to an IV and baby was born so many hours later".  No, I want something a little different, a little more interesting to tell my kids when they get older. 

Years from now this is the story my daughter will hear:

The night I went into labor I had been at my Mom's.  I still had a few days until my due date and had been to the doctor the day before, she was going to strip my membranes in the hope that I would go into labor sooner but once she checked me she said she couldn't because she was afraid she'd end up breaking my water instead.  I was 4 1/2 cm dilated and 75 % effaced, this is pretty typical of the end of my pregnancies.  With Grant I was 4cm dilated for a week before he was born so I was pretty sure I still had quite a few days left before this one would arrive.  I thought that day would probably be the last time Grant would be able to play at Grammy's before the baby came since the rest of the week would be busy with other errands. 

There were no real signs the baby would be coming except I thought I'd lost my mucus plug earlier that morning, still I was in denial.We got home a little after 9pm, and Grant and I went to bed a little before 11.  I'd been having Braxton Hicks contractions that were progressively worse for a few days but nothing consistent and not really painful just uncomfortable.  I had them so often I ignored them most of the time.  I was almost asleep and thought I was having a couple Braxton's when I realized I had been tensing up with the last 2 and actually had to tell myself to relax.  Braxton's never made me tense up before so I timed a couple of them, 11 minutes apart.  It was 11:33pm.

I went downstairs and continued to time them, I had a couple 11 minutes apart then a couple 6 minutes apart.  I called my Mom and told her I thought I was in labor but wasn't having really consistent contractions and just to stay tuned, it was 12:24am.  I considered them not consistent because I was only having a couple the same amount of time apart then the time between them would decrease by quite a few minutes.  This was a stupid assumption of mine.  I called my husband at 12:26am and told him I was in labor, he asked if I'd called my mom to come over and take me to the hospital and why I hadn't called him earlier.  I told him I'd only been having contractions for an hour and I probably had hours and hours of labor left.  He reminded me I was already 4 1/2 cm dilated and I reminded him I was 4 cm with Grant and had 9hours of labor with him.

I called my mom shortly after that because the contractions were getting pretty painful and told her she should probably make her way over, the contractions were 4-5minutes apart, it was 12:47am.  I still didn't have my bag completely packed, because I figured I had a few days to go so I was walking through the apartment packing the last few items I thought I'd need. 

Once my mom and step dad arrived my contractions were about 1-2 minutes apart. I was still under the impression I had plenty of time.  My mom was rushing, grabbing bags and getting to the car and I remember thinking, we seriously have hours to go there's no need to rush.  I had a contraction right before we walked out the door and made it to the end of the side walk and had another.  This should have been my clue, I did not have hours of labor ahead of me.  You would think I'd be a little smarter since I've been through this before.  It was 1:17am.

We got to the hospital, got checked in, weighed, and vitals taken.  As the nurse was wheeling me to a room she told another nurse she was pretty sure I was in labor so she was taking me to a large room.  All I could think was, duh I'm in labor why else do you think I'd be here at 1 in the morning.  I'm not one to make multiple trips to the hospital in false labor.  When I go in it's the real deal.

I changed into a gown, and another nurse came in to check me.  She said, "yep you're at 8-9cm".  My response was "holy crap!".  I thought I was probably at 6cm but never did I dream I was nearly ready to deliver.  Immediately a slew of nurses were coming in and out of my room with the baby warmer, trays of instruments, stacks of papers to go over and sign, etc.  My husband finally arrived, my doctor broke my water, contractions came one on top of the other without much rest in between.  They hurt, like no other.  I didn't have an epidural with my son so I knew what to expect as far as pain went but it's almost like your mind is in denial until you're actually in labor.  I remember thinking why the heck do I not get epidurals, it must be so nice not to feel any of this.

My doctor asked if I felt like I could push, I said I probably could but didn't have as strong urge.  She said she'd wait for me to tell her when I was ready, then she walked out of the room.  It was probably 30 seconds to a minute later, even though it seemed much longer than that when I had a contraction with the strongest urge to push I'd ever felt.  I told the nurse, "I need to push", she said "sorry honey you have to breathe through this one the doctor isn't in here".  If any of you have not had an epidural and had that contraction with the urge to push, you know your body takes over and you can't not push.  I tried to breathe but my body kept pushing anyway.  It was horrible.  My husband kept saying "breathe", I kept saying "I can't" and would push again.  All I could think was, this baby's coming out whether there's a doctor in this room or not.  That was the longest contraction of my life. 

My doctor came in during that contraction but I was still told to breathe through it as they finished doing whatever they felt they needed to do, I was busy so I don't have a clue what she was doing.  That contraction finally ended and my doctor said, "wow that one lasted like 2 minutes", that was the longest 2 minutes of my life.  I didn't even know contractions could last that long.  I was exhausted.  My doctor was doing what's called a perineal message, which is done to stretch the perineum and help prevent tearing.  I'm sure this was a good thing for her to do but to me it felt like she was pushing the baby back in, there was so much pressure I couldn't relax enough to get a good push.  My doctor kept telling my to relax my bottom and I kept saying "I can't".  Finally she looked at me and said "if you relax this baby will be out with your next contraction".  That's all I needed to hear.  The only thing going through my mind was "I want this baby out of me!".  So I took a few breaths and relaxed the best I could.  The next contraction came and I pushed 2 counts of 10 like it was the last thing I was going to do in my life and my baby was here.

The doctor: "It's a girl!"

I was convinced I was going to have a boy so my husband said, "you were wrong, you got your girl".

I was still a little in denial, even looking at her, I couldn't believe I had my girl.  I would have been perfectly happy with a little boy but since my husband said from the beginning this was probably our last baby I thought it would be nice to have one of each.  Of course as soon as she was here I looked at my husband and said, "yea we are done, I'm not doing this again.  Holy crap that hurt!" haha he laughed.


I was so relieved she was here, the pain was over, and so happy I had a beautiful healthy baby girl, I started tearing up.  I remember Grant's labor and delivery but I didn't remember it being that painful during the delivery part, and he was 10oz bigger than her.  I said it after Grant and I say the same now, even with all the pain I would have another one without an epidural.  I know most women prefer the more pain free route, and I honestly can't blame them, having a baby hurts more than anything you will feel in your life.  That being said, I didn't have to worry about headaches and neck pain from the epidural like my cousin did after having her baby, I could get up and move immediately after both my babies were born, and other than typical pain and exhaustion from giving birth I felt great.  It's not the right decision for every woman but for me it's the only way to go.

Eva was born at 2:35am, less than an hour after we arrived at the hospital, and was 8lbs 15oz and 20.5 inches long. I had no concept of time once we got to the hospital and I thought it was so much later than it actually was.  When I asked what time she was born and I realized it was less than an hour after we arrived I was shocked.  I thought we had been there so much longer.

I had said from the beginning of my pregnancy I was hoping for a quick labor and delivery.  Never dreaming of one as short as 3 hours.  I was thinking 5-6 hours would be great, 3 hours wasn't even a thought in my mind.  I told my husband if we were crazy enough to have another baby I would be terrified of not even making it to the hospital.  I'd have to go in with the first contraction I felt.

Now a month later Eva is waking up every 3-4 hours at night and after a few days of her not getting to sleep until 6 and 7 am she's finally starting to get on a bedtime schedule.  I look at her sweet face and think "yea I'd have another one."  My husband still says we are done, I say we will see.


Saturday, March 8, 2014

March Meal Plan 2014

We are doing our once a month shopping a little early this month because the day I would normally do it is my due date.  While I love my husband dearly I don't trust him to be able to pull off an OAMS trip without me.  When I send him for a handful of items I get numerous phone calls asking which brand to buy, this price vs. that price, and informed of other goodies he finds that we might "need".   When I told him this he suggested we forgo the big trip this month and instead he would do weekly trips.  I considered this for all of 10 seconds before saying no thanks.


Is that harsh?


Ok, I'll admit I'm a little controlling when it comes to my grocery shopping/list making/couponing/grocery budget.  I know what we need, what we go through, the amount of money we have to work with and how to make it work for us.  To someone who hasn't done a day of grocery shopping by themselves for a family in their life, it's not easy.  With a new baby coming and already having a very active 3 year old I want as few things to worry about as possible.  One of the things I don't want to worry about is food and meals.  I want everything I need for the whole month so I don't have to wonder if I have all the ingredients for this meal or that.  I've come accustomed to that luxury since I started OAMS.  It also might be selfish but I don't like the idea of sending my husband every week for groceries knowing it will take him a couple hours minimum and me stuck at home alone with 2 kids.  I would rather us all be stuck at home together.


When I started thinking of meals to make this month and the fact that I would be recovering from childbirth, the idea of doing a lot of from scratch cooking started stressing me out.  I have not one desire to make the meals I normally do.  This past month I had already slacked with the homemade cooking and resorted to some frozen family size meals which I hadn't bought in forever.  I decided my sanity and stress level was more important than trying to be supermom, so this month is full of quick, easy, and some store bought frozen meals.  I want to be able to focus on bonding, recovering, and establishing a new normal routine for our growing family not what to make for dinner.  The from scratch homemade meals will come eventually but no need to do it now.


Week 1
Sunday:  Lasagna (homemade by my mom)
Monday:  Breakfast for dinner- scrambled eggs, hashbrowns, bacon
Tuesday: Tomato Soup with grilled cheese sandwiches
Wednesday: fish stick sandwiches, mac & cheese, and fruit
Thursday:  Hamburgers with tator tots and fruit
Friday: leftovers
Saturday:  Grilled Chicken breast with green beans


Week 2
Sunday:  Stuffed Pepper soup (freezer)
Monday: Breakfast for dinner-bacon with biscuits and gravy
Tuesday:  chicken nuggets, corn, fruit
Wednesday: Spaghetti with garlic toast
Thursday:Salisbury steak, mashed potato, biscuits
Friday: leftovers
Saturday: hot dogs, mac & cheese, green beans


Week 3
Sunday:  chicken nuggets, mashed potato, corn
Monday: Breakfast for dinner- omelets
Tuesday:  grilled cheese, tator tots, fruit
Wednesday: Hamburgers & French fries,
Thursday: fish sticks, mac & cheese, fruit
Friday: leftovers
Saturday:   pulled pork sandwiches, corn, potato wedges


Week 4
Sunday:  Salisbury steak, mashed potato, biscuits
Monday:  Breakfast for dinner-pancakes with bacon
Tuesday:  Spaghetti with garlic toast
Wednesday:  hot dogs, mac & cheese, fruit
Thursday:  Grilled chicken, corn, corn bread
Friday:  leftovers
Saturday: pizza (take-out)


As you can see this months meals are pretty sad compared to previous ones but I wanted to make sure all the meals are ones my husband could easily make without my help, or that I could make with minimal energy and cleanup.  Paper plates will be my friend after my husband goes back to work and I will not feel guilty about it.  My goal is to make everything as easy as possible for the first month so I can focus on our new little one, Grant, and our new normal.

Friday, March 7, 2014

Labor Day Bags

When I went into labor with Grant we had to drive 45 minutes to the hospital at 3:30 am with me having contractions every 3 minutes.  It was miserable.  Once we got to the hospital I was more concerned with getting out of the car and into the hospital room to try and get some relief and my husband was only thinking about getting the car parked and getting inside to be with me.  Neither one of us thought about bringing my hospital bag inside and once we got to the room I refused to let Derrick leave my side to go get it.

Since it was so early in the morning when we left and every time I tried to stand up straight or move or pretty much do anything a contractions would hit me like a mac truck, I didn't take a shower or brush my teeth or anything else.

Of course I wasn't at all concerned about this while I was in labor.  How I looked or how horrible my breath smelled was the very last thing on my mind.  However once Grant was born and visitors started coming in to see us it dawned on me that I probably looked like a hot mess, with raunchy morning breath, and leftover makeup from the day before.  I vowed the next time I had a baby I would be better prepared.

That's where the Labor Day Bag comes into play.  This isn't the bag you pack for your hospital stay this is the small bag you have with essentials for a quick clean up before the guests start coming in and before you can actually take a shower, which is all you really want to do after you give birth.

Here are my essentials:

Colgate Wisps- these little baby's are fantastic to have for a quick brushing of the teeth.  You will have a regular toothbrush and toothpaste in your overnight bag but chances are you won't even have time to get out of the bed before the Grandparents are going to wanna come in and see your little one.  A quick once over with these and your mouth feels refreshed and your breath is no longer smelled from the other side of the room.

Headband- If you have an epidural maybe you won't be sweaty but if you are like me and go the natural route chances are you have spent hours upon hours in horrendous pain and sweating.  A headband will take care of some of those flyaways and hide some of the grossness of you not taking a shower that morning.

Face Wipes- To wipe away any leftover makeup from the night before and give you a quick freshening up.

Chapstick- labor makes your lips dry, it's a fact.

Mascara- Ok so you can live without this one in your bag but people will have cameras and you will inevitably be in the pictures.  After using your face wipes a quick swipe of mascara (no need for the works) and you will feel like a new woman.

Wash Cloth- Towards the end of labor all I wanted was a cold wet cloth on my forehead.  Yes the nurse can get you one but nurses are pretty busy since you are not their only patient.  I'm not one that wants to wait for anything while I'm in labor.  I didn't get an epidural with Grant and don't plan on getting one with this one either.  When I'm to the point I want a cold cloth I want to be able to tell Derrick and him have it readily available, not have to call the nurse and wait until she has the chance to bring one to us.

You want everything to fit in a small bag you can throw in your purse or carry as your purse.  There will be time to get your overnight bag later and this way you have one less thing to worry about.

I also made a Labor Day bag for my husband.  I vividly remember how horrible his breath was during my labor and I have already informed him I couldn't take that again for 9 hours straight.  I needed him to be minty fresh this time around.  Here's what I put in his bag:


Colgate wisps- for a quick teeth cleaning

Gum- just in case the wisps aren't strong enough, haha

Granola Bars and a Snickers bar- I refuse to have him eating anything major while I'm suffering and can't have anything but he will need something to hold him over if the labor is a long one.

Butterscotch candy- in case he just needs something to keep his mouth from being dry.

Water Bottle- The nurses can get you these but once again I like to have everything I can so I don't have to wait around for someone else to have time in their schedules.

Camera/Batteries-One of the few regrets I have about Grant's birth was not getting a single picture of the 3 of us or even him and I.  I swore I wouldn't let this happen again so this all goes in Derrick's bag.  I know everyone has a phone these days but I want actual pictures with a real camera.

Thursday, March 6, 2014

Hospital Goody Baskets

I started thinking about Grant and Derrick visiting me in the hospital and inevitably whenever you spend long periods of time in the hospital the vending machines and/or the cafeteria become your friends.  You end up spending too much money on snacks, drinks, and junk.  Money you probably don't need to be spending considering you just added a baby to your family.

That's when I thought of having a goody basket in my room specifically for my husband and Grant since they would be there the most.  I thought about the snacks each of them likes, made my list, and headed to the dollar tree.

 For my little guy: Strawberry Banana teddy grahams, junior mints, koolaid pouch, Yoo-hoo milk boxes, Whales (cheese crackers), and ninja turtle ring pops.

For my husband: sunflower seeds, snickers, sweetarts, butterscotch candies, and gum

I probably won't keep it in this bin.  The more I thought about it the more I thought a bag would work better.  I want it easy to grab and go when the time comes, but it does look cuter in a container.  This would be something really great to take to a new mom while she's in the hospital for her and her family if you know the snack foods they like.  I know I'm always trying to come up with something to take to the hospital when someone has a baby that is useful and not something they see and are thinking it's one more thing they have to pack home.

LinkWithin

Related Posts Plugin for WordPress, Blogger...

Total Pageviews