A few months back I bought 3 bags of frozen tilapia without a clue how to cook it, but my oh my how good it turned out.
Here's what you need:
Fish fillets
lemon pepper seasoning
1 stick butter/margarine
(dont you love recipes that only have a handful of ingredients)
Thaw your fish. Melt the stick of butter. Place your fillets into a glass dish in a single layer.
Pour the butter over top of the fillets and then add seasoning to your liking. I personally don't like a lot of spice, my husband however does, so I try to meet in the middle.
Now bake at 400 degrees for 20 minutes or until the fish is flaky when you pick at it with a fork.
I know what your thinking, Where's the picture? I know I would liked to have one to post for you because I found the fillets quite beautiful but no such luck. I'm horrible at remembering to photograph stuff (I don't think that's a good quality in a blogger, O well, forgive me). When I tell you it looks great when you pull it out of your oven, you will just have to trust me.
Now your done, so go eat!
Monday, October 31, 2011
Wednesday, October 26, 2011
Water Bottle Label How-To
I have started a small obsession with water bottle labels and feel the need for them to be apart of every celebration. My first dabble with them was for my wedding. I stupidly made 24 labels, with the intention of using them in goody bags for Derrick's family who drove from Tennessee to Ohio, ended up not doing the goody bags and put them on the table at the wedding. Needless to say everyone wanted one and they were gone before you could blink. I made those in Microsoft publisher which I no longer have on my computer, enter my Cricut. I used my Cricut to make the labels for my sister's graduation party and my cousin's baby shower and now my son's birthday.
Each time I do the labels I end up finding another way to make them. So here is how I made Grant's birthday labels:


Each time I do the labels I end up finding another way to make them. So here is how I made Grant's birthday labels:
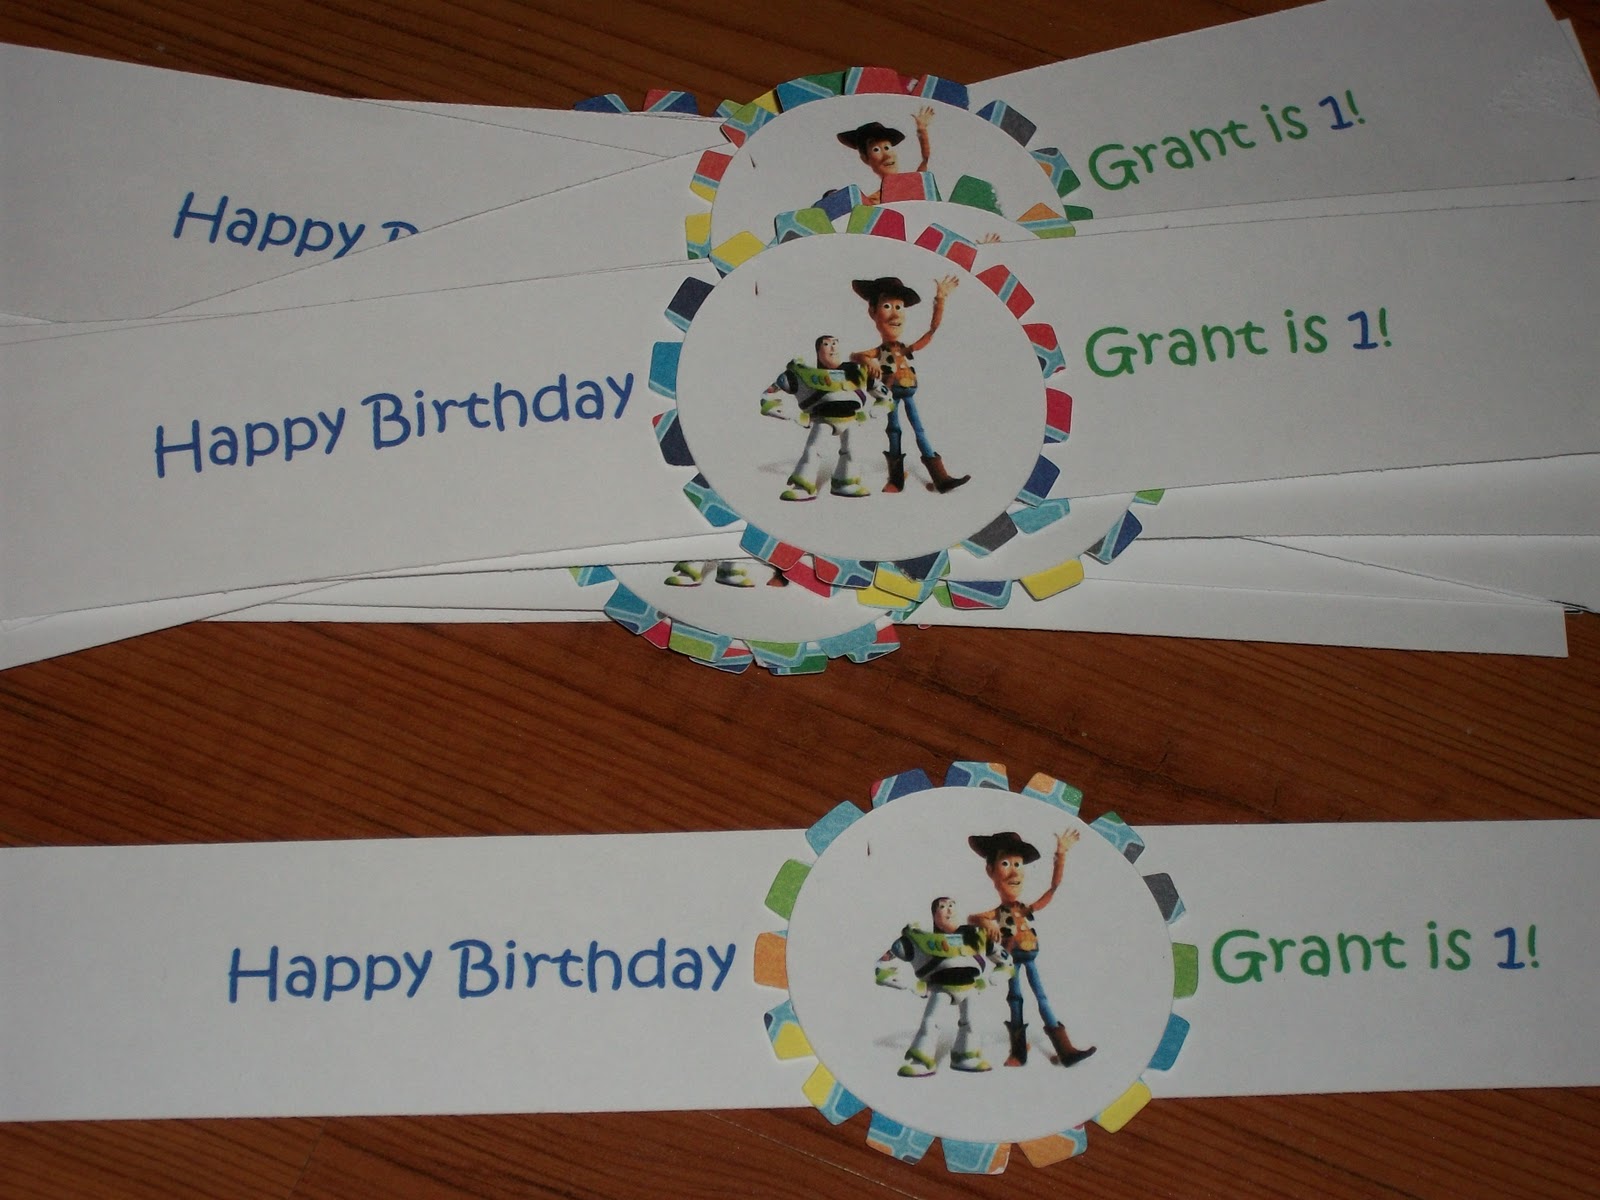
1st I typed the wording I wanted in a word document and spaced the Happy Birthday and the Grant is 1! as far apart as I could and still have them on the same line, then copied and pasted a few more on the page with enough room in between to cut. I printed them on white cardstock I bought at Walmart for $5.96 for 150 sheets
Then I took a label off the water bottle I intended to use keeping as much of it intact as possible to use as a template. I positioned the label wear I wanted it over top of the wording and made small marks to indicate where the top and bottom of the label would need to be cut (if you look close you can see these dashes on the right hand side of the cardstock page).

Now use your paper cutter, any paper cutter will do, and cut straight across where you made the dashes.

You will end up with a bunch of these:

Are you getting excited! I love this part of crafting, when the first part of your project is done and you get a little sneak of what its going to end up looking like. Haha I think only fellow crafters would understand that comment.
Anyways...
I found a picture online of Buzz and Woody I liked, copied it into my pictures file, then copied it into a word document, sized it to 1 inch and put multiple on one page, leaving enough room between them to cut them into circles.

Here is where my beloved Cricut comes in, can I say how much I love my Cricut, I love it I love it I love it.
Ok back to water bottle labels.
I used the Accent Essentials cartridge and cut the shape on the left, which I used as a background for the Buzz and Woody picture. I cut this shape at 2 inches out of regular scrapbook paper. I used the centerpoint feature on the Cricut and cut 1 3/4 inch circles around each of the pictures, then glued the circle onto the background shape using clear glue I bought at Walmart.

Now just glue the Buzz and Woody shape in between the wording on your label and TADAAA! Your almost finished, but look how cute they are!
Now, technically you could stop right here and just tape or glue these fabulously homemade and personalized labels to your water bottles, or if your like me and have a need to keep little momentos of birthdays (holidays, baby showers, bridal showers, etc etc etc), you can use contact paper to cover them and keep them from ruining or ripping. I read somewhere if you cover them in packing tape they will be waterproof, and all I can say about that is...
Lies! All Lies!
I tried this on my sister's graduation labels because the party was at a park and the bottles were going to be in a cooler of ice, needless to say my beautiful labels that I slaved over for hours ended up completely ruined with bleeding cardstock colors. O well live and learn.
Tuesday, October 25, 2011
Oh Ohio!
After Grant's birthday party I made a trip to Ohio to see my family during my school's fall break. Every time I go up there it becomes harder and harder to leave, but we had a great time visiting with family and relaxing. Now that we are home it's back to the daily grind of work, dishes, laundry, and diapers. This week is Grant's official birthday and we are planning on taking him to the zoo for the first time on Saturday, I can't wait!!
I do have a post or two up my sleeve but with trying to catch up on the never ending loads of laundry after being gone for a week and the dishes that never seem to disappear I haven't had the time to post any of them yet, but stay tuned!!!
I do have a post or two up my sleeve but with trying to catch up on the never ending loads of laundry after being gone for a week and the dishes that never seem to disappear I haven't had the time to post any of them yet, but stay tuned!!!
Monday, October 17, 2011
Toy Story Birthday
Grant's birthday party was Saturday and let me say this, I will be planning his 2nd birthday way in advance. I had the ideas for his party for quite a while but didn't actually get started on decorations until 2 weeks before the party, and all I can say to that is...... big mistake! When it comes to parties and holidays I always have this vision of what I want them to be and all the personal touches I want to add, and needless to say I procrastinate, stress myself out, get hateful, and almost cry because nothing is going the way I want. I had many ideas that fell apart due to time, money, and pure exhaustion after working all day and taking care of Grant and the house. However, now that it is all said and done I am so happy it went well and Grant had fun.
I bought 1yd of Toy Story fabric from Hobby Lobby to cover the table, and the banner was made using paper I already had in my stash.

My Cricut and I became very close working on this project, I think we are going to need a little time apart lol. I cut all the characters out using the Toy Story Cartridge. I attached kabob skewers to the back of each character and stuck them in a mason jar filled with basket filling. I found the Toy Story ribbon on clearence at Walmart and decided to wrap the jar in it and attach a number1.

I made his birthday hat using the Elmo Party cartridge and tieing white ribbon to either side, decorating it with dots and a number 1 cut using the Plantin Schoolbook and Accent Essentials. I made the "I am 1" banner with Cricut scrapbook paper.

We decided not to have the party at 3pm and just have desserts in order to keep costs down. I decided to
made chocolate cupcakes with homemade buttercream icing, rice krispy treats, chocolate covered marshmallows, and iced butter cookies. We usually buy quite a few 2 liters of different sodas but instead I decided to have sweet tea, punch, and bottled water.


I made Grant a 6 inch smash cake. I kept the decorating simple by piping a number one on top and making a border around the bottom.


I thought the marshmallow pops were so cute but not as tasty as I would have liked. The kids loved them though.

I had each of the characters cut out and hung on the cabinets.


My mom did the balloon wreath the night before, trying to help me get finished before dawn. I think the both of us finally made it to our beds at 2 am.
I bought the straw wreath form at Michaels for 4.99 and my mom used plain straight pins to attach all the balloons. The Toy Story emblem was made with my beloved Cricut and hung with thread.

I made a 12 month banner, cutting the "frames" out with my Accent Essentials cartridge

I love tissue poms!

I had to make him a special shirt, I appliqued a number 1 on the back of a white onesie...

and copied a picture from the internet into a word document, printed it on printable fabric from Hobby Lobby and appliquued it on.

When I pictured my little one's first birthday like most mother's I wanted the perfect picture of his cake covered face and since there were so many things that did not go as I wanted I figured there was no way I would be lucky enough to get this perfect shot.....but I did!

Is that not the cutest mouth and hand you have ever seen! haha.
Now the party is over and all my work is done (for this project anyway), now its time for me to rest.
Monday, October 10, 2011
Busy Busy
I am so busy making decorations for Grant's 1st birthday party this Saturday. My Cricut and I have grown very close being that almost all my decorations have been made using it. I have even started hanging things up eary just to get them out of my way lol. My mom is coming into town on Thursday, so cleaning is on my to-do list as well. I have grand plans of making Grant's Halloween costume in the next couple weeks (one more thing to add to my list). Of course all of these things are on top of the regular day to day work, cleaning, husband and Grant time, which makes for a very busy me.
I wish I had something to post, of course I have been getting things done but have not taken any pictures. Grant has been waking me up at 3am most mornings, which you would think I would look at positively as it could give me extra time to get things done. However I moan and groan and squeeze every last minute of sleep I can out of my bed.
What I'm really hoping for is a burst of energy to get the last few things done, which include water bottle labels, altered board book, and multiple tissue poms. I have vowed to start on little man's 2nd birthday extra early to prevent this midnight madness. So for now cross your fingers for me and say a prayer as I attempt to get a little shut eye in the hopes that I will get that energy boost tomorrow morning.
Monday, October 3, 2011
Birthday Stuff
Yes it is time for another party. Grant's birthday is coming up and we are doing a Toy Story party. I bought the Toy Story Cricut Cartridge about a month ago and bought 2 stacks of multicolored cardstock last Sunday. After the success of the baby shower I was all about getting started on Grant's party decorations. Then Monday happened and days of diahrrea followed so last night I finally was able to get reacquainted with my Cricut.
Here's what I have done so far:
I love how woody turned out, isn't he so cute! I cut him at 6 inches and I plan on using this one to go with the banners that will be hanging around the room.

Here's the pieces of the high chair banner. I used scrapbook paper I already had on hand so I wouldn't have to use my solids (those are reserved for Toy Story characters) and I wouldn't have to purchase any new. I have yet to add the ribbon.

(Do you see my little helpers boots at the top of the pic. He likes to be at the center of everything)
I'm so excited with his Happy Birthday banner. It's nothing special but It turned out just as I wanted. I like simple, so I didn't add alot. Again I used scrapbook paper I had in my stash, none of them match yet somehow I think they all go together.
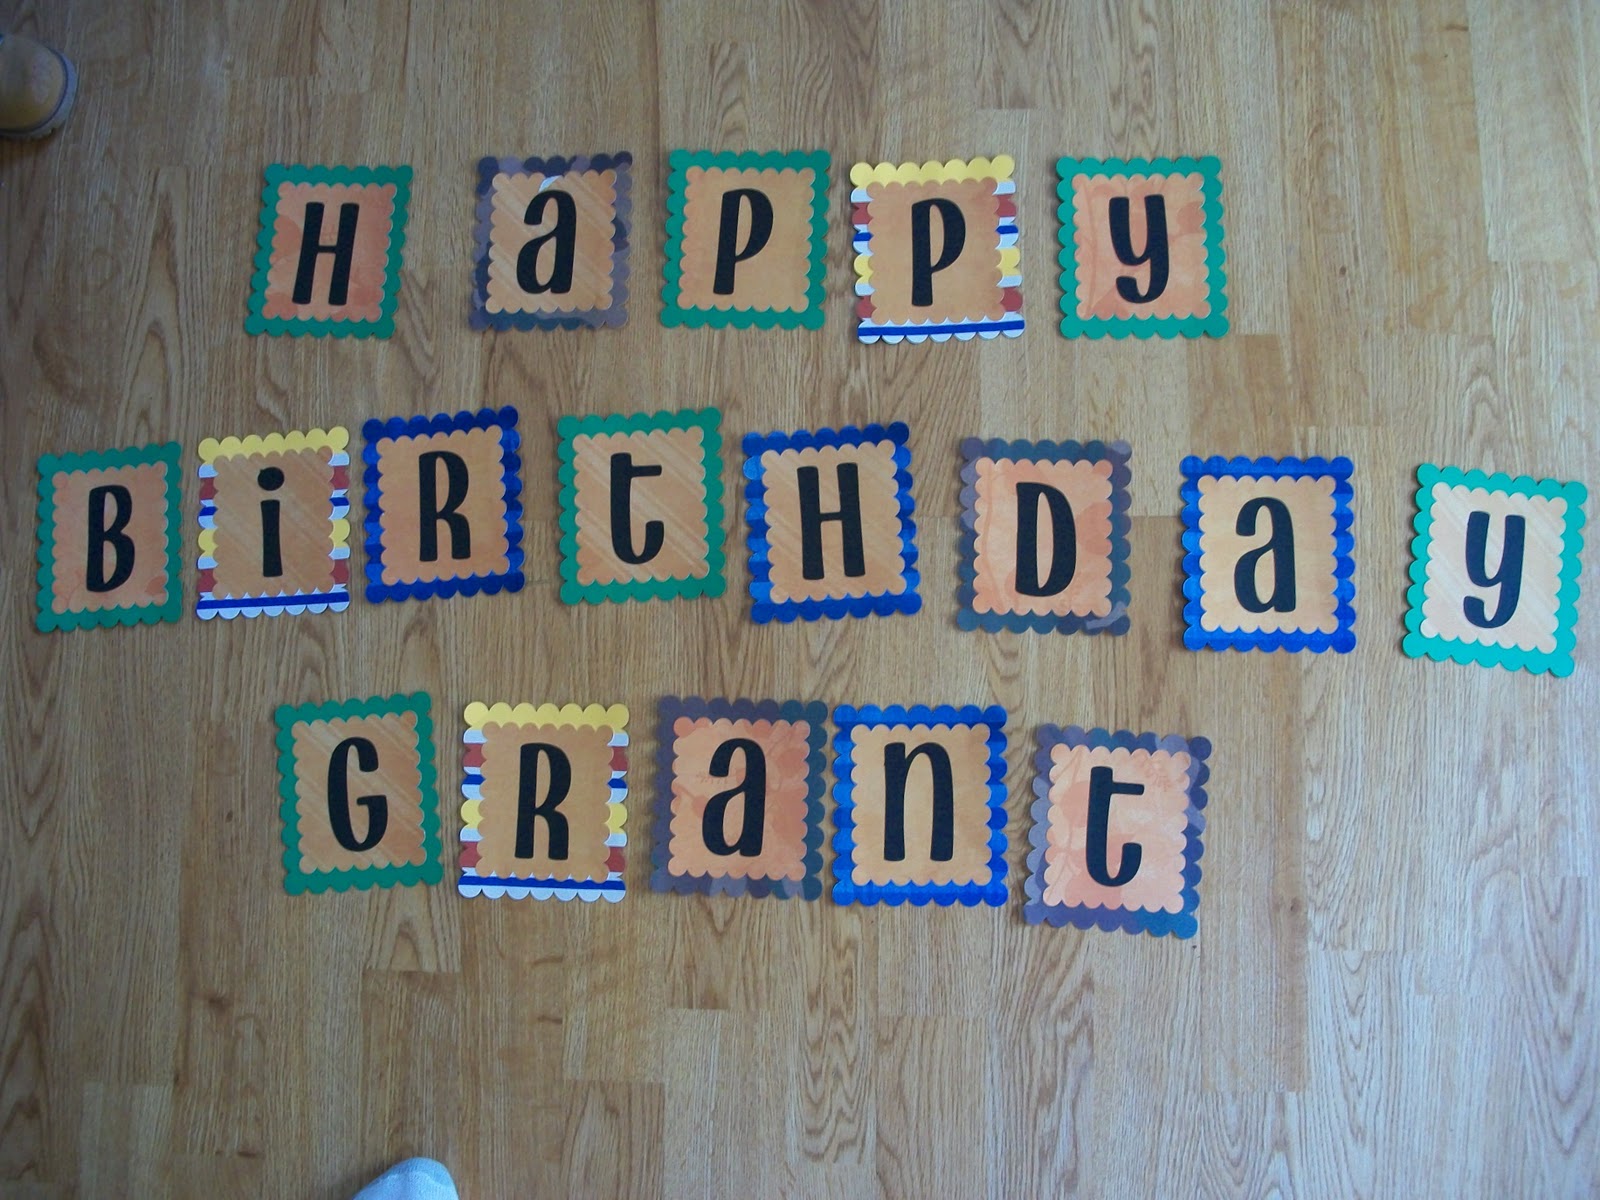
(Didn't realize my foot was in the bottom of this one. I was too busy watching Grant to make sure he didn't step on my hard work, lol)
Tonight will probably be another late night of crafting decorations. Wish me luck!
Subscribe to:
Posts (Atom)