Showing posts with label cricut. Show all posts

Wednesday, July 23, 2014

Relay For Life 2014


Our Relay was at the end of June this year and while I'm relieved the festivities are over (due to the amount of preparation and work involved) I'm also sad because I thoroughly enjoy it.

We had some new team members this year so I spent the whole of one evening painting more team shirts using the freezer paper stencil method.  I think I ended up finishing about 15 shirts including a onesie for our youngest relayer.

We stepped it up this year with games at our campsite.  One of them was the fishbowl game.  A classic carnival game we all love to play but our parents dread because it comes with the possibility of owning a goldfish.  We didn't want to buy a bunch of goldfish, nor do we as parents want to put that on other parents so the solution was Swedish Fish and Goldfish crackers for our younger relayers as prizes.

 
I created a cute little tag for each of the prize baggies that said "Thank you for supporting Betty's Hope" so people would know where they won their prize and who we were.  I created them in Picmonkey and they were super easy and I think, a great little added touch.
Here are the games we had at our campsite, the fishbowl game and the Cancer Sucks game which was like a lollipop tree but in a flower pot instead.  We had a small bucket of trinkets if you picked a lollipop with a black tip you won a prize.  If you picked one without you still got to keep your lollipop.

We also had homemade cookies and a fleece blanket raffle.  For a few of the team members I busted out the good ol' Cricut and made team cups.  I purchased the clear tumblers from the Dollar Tree and used my breast cancer awareness cartridge to create the image and the calligraphy cartridge for the words.
We bought the trifold boards at the Dollar Tree and I used my cricut to cut out the letters.  We were really psyched with how good they looked.  Not to mention super easy to read as you walked by our campsite.

We like to take care of our overnight and early morning walkers so I whipped up some breakfast burritos filled with egg, sausage, green pepper and cheese.  I wrapped them in plastic wrap then in foil and around 3 am they go into the crockpot on warm and are hot and ready for everyone within an hour or so.

This is the second year I've made these and everyone really loves them.  They are easy to walk and eat at the same time which is perfect for any relayer.

We are already coming up with ideas for next year's relay and I'm excited at the possibility of new team members, and more money raised.  This year we have almost hit our goal of $1500.  Last year we raised just over $1000 and the year before (our first year) we raised $500.  We are steadily increasing and that's exciting for us.

If you want information on a Relay for Life event near you go to relayforlife.org for more information.


Thursday, May 29, 2014

Yellow/Pink Chevron Bridal Shower

My sister's bridal Shower was this past weekend and I of course had to make some water bottle labels for my lil sister's shower.  I'm so excited with how they turned out.  I used Picmonkey to create the image and wording.  It's simple yet classic and that's what I wanted.

I used my Cricut to cut the circle shapes

Originally, when I offered to do the shower I had a vision in my mind of all these beautiful floral centerpieces.  Of course after we had our daughter and put a new engine in our truck I could no longer justify spending a bunch of money on flowers that would inevitably be thrown away or packed in a box.  My solution was to figure a way to make my own flowers.
Enter: Coffee filter flowers.  Here's how my first one turned out before I painted it.


Isn't it pretty.  I was so excited.  I used the templates from Martha Stewart but didn't actually read her instructions.  Being impatient as I am I just started cutting and taping and they turned out great.  So with my coffee filters that cost all of $1.79 for over 100 of them at Walmart.  Here's a word to the wise, make sure you paint the petals before you go to the work of curling, taping, and positioning every petal.  If you do like I did and paint them after you have them all put together and looking similar to perfection, the paint will ruin all your hard work and you will spend another 10 extra minutes reshaping every single petal.

I used paint I had in my stash.  Cheap acrylic that I squirted some into a small bowl of water, mixed it together and started painting.  I wish I would have gotten a great picture of the centerpieces before the event but I can't remember anything these days.  I didn't think about a pic until I was standing taking pictures of my sister opening her gifts, so this picture is not fantastic and of course the centerpieces fell over in the car on the way to the site which bent some of the petals (frown).  I used Frappuccino bottles wrapped in twine and a yellow polka dot ribbon tied around it.  Each one had 3 pink coffee filter roses.

Here are the thank you tags I created in Picmonkey.  I used the background of a pink heart in all the tags I used.  All the food labels, signs for the Recipe card tree, card basket, and cookie buffet.  I created it without really thinking and really really like it.  It's so simple yet it worked!

These tags were stuck on clear treat bags I bought from Hobby Lobby.  I used glue dots to attach them.  Everyone took a bag and filled it with cookies of their choice as their favor and dessert.

The cookie buffet:


Can't for the life of me remember what the sign said but It's something I found by googling "cookie buffet signs".

Once again I forgot to take pictures until the whole shebang was pretty much done.  I had 5 kinds of cookies for people to pick from, butter cookies, white chip chocolate, red velvet hearts, chocolate chip, and peanut butter.

One of my favorite decorations was the recipe card tree.  I sent the recipe cards with the invitations with directions to fill it out and bring it to the shower.  I took clothespins I had in my craft stash and used decorative pink striped tape I found at the dollar tree to cover one side of them.  The sticks were found in my mom's yard and placed in a half gallon mason jar.  I thought this was so cute and she got some really great recipes I plan on stealing haha.

This banner was not made by me but my sister's future mother-in-law had it from another shower she had done and asked if I wanted to use it.  It was burlap and so cute I had to get a picture.

I also had tissue paper poms in dark/light pink and yellow.  I made circle garland that didn't end up getting hung up because of time restraints and guests arriving early.

For food I chose chicken salad and ham salad sandwiches, pasta salad, deviled eggs, watermelon, strawberries, and cantaloupe.  For drinks we had bottled water, homemade strawberry lemonade, and sweet tea. 

My family is not big on games, in fact with every shower I've done (and there have been a few now) they complain at the mere mention of a game.  That being said, I had to have something else for everyone to do other than eat and watch Kayli open gifts.  So I chose the candy game where you match bridal phrases with a candy.  The prize was boxed Sugar Daddy's, Sweetarts, Nerds, Twix mini candy bars, and a PayDay candy bar stacked and tied with pink ribbon.

Everything turned out so great and even though I didn't get to decorate fully like I usually do everyone enjoyed themselves and Kayli got lots of goodies to start her married life.


Thursday, May 15, 2014

Yellow/Pink and Chevron Bridal Shower Invitations

There has been very little crafting going on in our house since Miss Eva came into this world.  She is a much better sleeper than my son ever was but my days with a newborn and a 3 1/2 year old are pretty busy.  Between feedings, diaper changes, meal prep/cooking/eating, naptimes, dishes, and laundry it's difficult to squeeze crafting time into the day.


That being said, last year I told my sister I would do her bridal shower for her upcoming wedding this summer.  This was before I was pregnant, before we were living on our own, before I was babysitting another toddler.  Pretty much before I was super busy.


Now the shower is a mere 2 weeks away and I'm scrambling to get things bought, made, and together.


I finished the invites over the weekend.  There is no theme other than the colors Yellow and Pink and chevron and heart prints.  This shower is going to be a huge undertaking, the biggest party I've done so far with a guest list of about 60 people.  So for the sake of my sanity and my bank account, I'm really trying to keep things simple.


I used my Cricut for the invites to cut the scrapbook paper and cardstock.  I used the Plantin Schoolbook cartridge for the yellow rectangle  and oval wording, and the Accent Essentials cartridge for the chevron cutout. I got the wording for the invite from this site.  I thought it was really cute and since there's no real "theme", I needed wording that was universal.


I saw an idea for recipe cards and thought I saved the blog I saw it on but of course my brain is not working most of the time and I didn't.  I loved the idea of a recipe card tree instead of an advice tree.  I didn't want to go the route of advice cards because it seems to me that everyone pretty much writes the same old same old, "don't go to bed angry", etc etc.  And while that's great advice, I'll say from personal experience there will be times when unless you want to be up all night, you're probably going to go to bed angry a time or 2 in your marriage.  I've also had many times at showers I've attended/hosted when people make the comments they don't know what to write and almost seem put out by having to come up with something.  So I decided to design a recipe card and include it with the invite letting people know to bring it to the shower with their favorite recipe written on it.  Once at the shower there will be clothespins and a "tree" for them to attach it to.  I just love this idea. 


I designed the recipe card at Picmonkey.com. I seriously love this site and have used it for so many things since I found it a couple years ago.  Once created I saved the image as a photo, uploaded it to my Kodak software on my computer and printed it on white cardstock as 3x5 images (4 to a sheet).


It's a huge relief to have these finished and mailed out.  Now on to the other dozen projects I have in store for this little soirée.


Monday, January 20, 2014

Western Baby Shower

I so wish I would have gotten more pictures of this shower, but after dropping the little one off at Grammy's and stopping at the store for fresh fruit, I had only a few minutes to snap these pics and get the food set out.
I have to give a huge thanks to my husband who cleaned the apartment while I was gone, it looked great and there's no way I would have had time to do it before guests arrived.


 I lucked out with some of the decorations because my sister is getting married in August and is doing a country theme.  She provided me with the burlap table runners I used as the backdrop behind the table.  I just used tacks to hang them side by side.  The onesie bunting I adored.  I used scrapbook paper I found at Hobby Lobby in 4 various prints, denim, red paisley, blue paisley, and blue plaid.  I attached them to twine with tape and draped them.  
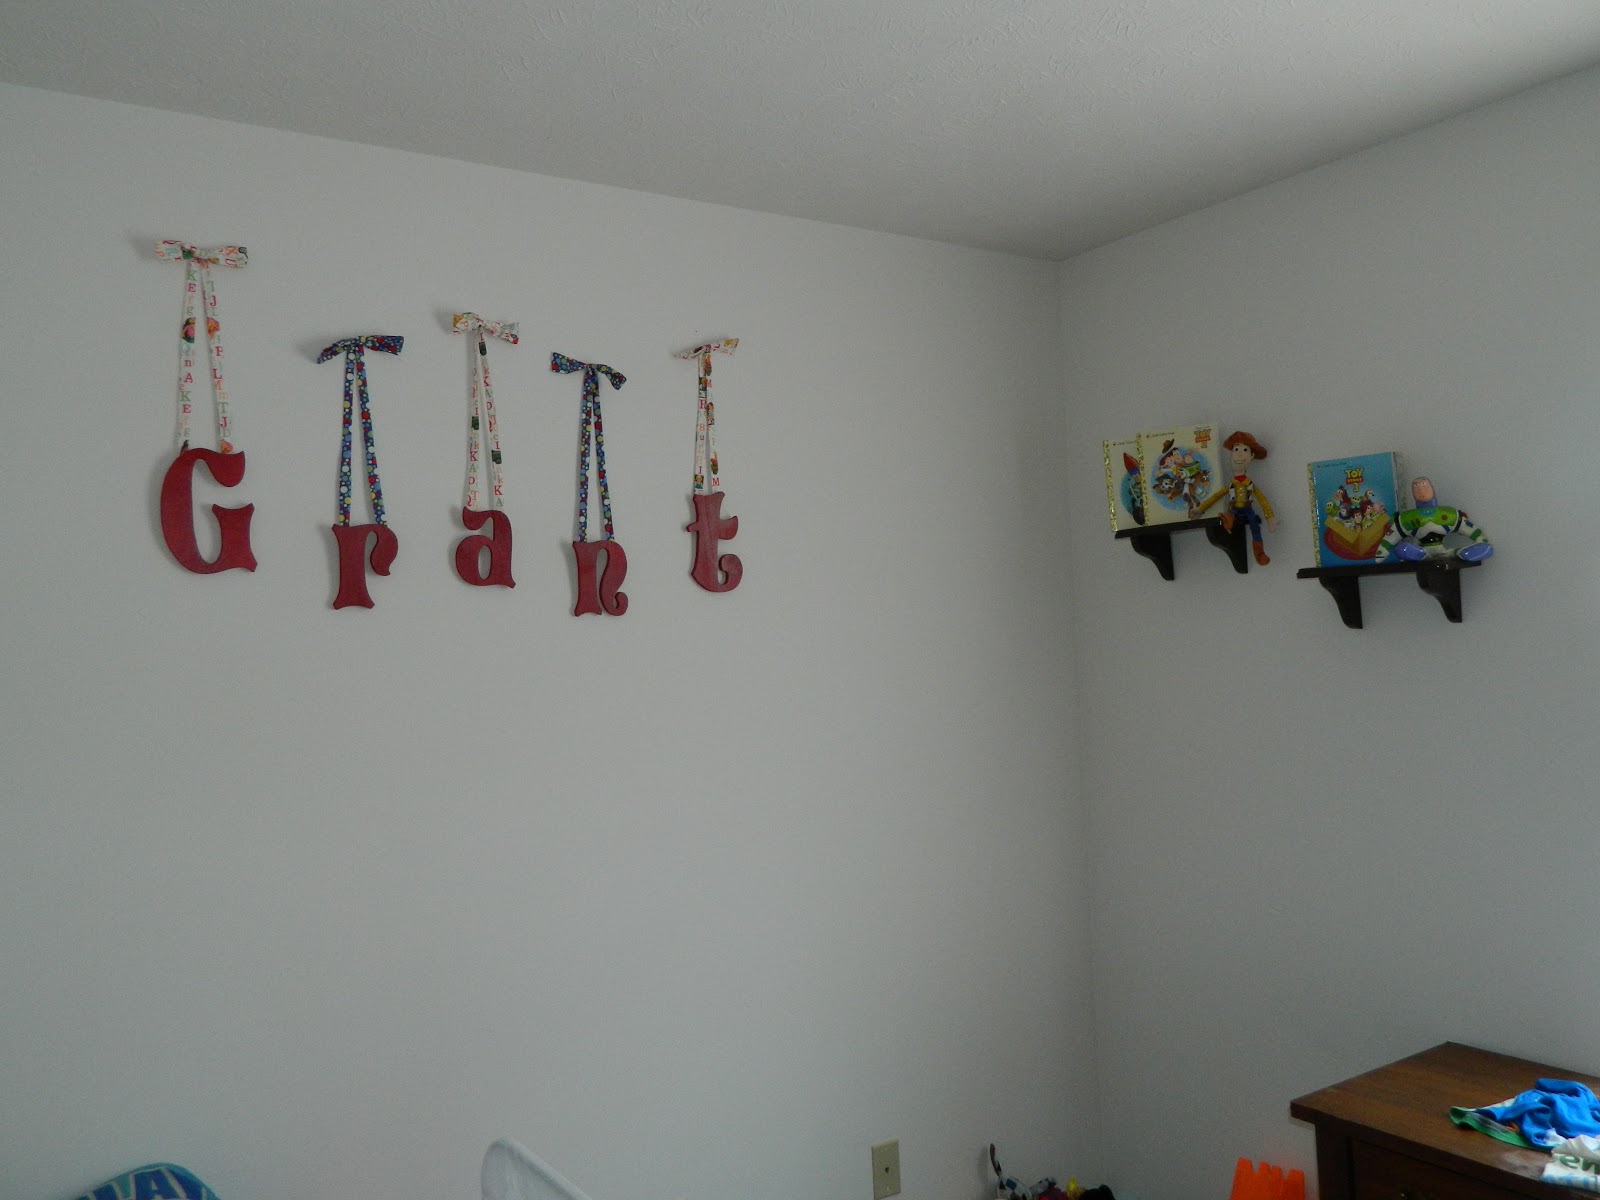
The Name canvas was very popular and Audra (the guest of honor) loved it and took it home to hang in her nursery.  I explain in this post how I made the canvas.
I also had 6 mini tissue poms hanging from the ceiling in red, blue, and brown.
 I made butter cookies.  My mom and I are famous in our family for them.  I tried like everything to get the icing color to be a Christmas red and after using half the little jar of Wilton red food coloring I gave up and settled on the above orangey color, tied the favor bags with twine, and called it a night.  I love the onesie cookie cutter I found in Amish country last year and used it at the "About to Pop" shower I hosted last Spring.  After I snapped the above photo I found a cute wicker basket to put these in so they weren't just thrown all over the table.
My cousin loved the ultrasound picture and was so happy to have a 4x6 snapshot of it.  Everyone else was excited to look at it too as most of them had never seen it.


I made lemon blueberry cupcakes which turned out delish.  It's a combo I've never made in cupcakes before and everyone said they were so good except my aunt who hates blueberries, haha.  I used the recipe from here as a base.  It originally came from the book by the girls of DC Cupcakes.  I changed it up some though. Check out the bottom of this post for the recipe I used.  The cupcake pics were made using burlap printed scrapbook paper and a monogram "R" printed on white card stock.  I used my cricut to cut the circles of both and attached them with glue dots.  Then taped them to mini skewers.
I told how I made the wreath in this post.  I ended up adding a mini pennant banner I made with my cricut and leftover scrapbook paper.  The crate I used as a prop I already had in my house and I think it added just the right touch to elevate the cupcakes and house the quote I framed.

I kept the food simple, wish I had a picture of it all set up but no such luck, so I'll share the recipes and the sites I got them from or got inspiration from instead.

Menu: 

*Ham and Swiss cheese sliders
Homemade Salsa and tortilla chips
Bacon Ranch Pasta Salad (boxed mix I already had in pantry)
Apples and Strawberry slices
*Deviled Eggs
*Strawberry Lemonade
Sweet Tea
Ice Water
*Lemon Blueberry Cupcakes
Frosted Butter Cookies 

*recipes below


Baked Ham and Cheese Sliders

24 slider buns
16oz thinly sliced deli ham
16 slices swiss cheese (you will have leftover)
4 1/2T dijon Mustard
1 1/2 medium chopped onion
1 1/2T Worcestershire sauce
1 1/2 sticks butter/margarine 
The ham and cheese sliders got rave reviews, and I had to agree with my guests, they were quite tasty.  I will definitely be making them again.  They were so easy and since all my other food could be made the day before these were simple to put together and they were the only thing I had to pop in the oven before guests arrived. I found the original recipe online and for the life of me I can't find the website I got it from, oops.  This is why I should write things down.


I've noticed recently that everyone has a different way of making deviled eggs.  I've seen people add vinegar and pickles and that just grosses me out, why do you need such things in deviled eggs? For years it never occurred to make them any way other than how my mom taught me and I've found her way is the easiest of them all so I thought I'd share.  Her recipe calls for all of 3 ingredients, boiled eggs, mustard, and mayo.  I've made them so many times I don't measure anything.  I go more on consistency and taste than measurements.

Deviled Eggs

1 dozen eggs (boiled)
about 3/4c mayo
about 1/3c mustard

I boil my eggs for 5 minutes at a rolling boil, turn the heat off and let them sit in the covered pot on the stove for about an hour.  Then I put them in the fridge to cool before I peel them.  Once they are cooled, peel the shell off each egg and cut them in half lengthwise.  Separate the yolks from the whites of the eggs and put in a small mixing bowl.  Once all the yolks are in the bowl mash them up with a fork until they are good and crumbly.  Add your mayo and mustard and stir until combined.  Take a small spoon and fill each egg white with some of your yolk mixture.  Remember you can add more or less mayo and mustard depending on your taste buds, again I don't measure I go off consistency and taste.  Don't be scared you can do it!

Lemon Blueberry Cupcakes 

2 1/2c flour sifted
2 1/2t baking powder
1/4t salt
8T unsalted butter-room temp
1 1/2c sugar (original recipe calls for 1 3/4c)
2 eggs-room temp
2 1/4t vanilla
1 1/4c milk-room temp
zest of 2 lemons
1/2-1tsp lemon extract depending on your taste buds
1 1/2c blueberries
1/2T flour (to coat blueberries and keep them from sinking during baking)

sift flour, baking powder, and salt.  Measure sugar in a bowl, add zest and rub together with fingers.  Cream butter and lemony sugar.  Add eggs 1 at a time, mixing between each addition.  Add vanilla to milk.  Add 1/3 of dry ingredients, then 1/3 of milk/vanilla mixture.  Continue until all dry ingredients and milk mixture is used.  Add lemon extract, mix.  Fold in blueberries.  Bake at 350 for 15-18 minutes

Strawberry Lemonade 

1 gallon water
3 lemons-wedged and seeded
1 1/2c sugar
1/2lb strawberries fresh or frozen

combine all in a pitcher and mix until sugar is dissolved.  I try to stock up on strawberries during the summer and freeze quite a few quart size bags just for this lemonade.   When I use frozen berries I don't even thaw them I just throw them in and they double as ice.  This is seriously good and addicting lemonade.  I started making it for every shower and birthday party I do instead of buying sodas and I've never had anyone complain.  My one piece of advice, If you're shower is going to have more than 10 people I'd advise making more than 1 gallon because you will run out.  Yes it's that good!


I am so glad this shower is done.  I had a blast making everything and brainstorming ideas and of course the best part is always seeing the guest of honors face when she walks in but the last minute frantic rush always exhausts me.  Now, as always, I'm looking ahead to my next line up of projects.  What are they you may be asking yourself
1. Baby goodies- hooded towels, 1 yard receiving blankets, hospital gown, binky clips, nursing cover
2. Valentine's Day
3. Easter
4. My neice's Dora the Explorer 3rd birthday party
5. My sister's Bridal  shower- this one's gonna be a big one, the biggest party/shower I've done since my own wedding.  I'm excited but nervous all the same.  It's going to be a lot of crafting, a lot of prep, and everything will have to be transported to another location since it will be for all 4 sides of the family.  All that with a 3 year old and an infant to take care of, I'm already tired thinking about it.


Monday, January 13, 2014

Western Baby Shower Invitations

My cousin is pregnant and due almost exactly 2 weeks before me.  This is her 3rd and her other 2 are already in school so quite an age gap between them.  I told her years ago if she ever decided to have a 3rd I wanted to be the one to do her baby shower.  Little did I know we both would wind up pregnant at exactly the same time.  I still offered to do her shower because I'm one of those crazy weird people that enjoys doing them.

She is having a boy and requested a western/country themed shower. As I usually do I scoured the internet for ideas and bounced back and forth on colors and images up until the holidays hit and then it all hit the back burner and now the shower is a week  away and I'm seriously needing to craft for this party.

The difference between this baby shower and the others I've done is 1. its right smack after Christmas which puts a kink in finances and 2. I'm having a baby too which puts a kink my energy to craft and throw such a party.  That being said I'm still excited to be doing it and have come up with some ways to make things easier and more cost effective for myself.


I chose blue and red for the colors.  I went back and forth on the this forever and it really was the most difficult part of the shower for me to nail down and make a decision.  There are so many color combinations I love but in the end I thought blue and red would be the easiest for me to find and match up in fabric, ribbon, and scrapbook paper.  I'm really trying to go for western simplicity with this shower, not only to make things a little easier for myself but also because I think a lot of times people (me included) can go overboard with decorations and such.  I tend to over think things and having the mentality of simplicity helps me keep things in check.


As always. I'm made the invites.  I figured out months ago what I wanted them to look like and used blank cards already in my stash.  I found the rocking horse image online, saved it into my images, opened it in Microsoft paint, then erased the wording and printed them in a Microsoft works word document. 


I used my cricut and the Accent Essentials cartridge to cut the images out into a circle shape, then cut another circle 1/4 inch larger circle in blue and red (because I ran out of blue paper) to go behind the rocking horse image and to add a little bit more color.  I had originally wanted 1/2 inch red gingham ribbon but I procrastinated, then a snow storm hit, then the flu hit, then Hobby Lobby was closed.  I ended up having to go to Joann's which of course they were out of the 1/2inch and I was forced to get the 1/4inch ribbon.  It still worked fine but I really wanted something a little wider.  Oh well, I guess no one else will know the difference.  I attached the ribbon, scrapbook paper circle, and rocking horse image with glue dots.


I have had this post ready for about a week now except for a photos but for whatever reason blogger isn't letting me upload my second one and I'm a little tired of trying.  So there is no photo of the inside of the invite. I printed the invitation info on white cardstock using font's from dafont.com.  I downloaded 2 different ones I thought looked western.  I used my cricut and the Don Juan cartridge to cut them out then used glue dots to stick them to the inside of the cards.


The inside read: A little cowboy is on the way
                           Let's celebrate before the big day
                           Join us for a baby shower honoring
                             (enter guest of honor name)
                             (enter party details of time, place, etc)


Other than the size of ribbon these turned out exactly as I wanted.  I was going for simplicity which I think I found and I'm so relieved they are finished and mailed. 


Now on to the other projects on my list.

Friday, December 27, 2013

Santa Milk & Cookies Mug

There are a few Christmas posts I had planned to post before the big day but of course that didn't happen so I'm posting them all at once before the New Year.  I have wanted a special Santa cookie plate and mug for Grant to set out Christmas Eve since he was born, but of course he really wasn't old enough until this year.  I bought the white mug at Walmart because for whatever reason the Dollar Tree was out of plain white ones, it cost $1.25  I did find the white plate at the Dollar Tree.  I knew I wanted to decorate them really simple with my Cricut and vinyl I already had in my stash.

 
I loved how the mug turned out and was super excited to finish the plate but after babysitting, cleaning, finishing up last minute gifts, wrapping gifts, packing, etc I had no energy left to get my beloved cricut out and finish the plate.  So instead the cookies were set out on a Christmas napkin and of course Grant couldn't have cared less as long as they were out and ready for Santa.
 
I figure I can finish the cookie plate and pack it with all the Christmas decorations, and have it ready for next year.

Wednesday, October 30, 2013

Gender Neutral Baby Shower Gift

I was invited to a baby shower over the weekend and the parents had decided not to find out the gender of their baby.  I'm not one to buy outfits as baby shower gifts, instead I like to buy/make the useful items I've heard others say are boring to shop for.  So I raided my fabric stash for anything I had that didn't scream boy or girl to whip up a quick couple of burp cloths and bibs.  I feel like every mom in the world should have burp cloths like these.  I have been making them since before Grant was born and I LOVE them.  They are all I used with Grant and all I plan on using with this next little one.  I didn't have spit up leak through them one time, and my little guy was quite the spit-upper (is that even a word?).
I used Grant's old bibs as a template for these.


I give these burp cloths to almost the mom of almost every baby shower I attend.  I get a little bored making the same things all the time but I just can't get away from them.  Every mom needs them and I hate to see them using the ugly old school flat fold diapers, or the super thin burp cloths you can buy in the stores.  So I break out the flannel and quilt batting and cut a few out knowing how useful they will be.

I added a couple bottles (using a buy one get one free coupon), baby spoons, and 2 boxes of baby cereal (I paid all of $0.08 for a few months back using coupons).  So I kind of went with a feeding item theme.  The total cost of the entire gift was under $6 and I'm pretty satisfied.  I know the new mom and dad will get plenty of use out of everything, and that's always my goal when baby shower gift shopping.

At the last minute I realized I didn't have a card, which happens to me a lot.  I tend to forget to include one and have the guest of honor who the gift is from, to which I have to shout over every one "that ones from me".  So I got out my Cricut and my Boys Will Be Boys Cricut Lite cartridge and made this:
 
I love the simplicity of it which is just what I look for in cards these days.  It took me all of 5 minutes to make this which made me really want to whip up a few extras for future showers, as it seems someone is always pregnant around here.  Maybe another day when I have nothing to do, cuz you know I have soooo much extra time on my hands these days...lol

Monday, May 20, 2013

Toy Story Wall Hangings

I've been really anxious to decorate our new place, you know to make it a little more homey.  The last few places we have lived were very temporary and we never even unpacked everything. How sad is that. 

I wanted to make sure not to do that this time around.  I want to be fully unpacked and the place completely put together.  I knew Grant's room would be fun and of course it's got to be done in Toy Story.  Since his first birthday, which was Toy Story themed, I knew I wanted to make his room with the same theme.  I made multiple Toy Story Cricut character cut outs for his birthday and have saved them all this time with the intention of making them into some kind of wall art.

I had planned on buying some wood plaques from Hobby Lobby and painting them, but with the cost of moving and everything, I just couldn't bring myself to spend what I didn't have to.  I found 4 8x10 canvases I bought ages ago and decided they would work just fine.  So I dug through my acrylic paint and found 4 colors that were perfect blue, red, yellow, and green.  I had Grant help me pick the characters and then just mod podged them onto the painted canvas.


Are they not the cutest!

I love them and so does Grant.  He's constantly pointing at them and showing them to everyone.


I also used some of the other Toy Story items he has to decorate.  My friend gave him 3 Golden Books and 2 character dolls for his 1st birthday, so I took a couple shelves I've had forever and put them on it.

And of course I had to hang his name up. 

In case you are wondering I am fully aware the letters are not even. 

What can I say, I hung them by myself and didn't measure a thing.  Live and learn.

I have 1 more wall to decorate and I have no clue what to put on it, I need a little inspiration, but I love the what I've started.  Not bad for some free decorating.

Monday, May 13, 2013

Minnie Mouse Birthday

As I mentioned before my Neice turned 2 on the 4th and we through her a small birthday dinner, but even with a small dinner a little girl needs some decorations.  Which is where I come in.  I used pink and purple poms for the baby shower I did and just reused them for Sophie's birthday. 

I made a banner with my Cricut and used the Minnie and Daisy Cricut images I made for Grant's Mickey Mouse Clubhouse birthday.  I absolutely love how this banner turned out.  I had debated about making one, not knowing if I wanted to add one more project to my to-do list, but I'm so glad I did.
 
I got to use the cupcake stand I made for the baby shower as well.  I love getting multiple uses out of things.
 
 
Are these not the cutest girly cupcakes (recipe coming later):
 
We didn't do many other decorations but even still it looked too cute all put together, and Sophie loved it all which is the most important thing.


Friday, May 10, 2013

Minnie Mouse Birthday Invitation

My niece turned 2 over the weekend and my mom and I decided to have a birthday dinner for her.  The invites were the easiest ones I've ever made.  I used my Cricut and the Mickey and Friends cartridge.  I cut out a plain Mickey head then a bow, used glue dots to adhere them and printed the party info on white cardstock cutting it out in a circle. 

 
It's simple yet so adorable.

Wednesday, May 8, 2013

About to POP Shower Invitations

In all the pictures I showed in this post about the baby shower, I completely forgot to mention or show the invites.  I made them pretty simple, but I think they were super cute.
 
I cut the circles out with my Cricut of course and stitched them on with my sewing machine.  I did this for 2 reasons.  1- I didn't want to use any more of my glue dots since I was running low. 2-I thought it would add a cute detail.
 
 
Usually when I pick a theme for a party or shower I am overflowed with ideas for invites and just can't decide on one.  However this time every one I saw online was computer generated.  Don't get me wrong they were all cute but just not anything I could duplicate easily.  Hence the simplicity of these invites.

Monday, April 29, 2013

Wild Child Zoo Shirt and Water Bottle

I've been on the hunt for things to do with Grant this summer.  I desperately want to keep him busy and entertained, with the idea this will minimize the tantrums and fit throwings.

I know this is probably wishful thinking but a mama's gotta have hope.

We took him to the zoo last year for the first time and he loved it, we had a great time so I started looking into a membership.  Turns out they aren't too bad in price when you add in the parking fees and the fact that Grant is over the age of 2 which means we have to pay a whopping $10 admissions for him.

Which I personally think is a little crazy but whatever.

Naturally I figured if we would be going to the zoo Grant would need a zoo shirt (and since it's Kids Clothing Week I figured it's the perfect time to finish one).  I always go through the gift shops and see all these cute things I want to buy, you know as if Grant cares if he has a shirt that says zoo on it, but never want to pay the money for them.  Let's face it, most of the stuff they will never play with or only wear a short while.  And what kind of crafty Mama would I be if I didn't at least attempt to make him a shirt myself.

Since I have a new obsession with freezer paper stenciling I thought the zoo shirt was a great excuse to feed into that obsession.  I googled zoo animal silhouette and decided on a rhino.  Mainly because it seemed boyish, don't ask me why, it just did.

I printed the image in the size I wanted, traced it onto freezer paper, cut it out with an exacto knife, ironed and painted it onto the shirt.  Here was the end result:

 
I look at some blogs and they have the cutest pictures with their kids posing so nicely in the clothes they lovingly made.  It took me 10 minutes to get the picture you see above.  He kept turning to the side and turning his back to me.  Then wanted to look through all the pictures on my camera.
 
 
And it wouldn't be complete without throwing himself on the floor at least once, shouting "NO", when asked to show me his new shirt.
 
I thought "Wild Child" was the perfect  wording for the shirt.
 
 
I debated for awhile on whether or not to put the Columbus Zoo and the year on the back.  Why do I debate over such things?  In the end I decided if I were to buy one at the zoo gift shop it would have the year on it so mine should too.
 
No trip to the zoo would be complete without a water bottle.  Last year we had a regular old sippy cup but I have found I can actually get Grant to drink water if it's in a water bottle, he loves them.  I bought these at Hobby Lobby 40% off for $1.74. 
 
(please excuse the wrong turned picture, I can't for the life of me get it to upload in the right direction)
 
I used my Cricut and vinyl from Expressions Vinyl to decorate the outside with polka dots and their names.  I had to make one for my neice as well, since she will be with us on at least one trip to the zoo.
 
I'm in love with these bottles, they are too cute, and Grant carries his all over the house.


Monday, March 4, 2013

Popcorn boxes for a Baby shower

As I've mentioned in a few posts there are people having babies all around me.  Right now I know of 3 mommies-to-be and one of them I'm hosting a shower for at the end of April.  I'm constantly saving different baby shower themes to my favorites folder in the hopes that one day I'll get to use them on someone. 

Finally my day has come.  The last shower I hosted was back in 2011 for my cousin's twin boys.  I did a Thing 1 and Thing 2 theme and I had so much fun planning a crafting for it.  Since then I've tried to talk a few family members and friends into having another baby just so I can do their shower, haha. 

I know, that's a little crazy but I can't help it. 

Anyways my cousin is having a baby girl (it's the season for girls, every mommy-to-be I know is having a girl), and I've decided on the theme "About to POP".  Many people have used this theme, it's not original on my part but it's so  much fun!

Ok so I confess I was sold on the theme when I saw the popcorn bar most people have.  I mean seriously who doesn't love a popcorn bar of gourmet flavored popcorn.

My mouth is watering...

As usual I've scoured the internet for ideas and inspiration and my favorites folder and picture folder on my computer are bursting.  If I could figure out Pinterest my computer would thank me but that's for another day.

The biggest issue I have when planning and crafting for a shower (after I choose a theme) is the invitation.  I try to remind myself to keep things simple and classic but always end up with a million ideas floating around and can't decide on the perfect one.  With this theme I had the exact opposite happen.  I couldn't figure out how to make them at all.  It seems most people order their from Etsy or make a printable one with their computer.  Of course my mom said I could just go to Walmart or Target and pick up a package of invites and write the info on them.

"What?"   was my response.  The crafter in me just can't do that.  Just like I can't go to the party store and pick up all my decorations.  I HAVE to make them.  After all that's part of the fun....

and the stress...
 
and the frustration....
 
But mainly the fun of having a shower for someone.
 
Of course if you're going to have an "About to POP" theme with a popcorn bar, popcorn boxes are a must.  I could have found some online to purchase I'm sure, but what's the fun in that.  I did a google search and found a template, printed it out, traced the template on cardstock, cut it out, and glued the pieces together.


I used my cricut to cut out some circles out of scrapbook paper to decorate the boxes.  I decided I didn't want to use glue to attach them for fear of the paper wrinkling, or glue dots because I was afraid they might fall off or tear. 
 
So what's a girl to do?
 
Sew them on.  Before I glued the pieces of the popcorn boxes together I took one side and stitched the circles on each of them.
 
 
I made the boxes in a variety of colors.  Pretty much I went through my cardstock stack and grabbed any color I liked and that was bright.
 
I think they are super cute and can't wait to fill them up with some gourmet popcorn!!!


Friday, March 1, 2013

Baby Shower Banner

I'm so excited to be planning another baby shower.  About a year and a half ago I did a Thing 1 and Thing 2 for my cousin who was having twin boys.  I can't believe they are over a year old now.  When I found out my cousin Trevor and his fiance were expecting I immediately volunteered to do their baby shower.  I chose the theme "About to POP", mainly because I really really wanted to do a Popcorn bar but also because I knew I could use a rainbow of colors and I want this shower to be bright and cheery, full of lots of color.

I bought a scapbook paper stack from Hobby Lobby.  180 sheets of polka dot, stripes, plaid, etc in a variety of colors and I'm going to do all the decorations and invitations using them.  The first project I tackled was a banner.  After all every good party needs a banner right?  I saw this one and knew I needed to make one of my own.  I hand traced and cut each onesie out and used my cricut to cut the circles and letters to spell baby Channing's name.  I have to say after cutting all those onesies out by hand I have a new found appreciation for my beloved Cricut.
 
I used some ribbon I already had along with clothespins I already had.  Then I dug through my boxes of fabric to find some scraps I could cut up to tie in between each onsie.  I wasn't trying to make colors match or anything, I just wanted some bright colors in the mix.
 
This is not where the banner will hang during the shower but it was the only wall space that I could get a picture without toys, pictures, tables, windows, or Grant's hands in the photo.
 
 
I absolutely love this banner.  It just screams "baby", and I like that it couldn't be used for a birthday or any other kind of celebration.
 
I have many more "About to POP" projects coming up, as I'm slowly completing them marking them off my list one by one, so stay tuned!


Wednesday, January 9, 2013

Play Kitchen Details

I posted yesterday about the play kitchen I made for Grant and I finally was able to upload pictures!  I knew after I posted the one picture I'd figure out how to upload the rest, so here they are:

I attached (ok well technically my husband attached it but it was my idea and I painted it so I'll take the credit for now) a menu board to one side.  Grant is still a little to young to be trusted with chalk in order to actually use the menu chalkboard but I think it will be a nice touch when the times right.  I bought the chalkboard at Hobby Lobby for $4.99 (used my 40% off coupon of course), painted the outside, then used my Cricut to make a stencil out of vinyl for the MENU label.  The opposite side of the kitchen has 3 hooks, I bought at Walmart in a package of 4 for $0.97, to hold his hat, oven mitts, and dish towles.

Do you notice the fact that the oven door is missing?  Only took a few hours before Grant pushed down on it a little too long and off it ripped taking the screws out and everything.  Needless to say, learn from my mistakes and use heavy duty screws.
 
I used my Cricut, vinyl, and the Accent Essentials cartridge to make the stove burners.  I painted them on with acrylic paint.  Getting them in the right spot was the most frustrating part.
 
 
 I originally wanted a tile effect painted on the backsplash, but due to time constraints and my lack of patience I only got one row of them done.  I actually really like the way it turned out with just the one row but maybe I'm just trying to make myself feel better.
 
I bought these drawer pulls in the unfinished wood section at Hobby Lobby, painted them back with a silver dot in the center then glued them to the top of the stove.  Here's a little tid bit for anyone who doesn't already know this (of course I could be the only one out there) if you are glueing these to the top make sure it's on an unpainted surface.  My father in law informed me, after mine started falling off, if the wood is painted the wood glue has nothing to adhere to.  I ended up having my husband screw them all on.


The 2 other knobs were made from 2 1/2inch wood discs bought at Joann's and the same drawer pulls I used above.  I used a black sharpie to make the lines and words on the disc.  Again these ended up having to be screwed on after they started falling off.
 
Of course no kitchen is complete without a chef's hat, and of course I can't just go to the store and buy a chef's hat without adding my own little touch.  I embroidered the top and I am in love with how it turned out.  He looks so cute in it, I just wish he would wear it more, maybe as he get's older.
 
I am so pleased with how the kitchen turned out (with the exception of the broken oven door) and how much Grant loves play cooking for us.  It's so much fun to play with him.
 
Here's the link to my other post regarding this labor of love including links for the felt food, oven mitt, and dish towels.


LinkWithin

Related Posts Plugin for WordPress, Blogger...

Total Pageviews