Showing posts with label parties and showers. Show all posts

Thursday, May 29, 2014

Yellow/Pink Chevron Bridal Shower

My sister's bridal Shower was this past weekend and I of course had to make some water bottle labels for my lil sister's shower.  I'm so excited with how they turned out.  I used Picmonkey to create the image and wording.  It's simple yet classic and that's what I wanted.

I used my Cricut to cut the circle shapes

Originally, when I offered to do the shower I had a vision in my mind of all these beautiful floral centerpieces.  Of course after we had our daughter and put a new engine in our truck I could no longer justify spending a bunch of money on flowers that would inevitably be thrown away or packed in a box.  My solution was to figure a way to make my own flowers.
Enter: Coffee filter flowers.  Here's how my first one turned out before I painted it.


Isn't it pretty.  I was so excited.  I used the templates from Martha Stewart but didn't actually read her instructions.  Being impatient as I am I just started cutting and taping and they turned out great.  So with my coffee filters that cost all of $1.79 for over 100 of them at Walmart.  Here's a word to the wise, make sure you paint the petals before you go to the work of curling, taping, and positioning every petal.  If you do like I did and paint them after you have them all put together and looking similar to perfection, the paint will ruin all your hard work and you will spend another 10 extra minutes reshaping every single petal.

I used paint I had in my stash.  Cheap acrylic that I squirted some into a small bowl of water, mixed it together and started painting.  I wish I would have gotten a great picture of the centerpieces before the event but I can't remember anything these days.  I didn't think about a pic until I was standing taking pictures of my sister opening her gifts, so this picture is not fantastic and of course the centerpieces fell over in the car on the way to the site which bent some of the petals (frown).  I used Frappuccino bottles wrapped in twine and a yellow polka dot ribbon tied around it.  Each one had 3 pink coffee filter roses.

Here are the thank you tags I created in Picmonkey.  I used the background of a pink heart in all the tags I used.  All the food labels, signs for the Recipe card tree, card basket, and cookie buffet.  I created it without really thinking and really really like it.  It's so simple yet it worked!

These tags were stuck on clear treat bags I bought from Hobby Lobby.  I used glue dots to attach them.  Everyone took a bag and filled it with cookies of their choice as their favor and dessert.

The cookie buffet:


Can't for the life of me remember what the sign said but It's something I found by googling "cookie buffet signs".

Once again I forgot to take pictures until the whole shebang was pretty much done.  I had 5 kinds of cookies for people to pick from, butter cookies, white chip chocolate, red velvet hearts, chocolate chip, and peanut butter.

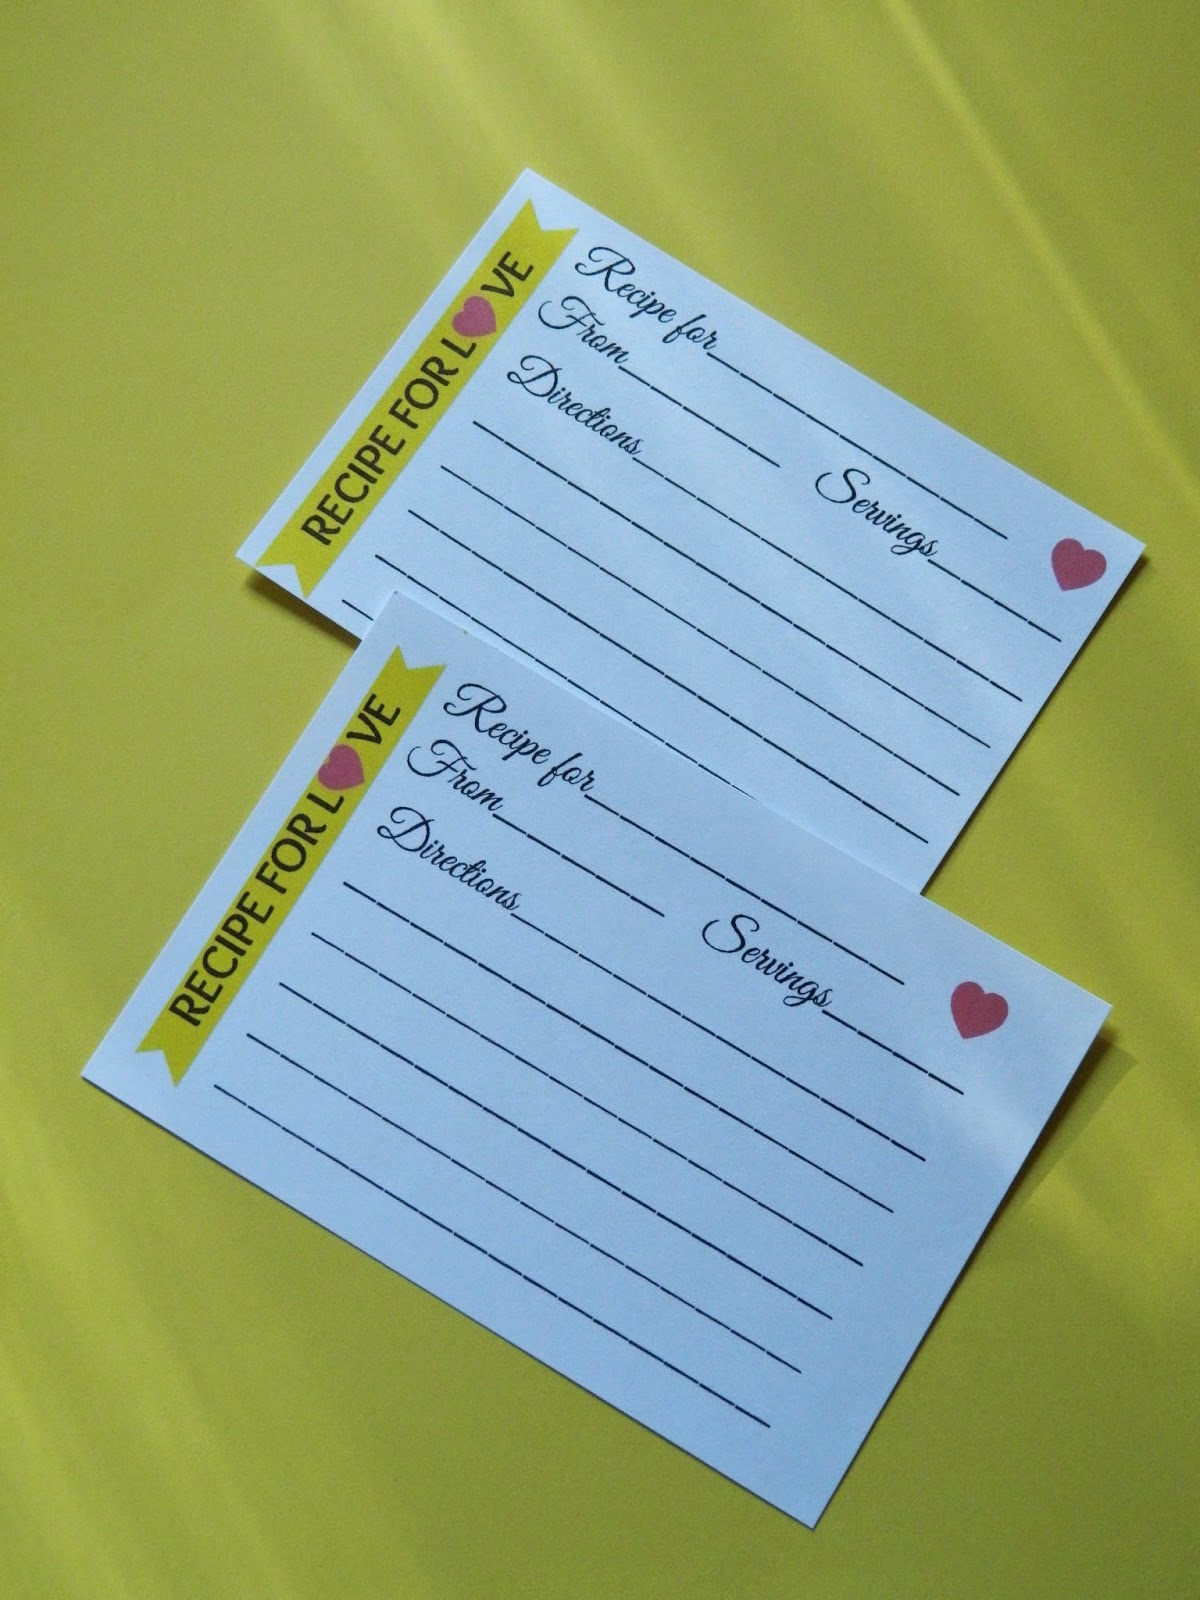
One of my favorite decorations was the recipe card tree.  I sent the recipe cards with the invitations with directions to fill it out and bring it to the shower.  I took clothespins I had in my craft stash and used decorative pink striped tape I found at the dollar tree to cover one side of them.  The sticks were found in my mom's yard and placed in a half gallon mason jar.  I thought this was so cute and she got some really great recipes I plan on stealing haha.

This banner was not made by me but my sister's future mother-in-law had it from another shower she had done and asked if I wanted to use it.  It was burlap and so cute I had to get a picture.

I also had tissue paper poms in dark/light pink and yellow.  I made circle garland that didn't end up getting hung up because of time restraints and guests arriving early.

For food I chose chicken salad and ham salad sandwiches, pasta salad, deviled eggs, watermelon, strawberries, and cantaloupe.  For drinks we had bottled water, homemade strawberry lemonade, and sweet tea. 

My family is not big on games, in fact with every shower I've done (and there have been a few now) they complain at the mere mention of a game.  That being said, I had to have something else for everyone to do other than eat and watch Kayli open gifts.  So I chose the candy game where you match bridal phrases with a candy.  The prize was boxed Sugar Daddy's, Sweetarts, Nerds, Twix mini candy bars, and a PayDay candy bar stacked and tied with pink ribbon.

Everything turned out so great and even though I didn't get to decorate fully like I usually do everyone enjoyed themselves and Kayli got lots of goodies to start her married life.


Thursday, May 15, 2014

Yellow/Pink and Chevron Bridal Shower Invitations

There has been very little crafting going on in our house since Miss Eva came into this world.  She is a much better sleeper than my son ever was but my days with a newborn and a 3 1/2 year old are pretty busy.  Between feedings, diaper changes, meal prep/cooking/eating, naptimes, dishes, and laundry it's difficult to squeeze crafting time into the day.


That being said, last year I told my sister I would do her bridal shower for her upcoming wedding this summer.  This was before I was pregnant, before we were living on our own, before I was babysitting another toddler.  Pretty much before I was super busy.


Now the shower is a mere 2 weeks away and I'm scrambling to get things bought, made, and together.


I finished the invites over the weekend.  There is no theme other than the colors Yellow and Pink and chevron and heart prints.  This shower is going to be a huge undertaking, the biggest party I've done so far with a guest list of about 60 people.  So for the sake of my sanity and my bank account, I'm really trying to keep things simple.


I used my Cricut for the invites to cut the scrapbook paper and cardstock.  I used the Plantin Schoolbook cartridge for the yellow rectangle  and oval wording, and the Accent Essentials cartridge for the chevron cutout. I got the wording for the invite from this site.  I thought it was really cute and since there's no real "theme", I needed wording that was universal.


I saw an idea for recipe cards and thought I saved the blog I saw it on but of course my brain is not working most of the time and I didn't.  I loved the idea of a recipe card tree instead of an advice tree.  I didn't want to go the route of advice cards because it seems to me that everyone pretty much writes the same old same old, "don't go to bed angry", etc etc.  And while that's great advice, I'll say from personal experience there will be times when unless you want to be up all night, you're probably going to go to bed angry a time or 2 in your marriage.  I've also had many times at showers I've attended/hosted when people make the comments they don't know what to write and almost seem put out by having to come up with something.  So I decided to design a recipe card and include it with the invite letting people know to bring it to the shower with their favorite recipe written on it.  Once at the shower there will be clothespins and a "tree" for them to attach it to.  I just love this idea. 


I designed the recipe card at Picmonkey.com. I seriously love this site and have used it for so many things since I found it a couple years ago.  Once created I saved the image as a photo, uploaded it to my Kodak software on my computer and printed it on white cardstock as 3x5 images (4 to a sheet).


It's a huge relief to have these finished and mailed out.  Now on to the other dozen projects I have in store for this little soirée.


Monday, January 20, 2014

Western Baby Shower

I so wish I would have gotten more pictures of this shower, but after dropping the little one off at Grammy's and stopping at the store for fresh fruit, I had only a few minutes to snap these pics and get the food set out.
I have to give a huge thanks to my husband who cleaned the apartment while I was gone, it looked great and there's no way I would have had time to do it before guests arrived.


 I lucked out with some of the decorations because my sister is getting married in August and is doing a country theme.  She provided me with the burlap table runners I used as the backdrop behind the table.  I just used tacks to hang them side by side.  The onesie bunting I adored.  I used scrapbook paper I found at Hobby Lobby in 4 various prints, denim, red paisley, blue paisley, and blue plaid.  I attached them to twine with tape and draped them.  
The Name canvas was very popular and Audra (the guest of honor) loved it and took it home to hang in her nursery.  I explain in this post how I made the canvas.
I also had 6 mini tissue poms hanging from the ceiling in red, blue, and brown.
 I made butter cookies.  My mom and I are famous in our family for them.  I tried like everything to get the icing color to be a Christmas red and after using half the little jar of Wilton red food coloring I gave up and settled on the above orangey color, tied the favor bags with twine, and called it a night.  I love the onesie cookie cutter I found in Amish country last year and used it at the "About to Pop" shower I hosted last Spring.  After I snapped the above photo I found a cute wicker basket to put these in so they weren't just thrown all over the table.
My cousin loved the ultrasound picture and was so happy to have a 4x6 snapshot of it.  Everyone else was excited to look at it too as most of them had never seen it.


I made lemon blueberry cupcakes which turned out delish.  It's a combo I've never made in cupcakes before and everyone said they were so good except my aunt who hates blueberries, haha.  I used the recipe from here as a base.  It originally came from the book by the girls of DC Cupcakes.  I changed it up some though. Check out the bottom of this post for the recipe I used.  The cupcake pics were made using burlap printed scrapbook paper and a monogram "R" printed on white card stock.  I used my cricut to cut the circles of both and attached them with glue dots.  Then taped them to mini skewers.
I told how I made the wreath in this post.  I ended up adding a mini pennant banner I made with my cricut and leftover scrapbook paper.  The crate I used as a prop I already had in my house and I think it added just the right touch to elevate the cupcakes and house the quote I framed.

I kept the food simple, wish I had a picture of it all set up but no such luck, so I'll share the recipes and the sites I got them from or got inspiration from instead.

Menu: 

*Ham and Swiss cheese sliders
Homemade Salsa and tortilla chips
Bacon Ranch Pasta Salad (boxed mix I already had in pantry)
Apples and Strawberry slices
*Deviled Eggs
*Strawberry Lemonade
Sweet Tea
Ice Water
*Lemon Blueberry Cupcakes
Frosted Butter Cookies 

*recipes below


Baked Ham and Cheese Sliders

24 slider buns
16oz thinly sliced deli ham
16 slices swiss cheese (you will have leftover)
4 1/2T dijon Mustard
1 1/2 medium chopped onion
1 1/2T Worcestershire sauce
1 1/2 sticks butter/margarine 
The ham and cheese sliders got rave reviews, and I had to agree with my guests, they were quite tasty.  I will definitely be making them again.  They were so easy and since all my other food could be made the day before these were simple to put together and they were the only thing I had to pop in the oven before guests arrived. I found the original recipe online and for the life of me I can't find the website I got it from, oops.  This is why I should write things down.


I've noticed recently that everyone has a different way of making deviled eggs.  I've seen people add vinegar and pickles and that just grosses me out, why do you need such things in deviled eggs? For years it never occurred to make them any way other than how my mom taught me and I've found her way is the easiest of them all so I thought I'd share.  Her recipe calls for all of 3 ingredients, boiled eggs, mustard, and mayo.  I've made them so many times I don't measure anything.  I go more on consistency and taste than measurements.

Deviled Eggs

1 dozen eggs (boiled)
about 3/4c mayo
about 1/3c mustard

I boil my eggs for 5 minutes at a rolling boil, turn the heat off and let them sit in the covered pot on the stove for about an hour.  Then I put them in the fridge to cool before I peel them.  Once they are cooled, peel the shell off each egg and cut them in half lengthwise.  Separate the yolks from the whites of the eggs and put in a small mixing bowl.  Once all the yolks are in the bowl mash them up with a fork until they are good and crumbly.  Add your mayo and mustard and stir until combined.  Take a small spoon and fill each egg white with some of your yolk mixture.  Remember you can add more or less mayo and mustard depending on your taste buds, again I don't measure I go off consistency and taste.  Don't be scared you can do it!

Lemon Blueberry Cupcakes 

2 1/2c flour sifted
2 1/2t baking powder
1/4t salt
8T unsalted butter-room temp
1 1/2c sugar (original recipe calls for 1 3/4c)
2 eggs-room temp
2 1/4t vanilla
1 1/4c milk-room temp
zest of 2 lemons
1/2-1tsp lemon extract depending on your taste buds
1 1/2c blueberries
1/2T flour (to coat blueberries and keep them from sinking during baking)

sift flour, baking powder, and salt.  Measure sugar in a bowl, add zest and rub together with fingers.  Cream butter and lemony sugar.  Add eggs 1 at a time, mixing between each addition.  Add vanilla to milk.  Add 1/3 of dry ingredients, then 1/3 of milk/vanilla mixture.  Continue until all dry ingredients and milk mixture is used.  Add lemon extract, mix.  Fold in blueberries.  Bake at 350 for 15-18 minutes

Strawberry Lemonade 

1 gallon water
3 lemons-wedged and seeded
1 1/2c sugar
1/2lb strawberries fresh or frozen

combine all in a pitcher and mix until sugar is dissolved.  I try to stock up on strawberries during the summer and freeze quite a few quart size bags just for this lemonade.   When I use frozen berries I don't even thaw them I just throw them in and they double as ice.  This is seriously good and addicting lemonade.  I started making it for every shower and birthday party I do instead of buying sodas and I've never had anyone complain.  My one piece of advice, If you're shower is going to have more than 10 people I'd advise making more than 1 gallon because you will run out.  Yes it's that good!


I am so glad this shower is done.  I had a blast making everything and brainstorming ideas and of course the best part is always seeing the guest of honors face when she walks in but the last minute frantic rush always exhausts me.  Now, as always, I'm looking ahead to my next line up of projects.  What are they you may be asking yourself
1. Baby goodies- hooded towels, 1 yard receiving blankets, hospital gown, binky clips, nursing cover
2. Valentine's Day
3. Easter
4. My neice's Dora the Explorer 3rd birthday party
5. My sister's Bridal  shower- this one's gonna be a big one, the biggest party/shower I've done since my own wedding.  I'm excited but nervous all the same.  It's going to be a lot of crafting, a lot of prep, and everything will have to be transported to another location since it will be for all 4 sides of the family.  All that with a 3 year old and an infant to take care of, I'm already tired thinking about it.


Thursday, January 16, 2014

Western Baby Shower Project Preview

I've wanted to do a baby shower for my cousin for years, so I was super excited when she told me she was pregnant.  For the first time I actually asked the guest of honor what theme she wanted.  She requested a western/country theme.  I showed the invites here.  I'm trying to keep things simple yet cute, not only because I think that's what she will appreciate but also because I'm getting more uncomfortably pregnant by the day and my little guy is having surgery 2 days before the shower.  So big projects or any project that takes  a lot of time was out of the question. 

I think I came up with some really cute and cost effective solutions, cuz you know I'm all about cost effectiveness.  My goal is to stick with my usual party/shower budget of $50 and so far I've lucked out with some of my decorations.  My sister is getting married in August and is having a country themed wedding so I borrowed mason jars and burlap table runners from her.

I don't have everything finished yet and my dining room table is covered in baby shower projects but I thought I'd give a little preview of all the goodies I've been working on the last couple weeks, plus this way I can explain how I made the projects and my shower post can be mainly pictures of everything put together.

As with any party or shower I scoured the internet for ideas and found some amazing western/country baby showers out there.  I got loads of inspiration and I can't wait for my cousin to see everything put together.
Actually I can't wait to see everything put together.

Centerpieces:

I purchased a bush of fake daisies from Hobby Lobby at 50% off for $4.50.  There were 12 daisies in the bush.  I used 2 quart size mason jars I already had in my cabinet, wrapped them with twine (purchased at Wal-mart for $1.47 a roll) and tied a piece of paisley print fabric around them.  I bought a yard of  the fabric at Hobby Lobby at 30% off for $6.29/yd.   I used this fabric for different touches throughout the decorations to tie everything together.


Mini Tissue Poms:
Originally I knew I was going to use poms to decorate but had planned on making large ones.  Once I got to looking at the ceiling space and how low they would have to hang I realized they would end up being in the way while people were standing or walking through the dining room.  Instead I bought 3 packages of tissue paper in red, blue, and brown for $0.99 each and cut them down the center fold to make 2 mini poms from each color.  Not only are they cute and I get the same effect I was going for when I thought of using the large poms, but I get double the amount of them for the same price, $3.


Name Canvas:

I saw a couple showers with something similar to this, here and here.  As soon as I saw it I knew I had to do something similar.  I went back and forth on whether I wanted to use a frame, a piece of wood, plain ol' fabric, or canvas.  I ended up choosing the canvas because it was the easiest and most cost effective choice.  I bought an 11x14 canvas from Hobby Lobby for $5.99 that was a package of 2.  I plan on letting Grant paint on the other one.  I used the paisley fabric I purchased and hot glued it around the back making sure to pull it tight and smooth.  Then I just took rope (bought at Wal-mart for $4.97 a roll) and started gluing it to the fabric covered canvas to spell the baby's name, Reed.  I have to say I'm really glad they chose a short name because I don't think I would have been able to fit a long one on the canvas. 


Food Signs:

I like having signs for the food at parties, especially if there's something that's not completely obvious.  I hate going to a party and guessing at what each food item is, crossing my fingers it's something I like when I'm putting it on my plate.  While most of my food was easy to tell what it was,  I wanted everyone to know what type of pasta salad and sliders I made so they wouldn't have to wonder.  I used a font a downloaded from dafont.com and printed them from a word document onto white cardstock.  I taped them to scrapbook paper I bought at Hobby Lobby ($0.29 each at 50% off).  They are nothing fancy or special but serve their purchase and add a little something to the food counter.


Wreath:

The wreath isn't finished yet but I've hat this Styrofoam wreath form in my cabinet for over a year with intentions of making a yarn wreath that I've never finished, go figure.  I thought it would be a cute addition to the decorations and covered it in burlap I had in my stash and strips of the paisley fabric I bought for the shower.  I'm planning on adding a small pennant banner on the top with the baby's name or the word cowboy.

Mason Jar glasses:

Years ago I saw a wedding online that used Mason jars to drink from and have had it in my mind every since that some day I was going to use that idea at a shower.  Of course nowadays it's nothing original and I've seen it all over the internet, but I was super excited to use them for this baby shower just the same.  I wanted to keep them simple so I just cut strips of paisley print fabric and tied them with a knot around each glass.  These will sit next to the glass drinking dispensers I'm filling with homemade strawberry lemonade, sweet tea, and water.

Wishing Tree Tags:

It took me forever to decide on doing a wishing tree.  No one in my family is big on games at showers or activities in general.  They prefer to eat and visit with one another, which is fine with me, I just want to make sure my cousin has something to take home as a memento.  I printed the tags on white cardstock, used my cricut to cut them into a shape I liked, then used red burlap printed scrapbook paper cut 1/4inch larger as the backing.  I attached them with glue dots.  I punched a hole in the top and tied twine to each one so they will hang nicely on the branches.


Framed Quotes and Photos:


I saw this quote here, and thought it was beautiful so I decided to make my own version of it using fonts I downloaded from dafont.com, and changing the colors to match my theme.  I used a frame I already had.  I made a 4x6 print of one of my cousin's ultrasound photos and used a frame I already had using a burlap print scrapbook paper as the matting.  I always love seeing ultrasound pictures at baby showers.

The baby shower is getting close now, only a few days to go, and I can't wait for it to be here.  I think anyone who's done a party knows that feeling.  Once you've planned for so long, crafted, and have in your mind how you want everything to look, you get really anxious for the party to be here so all your hard work will be paid off.

Monday, January 13, 2014

Western Baby Shower Invitations

My cousin is pregnant and due almost exactly 2 weeks before me.  This is her 3rd and her other 2 are already in school so quite an age gap between them.  I told her years ago if she ever decided to have a 3rd I wanted to be the one to do her baby shower.  Little did I know we both would wind up pregnant at exactly the same time.  I still offered to do her shower because I'm one of those crazy weird people that enjoys doing them.

She is having a boy and requested a western/country themed shower. As I usually do I scoured the internet for ideas and bounced back and forth on colors and images up until the holidays hit and then it all hit the back burner and now the shower is a week  away and I'm seriously needing to craft for this party.

The difference between this baby shower and the others I've done is 1. its right smack after Christmas which puts a kink in finances and 2. I'm having a baby too which puts a kink my energy to craft and throw such a party.  That being said I'm still excited to be doing it and have come up with some ways to make things easier and more cost effective for myself.


I chose blue and red for the colors.  I went back and forth on the this forever and it really was the most difficult part of the shower for me to nail down and make a decision.  There are so many color combinations I love but in the end I thought blue and red would be the easiest for me to find and match up in fabric, ribbon, and scrapbook paper.  I'm really trying to go for western simplicity with this shower, not only to make things a little easier for myself but also because I think a lot of times people (me included) can go overboard with decorations and such.  I tend to over think things and having the mentality of simplicity helps me keep things in check.


As always. I'm made the invites.  I figured out months ago what I wanted them to look like and used blank cards already in my stash.  I found the rocking horse image online, saved it into my images, opened it in Microsoft paint, then erased the wording and printed them in a Microsoft works word document. 


I used my cricut and the Accent Essentials cartridge to cut the images out into a circle shape, then cut another circle 1/4 inch larger circle in blue and red (because I ran out of blue paper) to go behind the rocking horse image and to add a little bit more color.  I had originally wanted 1/2 inch red gingham ribbon but I procrastinated, then a snow storm hit, then the flu hit, then Hobby Lobby was closed.  I ended up having to go to Joann's which of course they were out of the 1/2inch and I was forced to get the 1/4inch ribbon.  It still worked fine but I really wanted something a little wider.  Oh well, I guess no one else will know the difference.  I attached the ribbon, scrapbook paper circle, and rocking horse image with glue dots.


I have had this post ready for about a week now except for a photos but for whatever reason blogger isn't letting me upload my second one and I'm a little tired of trying.  So there is no photo of the inside of the invite. I printed the invitation info on white cardstock using font's from dafont.com.  I downloaded 2 different ones I thought looked western.  I used my cricut and the Don Juan cartridge to cut them out then used glue dots to stick them to the inside of the cards.


The inside read: A little cowboy is on the way
                           Let's celebrate before the big day
                           Join us for a baby shower honoring
                             (enter guest of honor name)
                             (enter party details of time, place, etc)


Other than the size of ribbon these turned out exactly as I wanted.  I was going for simplicity which I think I found and I'm so relieved they are finished and mailed. 


Now on to the other projects on my list.

Monday, October 28, 2013

Thomas the Train 3rd Birthday

It doesn't seem like my little guy should be 3 or that it should be his birthday already.  I posted here about his birthday invites and now I have the party details.  I decided to do the party in our apartment rather than my mom's house this year which meant less space to decorate but I'm really satisfied with how everything turned out. 
(after this pic I realized my table was not centered and fixed it lol)

I used scrap paper I already had in my stash for the cardstock circle garlands and the #3/Happy Birthday hanging cutouts. 

I had planned on having these accordion circles hanging from the ceiling but when I went to put everything up it just didn't work.  Instead I hung them as a backdrop. 

The All Aboard banner was made with scrap paper I had in my stash.  I didn't do the typical Happy Birthday banner because I had one already made from last year and I had enough hanging from the ceiling with Happy Birthday on it I thought it might be a little overkill to have a banner too. 

This is the first birthday of Grant's I didn't do cupcakes.  I couldn't figure out a way to decorate them that satisfied me and when searching online I found some really cute round cakes that were decorated simply enough I thought I could do something similar.  I haven't decorated a cake since my sister's graduation party and I swore I would never use fondant again, which meant every detail on the cake was gonna have to be piped by hand by me.  That's a lot of pressure on this mama, and looking back I should have just made the cupcakes and stuck to what I know I'm good at.

I chose a pumpkin flavored cake with cream cheese frosting.  It took me forever and a day to decide on a cake flavor. I knew Grant wouldn't really care and we would be left with any that didn't get ate so I didn't want a plain old chocolate or vanilla, that's just not my style.  I decided on pumpkin because it's October and I love the smell of anything pumpkin flavored baking in my house.  I also made Butter Cookies, a signature cookie of my mom's.  She used to make these for every Halloween, Christmas, and Easter.  Every time I smell them baking I think of so many Holiday memories, and I've made them for every one of Grant's birthdays so far.

There weren't many things to actually buy for decorations this time around.  Other than the balloons, table cloth, streamers, and some cardstock.  Which was great because I got to use up some of the craft supplies I already have and it kept costs down.

I didn't do a whole spread of food this year since I'm pregnant, working part time, and I figured it was ok to cut myself some slack and take the easier way out by ordering pizzas and buying a couple 2 liters of pop.  I usually go a little overboard at showers and birthdays with all the food and then I'm left with a ton of leftovers, and spend the whole 2 hours before the party cooking and cleaning up the kitchen before people arrive.  I knew with me doing the cake during Grant's naptime I wouldn't have much time to cook a meal then clean everything before people started showing up.  And lets face it sometimes it's nice to not stress yourself out.  It seems the last hour before every party I've done is me being short with everyone, aggravated that certain things aren't done or people are in my way, and me runnin around like a chicken with no head.  It wasn't worth it this year, and given Grant's pickiness with food, I'm sure he more than appreciated the pizzas since it's one of the few things he loves eating.

After everyone left my husband and I sat there surrounded by toys, boxes, and wrapping paper and it was the feeling you get when Christmas is over.  All the build up and waiting all year then it's over and all I could think was, another year gone.  Another year celebrated.  Another year before the next one.  It's exciting to think next year Grant will have a brother or sister to celebrate his birthday with.
 
Until next year!

Monday, October 21, 2013

Thomas the Train Birthday Invitation


I decided awhile ago to do a train theme for Grant's birthday and since you really can't get generic train party supplies, or at least I've never seen any, it became a Thomas the Train party.  Let me say this.......I really don't like Thomas the Train.

I was secretly hoping he would pass over the cartoon so I'd never have to see it, but of course that's not the case.  He really doesn't care what I think about it and I decided to put my own dislikes aside and give him the party theme he would love.

Am I a good mom or what? lol

As I did last year for his Mickey themed party I set a $50 budget for the whole party, and quickly realized with this budget I was going to have to do some more improvising with decorations because there was no way I could afford to buy all the Thomas party supplies in the store.  I have lucked out with Grant's Toy Story and Mickey birthdays because I had the Cricut cartridges to do the main decorations.  But what do you know, Cricut doesn't make a Thomas cartridge so I'm on my own.

If I was the kind of person to look on the bright side of things I would see this as a great opportunity to stretch my creativity by coming up with new decorations on my own.......I'm not that person and I much prefer having the Cricut do that grunt work for me.

I did purchase a table cloth from the store with Thomas on it but this is the only Thomas specific item I have bought.  We have a small apartment which makes it nice for parties because the smaller area you have to decorate the less decorations you actually need to make a big impact which in turn means less money spent, and I'm all about that.

I decided to pick 3 colors, blue, aqua, and red and bought streamers and plan on buying balloons in these colors as well.  I had intended to buy some train clipart off Etsy.com I found that actually looks just like Thomas (without the smiling face) for $5, however as with any small budget, cuts had to be made somewhere to allow for other spending and I decided to find Thomas images online and use those instead.  $5 doesn't seem like much in the grand scheme of things but when it comes to a $50 budget that includes food, party supplies, and decorations, every penny counts.

I have only finished the invites for now as most of the decorations will have to be finished the week before the party (October is a super busy month around our house).  I had grand ideas of a really cute train ticket invite with the perfect font and images on it.  Then reality, pregnancy exhaustion, a part time job, and the month of October hit and that idea went down the crapper pretty quick.  Instead I opted for a simple invite printed on white cardstock with the Thomas image I downloaded from the internet and backed it with plain old red cardstock.  I cut the squares of the cardstocks out with my Cricut ( why use an old school paper cutter when you can push a button and watch the Cricut do it for you?).  This invite is similar to the others I've done, which is exactly why I wanted to do something different this time around but maybe next year.


I'm pretty lucky in that everyone I invite lives pretty much on the same road so I didn't bother with envelopes, stamps, or mailing them at all.  Instead I drove down the road and dropped them into their mailboxes.  One thing I hate about invites is the cost of stamps (if I wasn't one of those sentimental people who save cards and invites I would so do e-vites).

Even though these weren't the invitation I had dreamed of, they serve their purpose and I'm really glad they are done.  I guess there comes a point in life when you have to give in and realize you can't do it all.....

I'm just not ready for that yet. haha.                     

Monday, May 13, 2013

Minnie Mouse Birthday

As I mentioned before my Neice turned 2 on the 4th and we through her a small birthday dinner, but even with a small dinner a little girl needs some decorations.  Which is where I come in.  I used pink and purple poms for the baby shower I did and just reused them for Sophie's birthday. 

I made a banner with my Cricut and used the Minnie and Daisy Cricut images I made for Grant's Mickey Mouse Clubhouse birthday.  I absolutely love how this banner turned out.  I had debated about making one, not knowing if I wanted to add one more project to my to-do list, but I'm so glad I did.
 
I got to use the cupcake stand I made for the baby shower as well.  I love getting multiple uses out of things.
 
 
Are these not the cutest girly cupcakes (recipe coming later):
 
We didn't do many other decorations but even still it looked too cute all put together, and Sophie loved it all which is the most important thing.


Friday, May 10, 2013

Minnie Mouse Birthday Invitation

My niece turned 2 over the weekend and my mom and I decided to have a birthday dinner for her.  The invites were the easiest ones I've ever made.  I used my Cricut and the Mickey and Friends cartridge.  I cut out a plain Mickey head then a bow, used glue dots to adhere them and printed the party info on white cardstock cutting it out in a circle. 

 
It's simple yet so adorable.

Wednesday, May 8, 2013

About to POP Shower Invitations

In all the pictures I showed in this post about the baby shower, I completely forgot to mention or show the invites.  I made them pretty simple, but I think they were super cute.
 
I cut the circles out with my Cricut of course and stitched them on with my sewing machine.  I did this for 2 reasons.  1- I didn't want to use any more of my glue dots since I was running low. 2-I thought it would add a cute detail.
 
 
Usually when I pick a theme for a party or shower I am overflowed with ideas for invites and just can't decide on one.  However this time every one I saw online was computer generated.  Don't get me wrong they were all cute but just not anything I could duplicate easily.  Hence the simplicity of these invites.

Tuesday, April 30, 2013

About to POP Baby Shower

This past weekend was the About to POP baby shower I threw for my cousin's fiance...finally!

I feel like I've been preparing for this shower, FOREVER, but I've had alot of fun in the process.  It never fails that any time I host a shower or party of any kind, the night before I end up asking my husband, "why I decided to do this?" 

To which he responds, "because you like them".  Which is true but man the night before and day of is filled with alot of scrambling and stress.

Anyway, enough rambling, on to the party. 


I used multiple colors with the main 2 being pink and purple.  Of course no "About to POP" shower is complete without a popcorn bar, I too had to have one.  I made 3 types of popcorn, butter, caramel, and white chocolate with M&M's.  I made individual popcorn boxes, that were too cute.  I bought the book Hop on POP and had everyone sigh it for the baby's first book.  I had 2 types of centerpieces, the lollipop bouquet pictured above, and 2 diaper cakes.

 
I used my cricut to cut 2 inch circles and used them as a ribbon around the diaper cakes.  I had the hardest time figuring out how to top them.  First I planned on doing flowers like I did with the last baby shower I planned.  Then I thought of doing a painted wood letter "C", which stood for the baby's name, but neither of them looked right.  My last resort was the cloth baby shoes.  My intention was to decorate them with cute little bows and flowers (the above cake had pink polka dot shoes, the other one had purple polka dot shoes), however because I made these the day before during a rather short naptime and had a million other things to finish, it didn't happen.  They are still cute but I wish I had the time to jazz em up a bit.
 
I made a table runner for the counter out of polka dot scrapbook paper.  I didn't even tape them together, I just laid them next to each other and placed everything else on top which kept them in place.
 
 
I made the cupcake stand out of 3 wood plaques from hobby lobby and 2 glass candle sticks from the Dollar Tree.  I glued them together with E6000 glue and spray painted the entire thing.  I was so excited with my Chocolate caramel cupcakes.  They were so very delish and came out perfectly.
 
 
I have a thing about 2 liters of pop..... I hate having them at parties.  I always end up buying 2 many and I'm left with multiple opened bottles which inevitably go flat and get dumped into the sink.  I made strawberry lemonade, sweet tea, and cherry limeade.  I wasn't crazy about the cherry limeade, but other's said it was very tasty.  I also had bottled water with my cute little labels.  Which almost all got taken, so I was super happy.
 
 
I found a onesie shaped cookie cutter while my mom and sister and I were in Amish country and knew I had to use it for the shower.  It was just too cute.  I didn't want to frost them like I do any other cookie because I wanted them to look a little less homemade, not that there is anything wrong with homemade.  I took some tips for flooding the frosting and outlining the cookie from the blog Bake at 350.  If you are a cookie baker you must go to this blog, it is Heaven.  The cookies took a long time to flood but the end result was worth it.  I LOVE how cute they are.  Maybe eventually I'll get a little fancy with the frosting but the simple pink was just the right touch.
 
I made Snap Crackle POP treats.  Which was just store bought chocolate rice krispy treats cut in half with lollipop sticks sticks added.  I decided they needed to have some pink added to them so I dipped  in more chocolate and rolled them in sugar I dyed with food coloring.  I attached a tag that read, "thanks for POPping by". 
 
Here is one thing I have learned about favors, at least with my family, no one ever takes them, or even realizes what they are.  Unless it's a kid's party with goodie bags, I always get some puzzled looks when I mention favors.  So note to self.....don't worry about them next time.
 
I also had 9 tissue paper poms, 3 hanging from each light fixture in my mom's kitchen, dining area, and living room.  These tied all the colors together.
 
For food (which I completely forgot to get any pics of) was all popped themed.  I made POPcorn chicken using boneless, skinless chicken breast and Kraft Fresh Takes in Rosemary and Garlic as well as Italian Parmasan (spelling?).  They were super tasty.  We also had sweet pepper POPpers (I used cream cheese and cheddar shredded cheese), taco dip (Mouth POPin Taco Dip), pasta salad, and broccoli and Carrots (POP something healthy).  It was delish.
 
 
I'm so glad I did the shower because the guest of honor was super happy with everything but man am I glad it's over.  I was exhausted for 2 days after and very thankful I don't have another party to plan and prepare for until Grant's birthday.


Wednesday, March 13, 2013

About to Pop Water Bottle Labels

I feel like I've been MIA from my little blog FOREVER, even though its only been a little while.  Some great things and some not so great things have been going on.  I don't like to bring negativity into my blog space because this is supposed to be my Happy Place, so instead I chose to take a time out and come back when with a new attitude.

So enough about that, on to better things.

After making numerous popcorn boxes I took a break from all things baby shower related.  I just lost some steam and was stuck on how to do the invites and therefore everything was put on hold. 

I blame this brain fart on those darn popcorn boxes.  While I think they are so cute there are time consuming and a bit of a pain in my rear.  Next time I think I'll just use paper bags or buy some already made. 

Anyways

I finally finished the water bottle labels and love love love how they turned out.  I have a little love affair with water bottle labels.  They are at every shower/birthday part I do, just because I think it's a sweet and inexpensive touch.  Normally I personalize them with the baby's name for a baby shower or the birthday/name of the birthday person on the labels but for these I decided I wanted to just stick with the theme,  and that darn brain fart was creeping in again and I couldn't figure out how to use the baby's name on them.  Either way I love them and I think the mom to be will appreciate them too.

I made them basically the same as I always do, using my cricut, some glue dots and clear contact paper.  You can see a tutorial here for the ones I made for the Grant's 1st birthday.  For these I used multiple colors of polka dot paper for the wrap then another color cardstock for the center.

After finishing these I'm full speed ahead on getting more baby shower projects marked off my to-do list.  I bought the supplies for a new cupcake stand, more on that later, and the invites are in the process of being finished.  More on that later too. 

Monday, March 4, 2013

Popcorn boxes for a Baby shower

As I've mentioned in a few posts there are people having babies all around me.  Right now I know of 3 mommies-to-be and one of them I'm hosting a shower for at the end of April.  I'm constantly saving different baby shower themes to my favorites folder in the hopes that one day I'll get to use them on someone. 

Finally my day has come.  The last shower I hosted was back in 2011 for my cousin's twin boys.  I did a Thing 1 and Thing 2 theme and I had so much fun planning a crafting for it.  Since then I've tried to talk a few family members and friends into having another baby just so I can do their shower, haha. 

I know, that's a little crazy but I can't help it. 

Anyways my cousin is having a baby girl (it's the season for girls, every mommy-to-be I know is having a girl), and I've decided on the theme "About to POP".  Many people have used this theme, it's not original on my part but it's so  much fun!

Ok so I confess I was sold on the theme when I saw the popcorn bar most people have.  I mean seriously who doesn't love a popcorn bar of gourmet flavored popcorn.

My mouth is watering...

As usual I've scoured the internet for ideas and inspiration and my favorites folder and picture folder on my computer are bursting.  If I could figure out Pinterest my computer would thank me but that's for another day.

The biggest issue I have when planning and crafting for a shower (after I choose a theme) is the invitation.  I try to remind myself to keep things simple and classic but always end up with a million ideas floating around and can't decide on the perfect one.  With this theme I had the exact opposite happen.  I couldn't figure out how to make them at all.  It seems most people order their from Etsy or make a printable one with their computer.  Of course my mom said I could just go to Walmart or Target and pick up a package of invites and write the info on them.

"What?"   was my response.  The crafter in me just can't do that.  Just like I can't go to the party store and pick up all my decorations.  I HAVE to make them.  After all that's part of the fun....

and the stress...
 
and the frustration....
 
But mainly the fun of having a shower for someone.
 
Of course if you're going to have an "About to POP" theme with a popcorn bar, popcorn boxes are a must.  I could have found some online to purchase I'm sure, but what's the fun in that.  I did a google search and found a template, printed it out, traced the template on cardstock, cut it out, and glued the pieces together.


I used my cricut to cut out some circles out of scrapbook paper to decorate the boxes.  I decided I didn't want to use glue to attach them for fear of the paper wrinkling, or glue dots because I was afraid they might fall off or tear. 
 
So what's a girl to do?
 
Sew them on.  Before I glued the pieces of the popcorn boxes together I took one side and stitched the circles on each of them.
 
 
I made the boxes in a variety of colors.  Pretty much I went through my cardstock stack and grabbed any color I liked and that was bright.
 
I think they are super cute and can't wait to fill them up with some gourmet popcorn!!!


LinkWithin

Related Posts Plugin for WordPress, Blogger...

Total Pageviews