I measured my mom's Kindle and it was 5x7inches so I cut 2 pieces of fabric and 1 piece of heavy interfacing into a rectangle that measured 16x8inches so I would have a 1/2inch seam allowance. Layer your pieces in this order:
inner fabric wrong side up
outer fabric right side up
interfacing
Pin your fabrics all the way around.
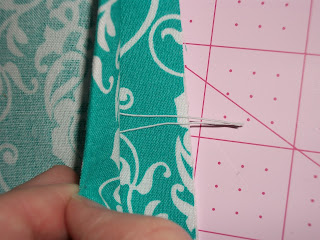
On one of the short ends of your rectangle place a looped piece of elastic, a thin hair tie, piece of ric rac, or ribbon as a closure for your case. In the picture below I have place my loop of elastic in between the right sides of my inner and outer fabrics with the ends of the elastic hanging over the end of my fabric. Be sure to pin this in place and double stitch over it to secure it in place.
Stitch around using 1/2inch seam allowance making sure to leave a 3 inch opening for turning. Clip corners.
Turn right side out and stitch around the outside, making sure to stitch the opening closed you used for turning, using a 1/4 inch seam allowance.
Fold one side of your case over about 6 inches and pin in place. Stitch only on either side, this will be the pocket for your kindle so you don't want to stitch it closed.
Stitch the button in place so you will be able to close your case.
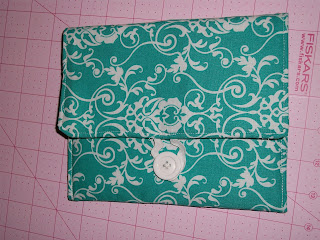
And here is what it looks like closed (I accidentally stretched my elastic out so it wouldn't hold my case closed. I used a small piece of ric rac and sewed it in place where the elastic is).
I'm so excited with how this case turned out and I absolutely love this fabric I bought at Hobby Lobby.


Lisa your blog is amazing!! I am in awe of everything you've done & do:) I had no idea you had a blog until you left a comment on mine! Thanks for doing that so I could discover this! I cloth diaper too so I'm so glad to see the reference to some patterns. I'm getting ready to make some covers tomorrow. Keep up the good work & I can't wait to see what you post!
ReplyDelete