First cut 4 pieces of fabric 6x7inches. I used the same fabric for the outside and interior but you could use coordinating and make it cuter than mine. You also want to cut a long strip 3x10inches.
Pin your interior and exterior square right sides together. Make sure to mark the side that is to be the top opening to be sure you don't stitch it closed. Also leave a 2 inch opening at the bottom of your interior square for turning your baggie right side out later.
Clip the corners on each of your pieces.
Take your long strip and fold one side to the middle as shown below. If your a pro sewer you could iron this down, but if your like me and trying to get this project finished in the 15 minutes your son is entertained by the Mickey Mouse Clubhouse, just hold it in place.
Now take the other side and fold it over top.
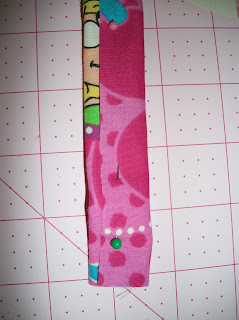
Pin in place. Notice I didn't fold the right side over all the way to the edge. Now stitch a straight line all the way down.
Clip a small square of velcro. Mine are about 1 inch each. Stitch one at the top and the other about 3 inches down (In the one I made for my son I used a suspender clip which works much better but I ran out. If you want to use a suspender clip just loop the top of your strip through the clip and stitch it in place).
Now turn your outside fabric right side out, leaving what will be your interior fabric wrong side out (make sure you remembered to leave a 2-3inch opening at the bottom of your interior fabric before sewing). With right sides together put your outside pocket inside your interior pocket matching up the side seams and tops of each pocket.
Before pinning in place take your strip with velcro (the end that does not have what will be the velcro loop) and place it between the right sides of the pockets leaving 1/4-1/2 inch overhang like the picture below. Pin pockets and strip into place and stitch around the top of the pockets.
Now you will need to turn your pockets right side out. Pull one pocket through the other using the 2 inch opening you left on the interior pocket.
When you lay it flat you should have something that looks similar to the picture below.
You need to stitch the opening on the interior pocket closed making sure to stitch as close to the edge as possible. No worries, no one will see this seam. Now stuff your interior pocket inside your outer and you're finished.
Here is the inside view:
And the outside:
I hope these directions were clear but if anyone finds them confusing and needs clarification just leave me a comment and I'll try to make better sense of it.
Here is my little guy in the grocery store snacks ready in his Goodie Bag attached to the cart handle.
When we are in the car I just clip it to his harness belt and he munches away, happy as can be.
I can't say enough how much I love this little goodie bag. After months of having to walk through the store with one hand on the shopping cart handle with a baggie of snacks and a screaming child if my hand and the baggie leave their designated spot on said shopping cart handle, this little thing equals a quiet, happy, scream free grocery trip.
Can I ask for more than that these days!


No comments:
Post a Comment