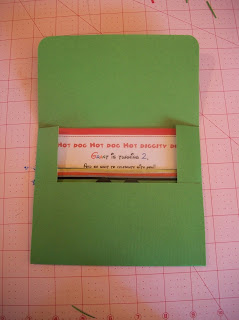
I used my cricut to cut the Mickey head and attached it to the wrap with glue dots. To make the wrap I had to measure each of the invites (because I wasn't smart enough to cut them all the same size) and added 1/2 inch seam allowance.
On the invite itself I downloaded the Mickey image from the internet and just created the rest in a word document and printed it on white cardstock. I stitched the white part of the invite to the colored cardstock, 1. because I didn't want to use any more of my glue dots, and 2. because I thought it would add something different to the invitation.
Because these weren't standard sized invitations I ended up having to make custom envelopes. They weren't difficult, just a little time consuming. I used a letter scorer (is that what they are called?), you can see it in the right of the photo below. It came with my cricut supplies, maybe it's a bone folder, either way, doesn't matter. I put the invite in the middle of my 12x12 cardstock, used a ruler and scored it so it would fold nicely.
As you can see above I cut the corners out so it would all fit together like an envelope. Fold in the right and left sides, and fold the bottom up attaching it to the sides with glue dots.
Then put your invite in and use another glue dot to close the top flap.
I'm so thrilled with how they turned out and even more thrilled they are finished. It feels good to be able to check some projects off my list.


Thank You Friend
ReplyDeleteMickey Mouse Clubhouse