Friday, December 7, 2012

PJ Set-A Christmas Gift

I made these pj's for my niece for Christmas, and I'm so glad they are finished.  I've had them sitting in my project box for a month or 2 waiting for elastic and  the legs to be hemmed.  Such simple tasks and yet it still took me that long to mark it off my to-do list. 


I used the same tutorial I always do, except now I've made them so many times I don't need a tutorial.  I'm so happy I stumbled across it a couple years ago.  I bought the white t-shirt at Joann's for $2.50 and appliqued her initial, simple yet cute.  I hope she likes them!

Friday, November 30, 2012

Handmade Christmas Cards

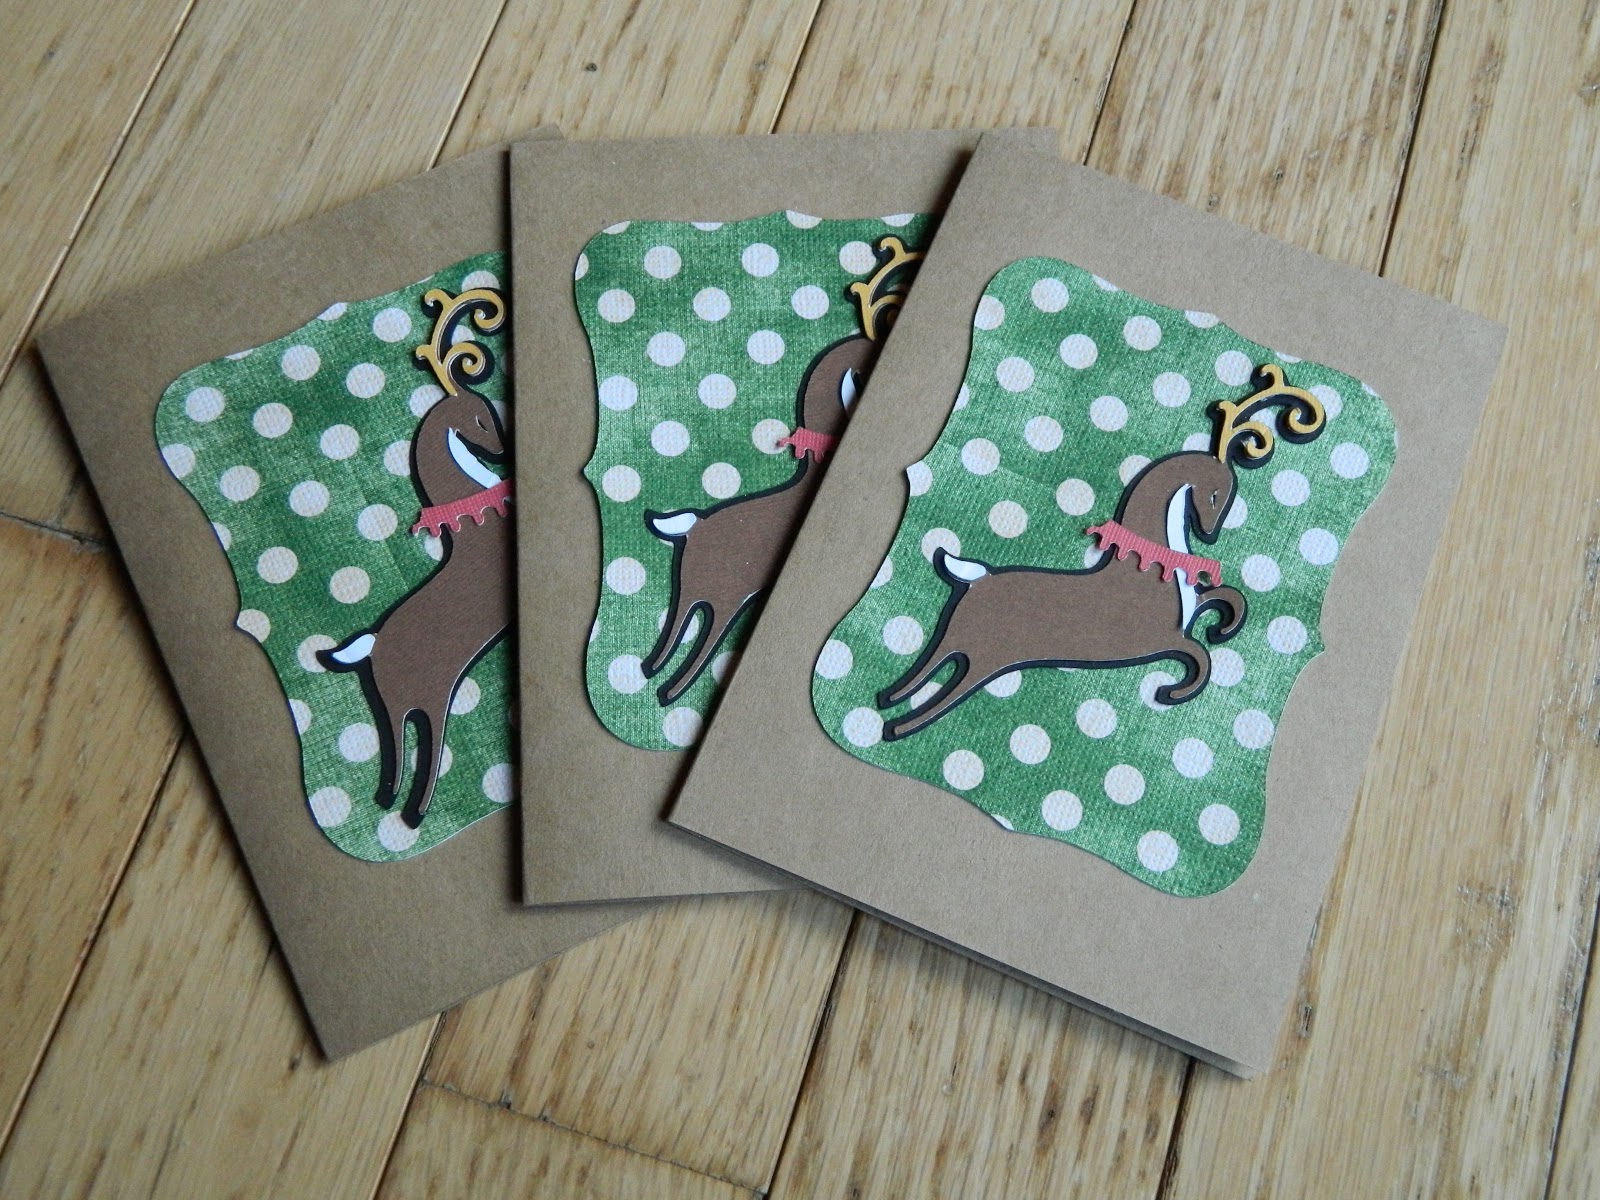
I've been wanting to make Christmas cards since I got my first Cricut and for whatever reason it has taken me about 2 years to actually get around to it.  I looked online for inspiration, gathered a few ideas and came up with this:

 
With everything I do this year from the wrapping paper, to the gifts, to the cards, I'm trying to go simple and classic.  I think Christmas has gotten out of hand in alot of respects and I think there is something to be said for simplicity around the holiday season.  I think these cards hit the mark.  I debated on whether or not to put Merry Christmas or Happy Holidays on the front but nixed the idea since I always write personal messages on the inside and lets face it, everyone will know this is a Christmas card regardless if it says Merry Christmas or not.

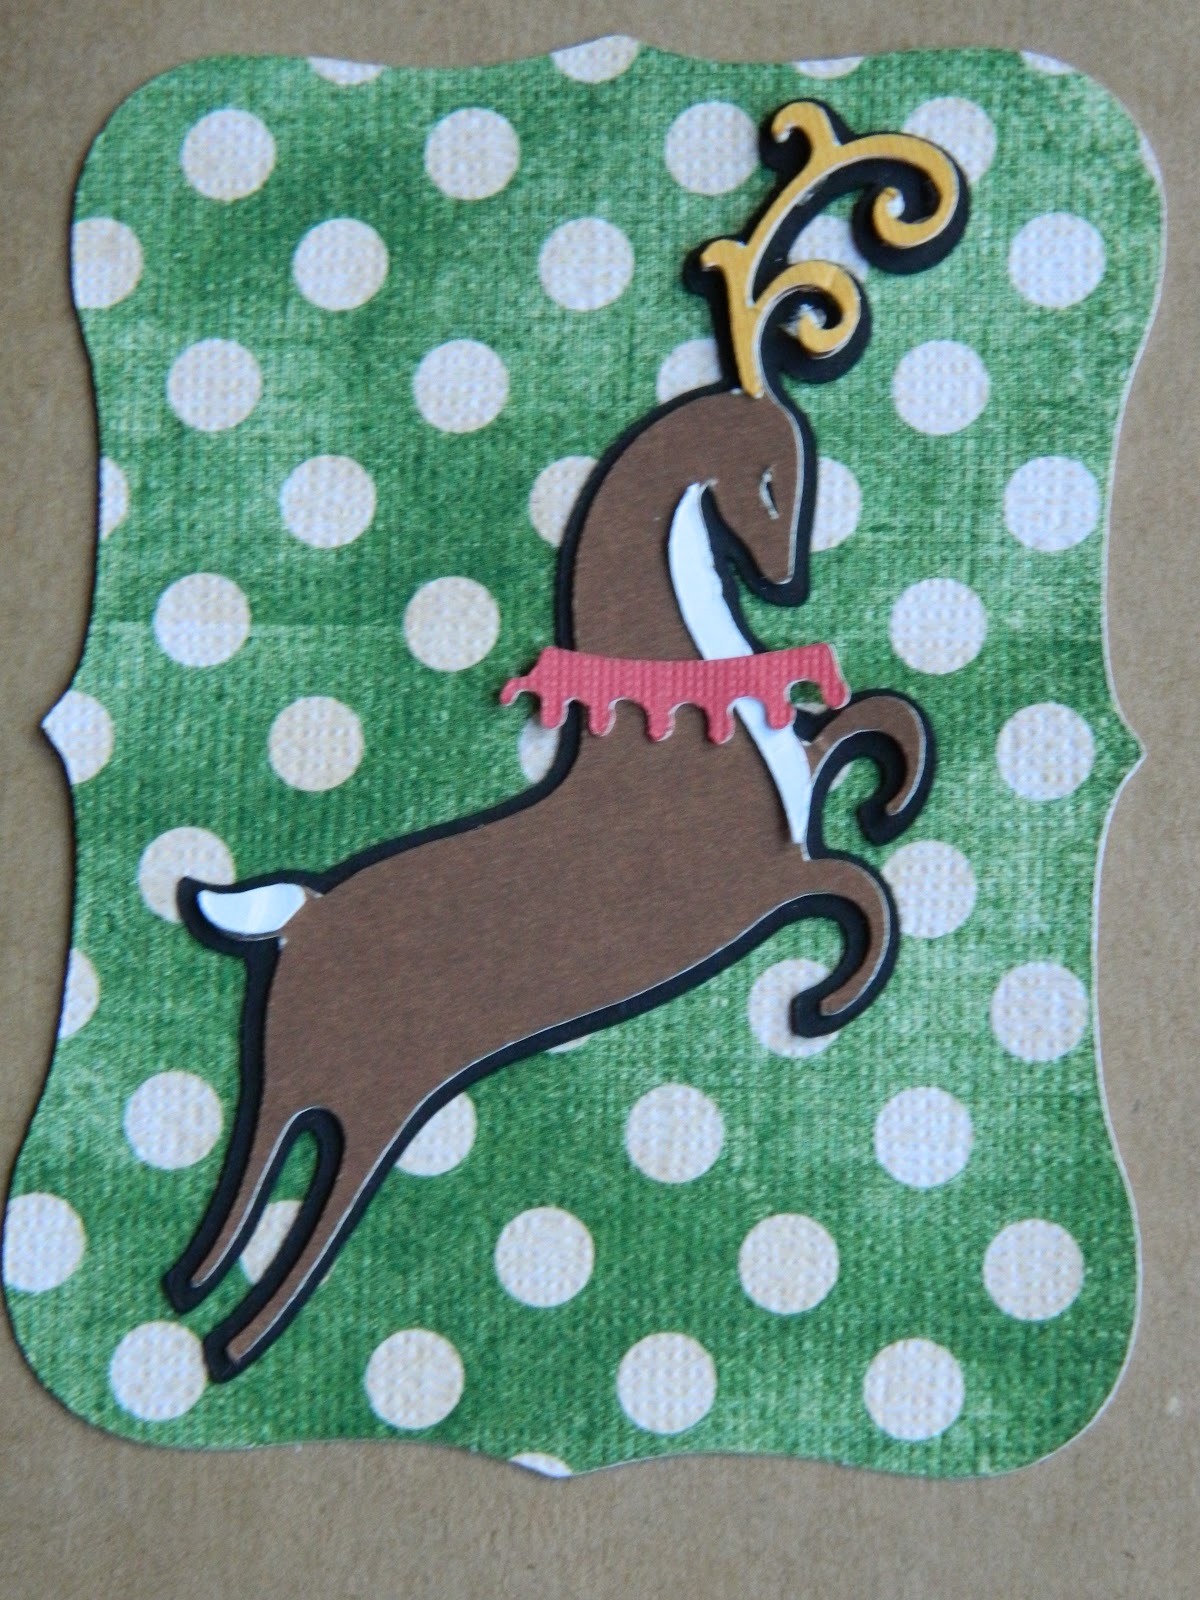
Now, on to how I made them.  I bought the cards with envelopes from Hobby Lobby (I'm really into rustic country/primitive looking stuff right now which is why I chose the brown) they were a package of 50 for $6.99, and I of course used a 40% off coupon.  The green/white polka dot paper I purchased in a Christmas stack of cardstock at Hobby Lobby as well. I used my Cricut and the Joys of the Season cartridge to cut out the reindeer at 3 inches, and Accent Essentials cartridge to cut out the green/white polka dot image behind the reindeer at 3 inches too.  I attached everything with micro sized glue dots.

 
I have to say for my first attempt at Christmas cards I'm really really pleased with how they turned out.
 
Whenever I start a project with my cricut I almost always google ideas whether it be Christmas cards or birthday invites and let me tell ya there are some amazingly talented cricut users out there.  I usually end up getting more discouraged the more ideas I see because some of them seem so intricate and time consuming, I figure there's no way to make them and have them turn out well.  That being said, what I try to stick to and my piece of advice is to keep it simple, at least to start with.  If you start simple you can always add ribbon, buttons, glitter, or words.  By starting with a simple design or idea first it makes the task less daunting and keeps you from getting discouraged.  So if you, like me, have been wanting to make your Christmas cards this year go ahead and bust out the Cricut and get crafting.

Tuesday, November 20, 2012

2 Mikey Monkey's for 2 Little Boys

My cousin has twin, almost 1 year old boys, I threw her a baby shower last year, and since we will be seeing her in Tennessee over the Christmas holiday I wanted to make something for them.  My cousin is not in the least bit a crafter, I swear one day I will convert her, so I never think of what to buy them but what to make them.  For Grant's first Christmas I made him a Mikey monkey and I thought it would be perfect for their gift this year.  There is something about a handmade toy, I feel like every child should have one.


I have to say I love these monkies but there are certain parts that can be a bit of a pain in the neck, not because of the pattern or instructions but because I never seem to follow them completely which can get me in trouble.  Anyway, I wanted to make them matching but not identical and I'm really pleased with how they turned out.  Originally I was going to do really good and make the matching baseball hat and tennis shoes but after I stuffed and stitched them up I decided for my crafting sanity I should leave them as is.  I'm so glad I can now mark these off my Christmas craft to-do list.  I can't wait to see the boys open them, my little guy has already been giving them kisses and trying to drag them around the house.

Thursday, November 15, 2012

Grandparent Christmas Ornament

I made this ornament for my Grandparents:


It is simple and classic and I'm in love with how it turned out.  I didn't want anything over the top or fancy because, to me, the picture speaks enough for itself.  It's their wedding picture over 50 years ago.  I've seen these ornaments done all over blogland and didn't ever really read a tutorial, I thought "how hard can it be?"  Well I don't know how other's made their ornaments but here's a few issues I ran into.

Originally I was going to make wallet size copies of the picture, cut them to size and put them in the glass ball.  FYI, it doesn't work.  I bought regular glass ball ornaments so I had to roll the picture up to get it inside the ornament and the photos don't unroll all the way.  Luckily I practiced with another photo first.  What I ended up doing was scanning the photo into my computer, printing it out on regular computer paper in a 3x5 size.  I cut a circle shape (trimming as needed), rolled it up, stuck it in the ornament, then used tweezers to maneuver it and straighten the paper out.  Once it was situated to my liking I stuck the top of the ornament back on making sure the metal things that stick down in (have no idea if they actually have a name, but you know what I'm talking about hopefully) were positioned behind the photo.  This prevents the photo from falling backwords.  I used some simple red ribbon to tie the bow on top and TA-DAAA, all finished.  I made 8 total one for each of my aunts and uncles as well as my Grandparents and plan on giving them at Thanksgiving so they can hang them on their trees this season.

Total these ornaments cost about $0.33 each since all I had to buy was the ornaments, everything else was already in my craft stash.  This is the perfect gift for a group of people or if you have multiple family members you want to gift to without breaking the bank.  Best of all it brings back memories for people and I think that's the best part of it!


Friday, November 2, 2012

Superhero Cape for Sophie: A Christmas Gift

I have to take a moment and say how proud I am of myself for already having quite a few Christmas gifts bought and made than I think I ever have in the past.  Usually the handmade gifts are always being finished into the wee hours of Christmas morning.  I vowed to myself I would not be doing that this year since we will be out of town for part of the holiday & packing up extra sewing and crafting supplies is not an option.

Sophie and Grant love playing together and see each other every weekend.  I knew I wanted to make them both superhero capes this year and finished Grant's about a month ago.  I'm thrilled with how both of them turned out, especially since I didn't have a pattern to go by.

I made this cape using the same pattern I created with Grant's.  I made it using one of his large bibs and newspaper.  I traced the neck part of the bib and created an A shape.

 
For the "S" I printed the letter from a Word document in the size I needed, traced it onto the fabric, cut it out, backed it with head and bond and stitched it to the triangle shape.
 
I think I mentioned this when I posted about my son's cape but here's a note, make sure you clip the corners and all the curves to make the fabric not bunch up around the neck when you turn it right side out.  I learned this the hard way the first go round.
 
I'm so excited to see them running through the house Christmas morning with these capes.

Wednesday, October 31, 2012

Mickey Birthday Shirt

The one picture I didn't get throughout the party was a good one of Grant's shirt.   My mom found this white shirt for $1 (SCORE!).  I printed Grant's name in Mickey font I downloaded from dafont.com, slipped it under the front of his shirt and traced the letters with a water soluble quilting pen.  Then I just embroidered the letters.


I didn't have any black fabric and rather than go buy some I decided to be really thrifty and use one of the old t-shirts we had in our give away pile.  I used the Mickey head image from my Cricut to make the head.  I backed it with heat and bond and stitched it with my sewing machine.  I printed the 2 in Mickey font then traced it with the water soluble pen and cut it out of red fabric I already had in my stash.  I backed it with heat and bond, ironed it on, and hand stitched it to the shirt.

 
I had intended for the shirt to be a lot more detailed and a lot  more colorful but time constraints (since I actually forgot about finishing the shirt until the day before the party) forced me to make it a little more simple.  However I'm really happy with the simplicity of it.  Grant kept trying to look at the back of his shirt to see Mickey while it was on him, too cute!

Tuesday, October 30, 2012

Mickey Mouse Clubhouse 2nd Birthday!

My son's birthday party was this weekend.  Normally once a party or shower is over I feel relieved to have it behind me and start crafting for the next one but I'm really sad his 2nd birthday is over.  I was looking back on pictures of my little guy from his first year and started tearing up.  It seems like forever ago since he was born and yet like it was just yesterday at the same time.

We did a Mickey Mouse Clubhouse theme this year and I set a challenge for myself.  To have a birthday party with food, cake, favors, and decorations with a budget set at $50.  Why did I do this you ask,  it seems everything nowadays is getting bigger and bigger, that includes birthdays.  I've seen some on tv, talked to friends and family members as they have been in the midst of party planning and i've heard mentions of decorations alone costing over $60, cakes $80 or more and entire parties costing in the hundreds, my mouth hits the floor every time.  If there is one thing I want to teach my son as he grows up it's to appreciate simplicity and the value of a dollar.  I could have spent more than the $50 I alotted myself but why?  If I can get the party I want for Grant and have all the things I know he will love, why spend a fortune that could be put towards something else for him. 

For food we had a hot dog bar complete with all kinds of toppings for hot dogs, cheese puffs, pretzels, potato wedges,deviled eggs, bacon ranch pasta salad, coleslaw, iced sugar cookies, and chocolate peanut butter cupcakes I made myself.  Most of these items were purchased over the last couple months with coupons.  For example the hot dogs cost all of $0.17/package, the ranch dressing for the pasta salad was $0.39, and the sugar cookies were made from a Betty Crocker sugar cookie pouch I got for free.  I am so proud of the party I was able to put together for the small budget I set for myself and I can honestly say there was nothing I was wishing I had bought or done differently.

Now onto the party.....

 
Centerpiece #1: All the images were cut with my cricut and attached to kabob skewers with tape.If you don't have a cricut you could easily print similar images off the internet and cut around them.  The bottom is just a wide drinking glass I stuffed 2 sheets of tissue paper down in and then wrapped it with another piece putting a rubber band around the top to hold it in place.
 
Centerpiece #2: The table runner under this centerpiece runs the lengths of the bar and is just strips of crepe paper streamers sewed together.  If you don't have a sewing machine you could easily tape them together on the bottom and get the same effect.  I cut 1 1/2inch black mickey heads to scatter around the table runner and act as confetti, these were also cut using my cricut.
 
 
I loved this cupcake stand and the cupcakes on it.  The stand is 3 boxes (a Special K granola bar box, shipping box, and the lid of a copy paper box) wrapped in red wrapping paper from the dollar store and stacked on top of each other.   One thing I learned with the small budget challenge was to use what you have and make it work.  This cupcake stand is a perfect example of that. The black Mickey images were cut with my Cricut using the Mickey and Friends cartridge.  I made the cupcake toppers myself using red chocolate from Hobby Lobby and a Wilton squeeze bottle.  I piped them with the squeeze bottle onto wax paper, put them in the fridge for about 10 minutes then popped them off and put them on the cupcakes with the flat side facing out.


I used some items we already had to decorate like the stuffed Mickey and the frames that held Grants 2 year pictures and subway art. 2 board books I found at the Target dollar spot are placed on either side of Mickey.
I made the birthday banner out of cardstock and fabric.  I cut the cardstock pennants with my cricut as well as the letters.  Using those as a guide I drew a template for the larger fabric pennants to go behind them.  I used glue dots to attach the letters to the cardstock and I stitched the cardstock to the fabric.  I then made my own bias tape to attach them all at the top and stitched it as well.  I was so excited with how this banner turned out and how well it went with the party without screaming "Mickey Mouse".

I made the character images with my cricut. I adored the mickey/circle garland.  I used primary colored cardstock, cut the Mickey heads and circles out with my cricut them stitched them together.  The effect was perfect and Grant loved them.  I can say the only thing I hate about making homemade decorations is I can't bear to throw away all my super cute hard work haha.
 
I purchased this blue bucket at the Dollar Tree for the ice and water bottles.  I showed the water bottle labels I made here.  I don't buy a bunch of 2 liters of sodas any more because the cost tends to add up & in the end your left with half a dozen 2 liters 1/2 full, and they end up going to waste.  Instead I have started making a large pitcher of homemade strawberry lemonade and sweet tea.  I figure anyone who doesn't like either of those can choose the bottled water.
 
 
I used the Mickey/circle garland I made out of cardstock to drape each of the windows.  After draping them I felt they were too plain and I immediately thought of window clings.  I used to love those when I was a kid.  I used my cricut and cut Mickey heads in 7 1/2 inches and 4 1/2 inches and stuck them to the windows.  Grant kept walking over to the windows and pointing saying "Mi, Mi" (Mickey).  After the party I took all the small colored ones and stuck them on the wall next to my son's bed, he loved it.


I was trying to get a better view of the table runner I made with crepe paper streamers and confetti in the picture above.  We also used water bottles as balloon weights.  I forgot to tell my husband to get weights when he went to pick them up so we improvised.
 
 For a game we had Mickey Mouse bowling I made with empty soup cans and cardstock.  Grant loved stacking them up and throwing the ball to knock them all down.  He hasn't quite gotten the hang of rolling the ball.
 
I made treat bags for the 2 little guests we had.  I debated for a long time on what to put in them and eventually decided to put in Grant's favorite goodies.  So inside were fruit snacks, lucky charms breakfast bar, homemade tootsie rolls, and a Minnie Mouse board book (because both were girls).
 
 
I posted about the Invites here.
 
I had so much fun planning, preparing, and putting together this birthday and I couldn't be happier with the results.  Grant had a great time with people he loves celebrating his 2nd year and that's the important thing.
 
Happy Birthday My Little Man!


LinkWithin

Related Posts Plugin for WordPress, Blogger...

Total Pageviews