First I layed the wipes case on top of the fabric I wanted and cut around it. I don't measure exactly or follow any pattern because I found it was easier to do it this way. Cut leaving extra to fit around, I usually just cut a wide square.
Set that fabric aside and now you will need to cut your quilt batting. I do use a pattern for cutting the batting, its at Homemade By Jill. Cut your batting and heat up your hot glue gun, this may get a little messy, haha, just kidding. Hot glue your batting to your wipes case. It should like something like this:
No worries if it's not perfect. Now if you are like me and tend to burn yourself multiple times whenever the glue gun comes out, here is my tip for you. Buy yourself a pair of cheap gloves from Walmart and wear them while you glue, it has saved my hands from many burns, and my mouth from many swear words. These are what mine look like:
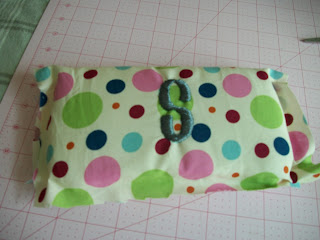
I wanted this wipes case to have a monogram on the front. If you don't need this part just skip to the next step. I used my cricut to make a stencil 'S' and a quilt pen to trace it onto the fabric. I then used a satin stitch to make my monogram. If you are doing this make sure you figure out where the center of your case will be before you start tracing your letter.
Open your case and lay it on your fabric so your monogram will be in the center or the front. Get your glue gun back out and start glueing around the edges, be sure to pull the fabric taut. I find it's easier to glue with the case closed, however I also have a tendency to glue my case closed in places when I do this, so just make sure your don't glue yours closed. Here is what it should look like when it's glued all around. You will have excess around the edges, no worries we will get rid of that in the next step.
Open the case and start trimming your excess fabric as close to the case as you can. Don't worry if it's not perfect, it doesn't need to be. The edges will be covered in the end and no one will know the difference.
Pick out what you want to go around the edges. This can be ribbon, ric rac, or trimming like I have (I havn't a clue what it's actually called, oops). Start at the bend of the case and start glueing again. Glue the trim as close to the edge as possible without lapping over it. I think it's easier to do this with the case open. Every time I have done it the other way I glue it closed and mess something up.
Here is what the edges will look like when all your trim is glued and finished.
Sit back and give yourself a pat on the back, you're done.


No comments:
Post a Comment